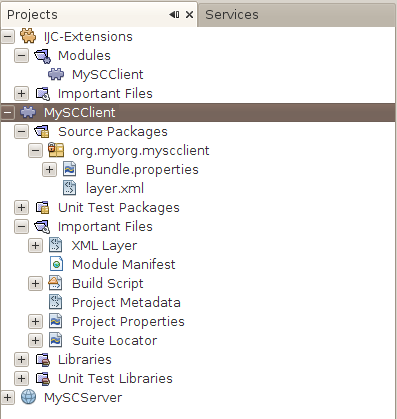
New 'MySCClient' module project in NetBeans IDE's 'Projects' explorer
This tutorial shows how to add an action, invoked by a menu item, that will use selected molecules and send them to a web service for processing and subsequently will apply results to an IJC entity.
This tutorial assumes that you have worked through IJC Plugin: Quick Start and IJC Plugin: Hello World! tutorials and that you are familiar with the concepts and instructions described therein. As before, you will use NetBeans IDE to create the example plugin that will extend Instant JChem.
Additionally, you are also expected to have already created the web service as it is described in StructureCheckerServer tutorial.
Contents:
If you followed the IJC Plugin: Hello World! tutorial you should have 'IJC Extensions' module suite and 'HelloWorldPlugin' module already available. Open 'IJC Extensions' suite project in NetBeans IDE, we will add a new module to it.
In your IDE go to main menu 'File' -> 'New Project...' and create a
new 'NetBeans Modules' -> 'Module' project. Call the project 'MySCClient'
and don't forget to add it to 'IJC-Extensions' module suite.
As the module's 'Code Name Base' enter org.myorg.myscclient
and tick the 'Generate XML Layer' checkbox, leave the default location offered for
the 'XML Layer' file.

New 'MySCClient' module project in NetBeans IDE's 'Projects' explorer
In contrast to other tutorial MySCClient plugin uses third party libraries, that is libraries that are not shipped as part of Instant JChem and therefore the plugin needs special set up.
There is a very simple way of adding third party libraries to NetBeans module system - create a plugin that wraps the library and exposes the libraries' packages as its own public API. If you are interested in more details, please, read NetBeans documentation, eg. DevFaqWrapperModules wiki page.
The third party library that MySCClient plugin needs is Apache HttpComponents Client
library, which can be downloaded for example from
http://hc.apache.org/index.html.
At the time of writing this tutorial HttpClient 4.1 version was available, but
newer versions should work as well. Please download HttpClient library,
it should contain at least the following jars that we need:
The following steps show how to create the library wrapper module and add it as a module dependency to our plugin.
'File' -> 'New Project...', which
will show the 'New Project' wizard, which will guide you through
the whole process. In the wizard choose to create a
new 'NetBeans Modules' -> 'Library Wrapper Module' project
and press 'Next'.
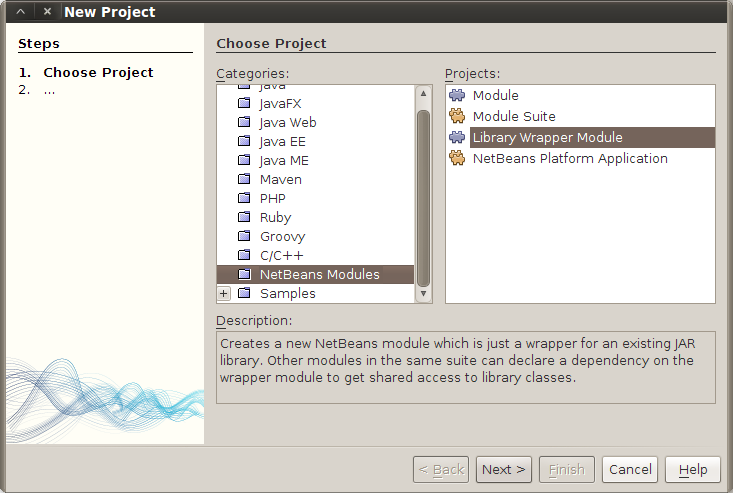
Creating Library Wrapper Module - choosing the project type to create
*.jar files when browsing for the content of the 'Library'
text box.'License' text box is to specify a text file that contains
the library's license.'Browse...' button and select the four jar
files downloaded with HttpClient library and mentioned earlier -
commons-logging-1.1.1.jar, httpclient-4.1.jar,
httpcore-4.1.jar, httpmime-4.1.jar.'Browse...' button and select
the LICENSE.txt file that was downloaded as well.
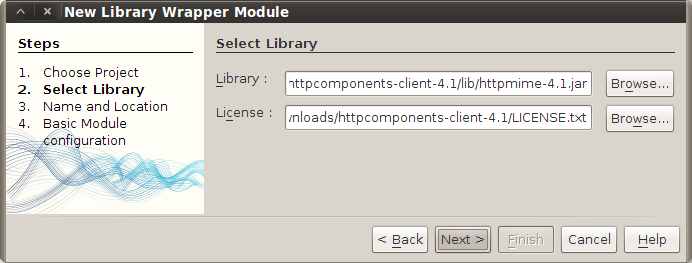
Creating Library Wrapper Module - providing wrapped jars and the license file
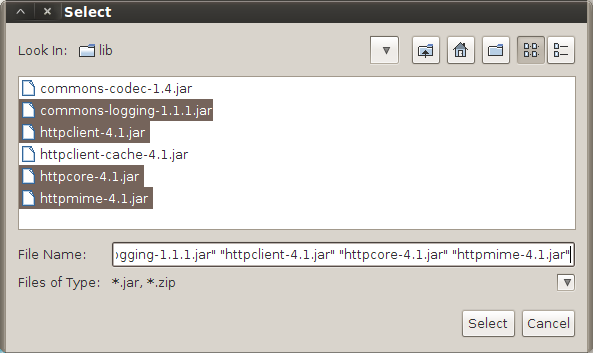
Creating Library Wrapper Module - library jars selection panel
'Name and Location' panel, which looks very similar to
panels for creating ordinary IJC plugin projects that we have been dealing
with so far. This is because the library wrapper module in fact is
an IJC plugin, which sole purpose is to provide access to the library
jars that it wraps.'HttpClientLibrary' as project name and press
'Next'.

Creating Library Wrapper Module - project name and location
'Code Name Base' and
'Module Display Name' for your library wrapper module.
Although the library wrapper module does not contain any source code,
it still needs a package for storing configuration files, eg. the
Bundle.properties file.org.myorg.libraries.httpclient for the code name
base and press Finish.
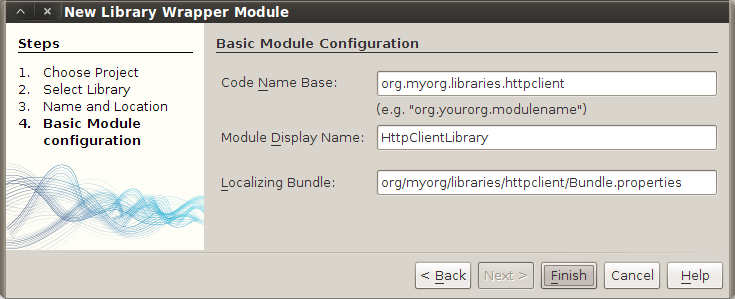
Creating Library Wrapper Module - code name base and display name
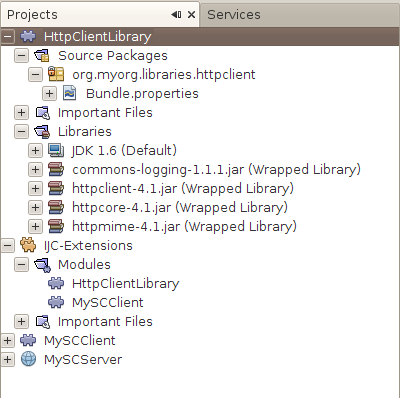
Creating Library Wrapper Module - HttpClientLibrary project in Projects explorer
We now have the Apache HttpClient library available in form of an IJC plugin and can use it in our main plugin project MySCClient. The process is the same as for adding dependencies on modules/plugins that are shipped with Instant JChem. The following instructions describe it in detail.
MySCClient project's node
and choose Properties in the popup menu. In the 'Project
Properties' dialog go to 'Libraries' -> 'Module Dependencies'
and click 'Add Dependency...'. The 'Add Module Dependency'
dialog will show up. Type 'httpclient' in the 'Filter'
text box, then select HttpClientLibrary module from the narrowed
list and press 'OK' button.
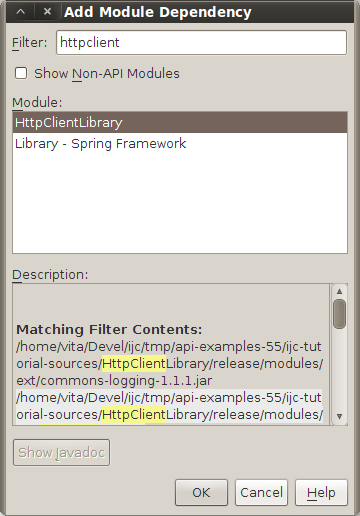
Adding module dependency on HttpClientLibrary module
'Project Properties' dialog.
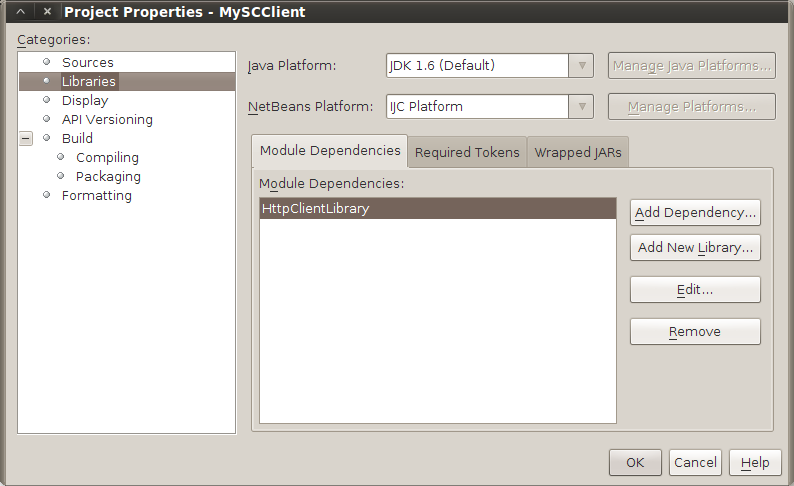
HttpClientLibrary module dependency in the MySCClient project properties dialog
In the next step we will add dependencies on other modules providing APIs that we will need in this example. Some of the APIs belong to the NetBeans API, while others belong to the Instant JChem API. Since our module is deployed to Instant JChem (ie. 'IJC Platform' that we set up earlier), which itself makes use of all NetBeans and Instant JChem APIs that we need, all these modules are readily available and we can simply just add them as module dependencies in the project properties dialog.
HttpClientLibrary module dependency. Click
'Add Dependency...' button again and specify additional modules
that 'MySCClient' module will use.
Commons - Database, Commons - Generic IM Commons,
Commons - NB dependent,
Dialogs API, DIF API, DIF Core Implementation,
Instant JChem Core, Library - Guava libraries, Library - JChem,
Lookup, Nodes API, Utilities API.
'OK' and close the 'Properties' dialog.
The list of module dependencies in the 'Project Properties' dialog should look like this.
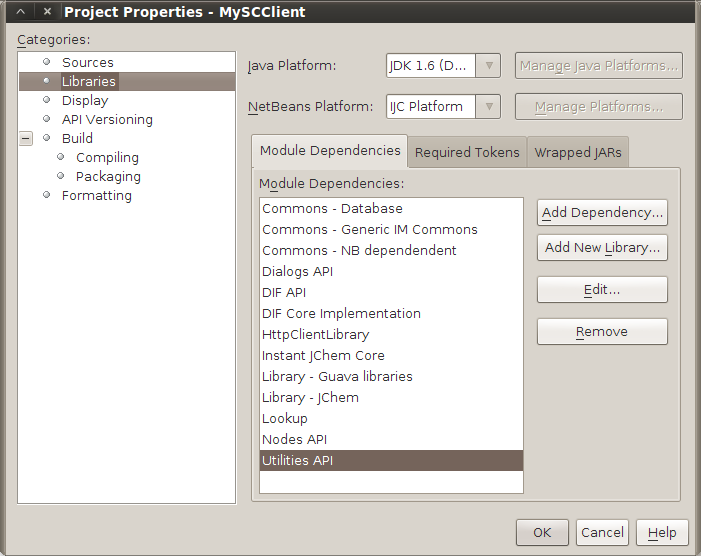
'MySCClient' module dependencies
ClientUtilities classFirst, let's begin by creating a utilities class that we will need in the rest of the module.
org.myorg.myscclient,
create a java class called ClientUtilities. Right click
the package's node and in the popup menu choose 'New' -> 'Java Class...'.
This will start the 'New Java Class' wizard where you can fill in
the class name.
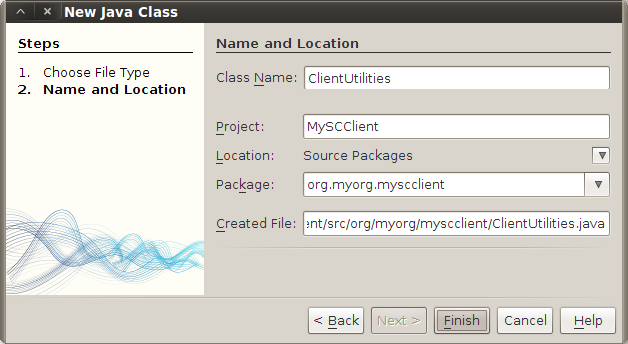
New Java Class wizard - creating 'ClientUtilities' class
ClientUtilities.java source file
SCWSClient classNext, we'll create the webservice client implementation.
SCWSClient.
Right click the package's node and choose 'New' -> 'Java Class...',
which will start the 'New Java Class' wizard.
SCWSClient.java source file
ServiceLevelException and HTTPLevelErrorException.
"ServiceLevelException" in package org.myorg.myscclient.
HTTPLevelErrorException class.
ServiceLevelException class and
replace the file's contents with the folowing:
ServiceLevelException.java source file
HTTPLevelErrorException class and update
its contents with the following:
HTTPLevelErrorException.java source file
CheckStructureWSAction class
Finally, we will create an action that calls SCWSClient and
the webservice.
CheckStructureWSAction.
CheckStructureWSAction.java source file
layer.xml file. Open
layer.xml file in the editor and replace its contents with
the following:
layer.xml source file
Bundle.properties
The centralized location for strings in our plugin is the resource bundle,
which is located in the main package and called Bundle.properties.
Let's update it to contain all localizable strings that we have used throughout the code:
Bundle.properties source file
That's it! All the files required for running the 'MySCClient' plugin are ready now. The project in NetBeans IDE's 'Projects' explorer should look like the picture below.
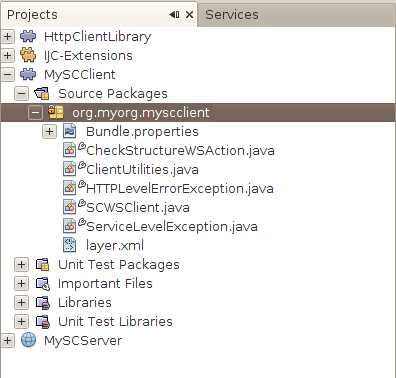
Complete 'MySCClient' project in NetBeans IDE's 'Projects' explorer
You can now r-click the project's node and build the project by choosing
'Clean and Build' and then run it by invoking 'Run' from the same popup
menu. Instant JChem will start with MySCClient plugin installed and the
action that we have created will be available in the main menu
'Help' -> 'IJC API Examples'.
In order to use the plugin you have to have the MySCServer web application running as it was described in StructureCheckerServer tutorial. MySCServer webapp contains a webservice that MySCClient plugin will call.
If you have MySCClient plugin running in Instant JChem, create the IJC demo project
(eg. in the main menu go to 'File' -> 'New Project...' -> 'General'
-> 'IJC Project (local database with demo data)'). Then open
'Pubchem grid view', select a single row and call the web service
by clicking 'Help' -> 'IJC API Examples' -> 'Structure Checker WS'
in the main menu.
You should see CheckStructureWSAction's activity in the log file
in 'Output' window. When the webservice is called the action
will add three new columns to the 'Pubchem grid view' and fill them
with data received from the webservice. The columns are called 'STRUCTURE_2',
'INTEGER_FROM_WS' and 'TEXT_FROM_WS' and they will
be populated with data only in the selected row.
If you customize the 'STRUCTURE_2' column and change its
renderer to 'Structure Renderer' you will see the column's
contents as a chemical structure. You can customize the column by r-clicking
its header and choosing 'Customize Widget Settings'.
The 'TEXT_FROM_WS' column's values tell what the chemical structure's mass is
(eg. 'Mass is 156.136').
You can select other rows in 'Pubchem grid view' and send their
structure to the webservice for processing. You can even select multiple
rows and send them to the webservice at once. They all will be processed
and results will be stored into each of them.
Congratulations, you have successfully created a web service client that calls a web service with structures data for processing and receives the result and applies it back to the IJC schema. In this tutorial you have learned:
For other IJC plugin development related tutorials please see their complete list here.