Using the database explorer
Whilst IJC provides the ability to perform most operations on your database sometimes it is necessary to perform SQL operations directly on the database when the operation cannot be done in IJC. This pages shows you how to connect to the database using the NetBeans Database Explorer that is included in IJC. You can of course connect using external tools. Oracle's SQLPlus and SQLDeveloper, Derby's ij, MySQL's MySQL Administrator are some good free tools that can also be used, but as the NetBeans Database Explorer is included in IJC we concentrate on using this tool here.
The NetBeans Database Explorer is part of the NetBeans platform upon which IJC is based. It is not developed by ChemAxon and is provided "as is" and cannot be formally supported by ChemAxon. A full user guide for the Database Explorer is included as part of the IJC user guide (only within IJC, not on the web).
The local database used by IJC is a Derby database. This is a perfectly normal and fully featured SQL database and you can perform SQL operations on it like any SQL database using the NetBeans Database Explorer. With local databases there are a few extra things that need to be considered. For Oracle and MySQL databases you can start from step 3 (but do note the importance of a database backup that is mentioned in step 2).
Step 1. Disconnect from the local database in IJC.
Derby databases running in embedded mode as they are in IJC can only have a single program connect to them at a time. The database explorer, although running within IJC behaves as a separate application (it is using a different Java class loader if you want the technical reason) so this means that if you want to connect to the database from the database explorer then you must first disconnect from it in IJC. To do this:
-
Find the local database node in the 'Projects' window.
-
Right click on it and choose 'Disconnect'.
Similarly, you must first disconnect from the database in the Database Explorer before you connect to it again with IJC.
Step 2. Find your database and make a backup.
Find the location of the project on your hard disk. This will probably be something like:
-
Mac: /Users/username/IJCProjects/ijc-project
-
Windows XP: C:\Documents and Settings\username\My Documents\IJCProjects\ijc-project
-
Windows Vista or 7: C:\Users\username\Documents\IJCProjects\ijc-project
-
Linux: /home/username/IJCProjects/ijc-project
Create a backup of this directory, either by copying it or creating a zip file or other archive of it. This way if you make mistakes the original database can easily be restored. Oracle and MySQL databases cannot be backed up by this means. Contact your database administrator if you need a backup to be performed.
More details about backup up databases can be found in the backup and restore help page .
Step 3. Show the Database Explorer.
This is present in the 'Services' window, which should be located in a tab next to 'Projects' window. In case it is hidden, use these steps to show it:
-
Use Window -> Other -> Services to show the services window. It should appear as an extra tab where the 'Projects' window is displayed.
-
The 'Databases' node will be displayed in the 'Services' window (probably this is the only thing present).
Step 4. Connect to the database.
-
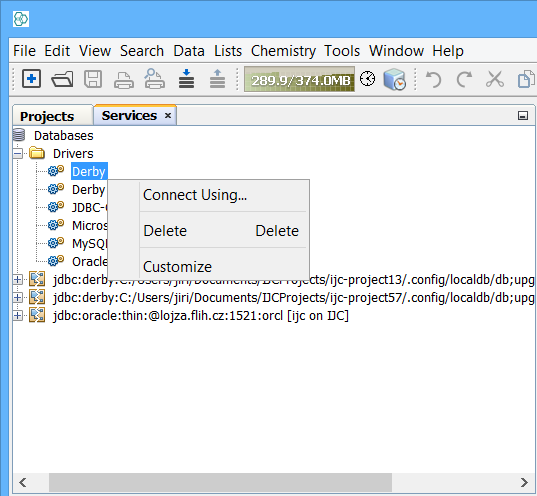
Expand the 'Databases' node in the 'Services' window, and then expand the 'Drivers' node and right click on the appropriate driver for your database (e.g. 'Derby' for a local database and choose 'Connect using...' option.

-
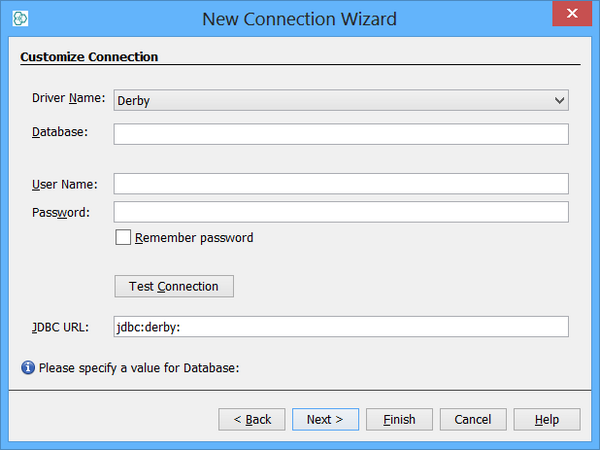
In the resulting dialog specify the connection options for your particular database type.
-
For Derby: Specify the location of your database, using the information you determined in step 1. The full location of the database will be something like this:
-
Mac: /Users/username/IJCProjects/ijc-project/.config/localdb/db
-
Windows XP: C:\Documents and Settings\username\My Documents\IJCProjects\ijc-project.config\localdb\db
-
Windows Vista or 7: C:\Users\username\Documents\IJCProjects\ijc-project
-
Linux: /home/username/IJCProjects/ijc-project/.config/localdb/db Username and password should be left blank.
-
-

-
For Oracle and MySQL: Specify the database connection details in the dialog. You might need to consult with your database administrator to obtain these details.
-
-
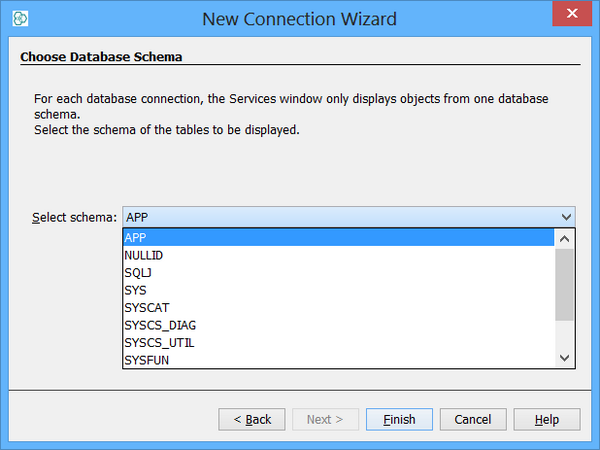
If the connection is successful then the 'Advanced' tab may be focused. You will not generally need to make any changes on this tab. Just click 'OK' again and the connection will be added to the Database Explorer.

Step 5. Using the database explorer.
The tables in the database can be explored directly using the Database Explorer. Use the right-click options on the elements in the explorer to perform operations. Also, you can perform SQL operations directly by right clicking on the connection and choosing 'Execute command...'. A window will open that lets you perform direct SQL operations on the database.
A full user guide for the Database Explorer is available in the IJC user guide within IJC (not in the web version).
Act with care!
Please note that performing direct operations on the database should be done with care. You must ensure that you do not remove things in the database (tables, columns etc.) that are being used by IJC. It is advisable to have a backup of the database before you start modifying it in this way. See above for how to do this.