Exporting Data to Plexus Analysis
Plexus Analysis is ChemAxon’s web-based solution for data visualization and analysis. Since 16.11.7.0 version of Instant JChem, it is possible to export your data directly to a Plexus Analysis server.
In general, Export to Plexus Analysis feature has similar behavior as export to other file types such as CSV. The export can be started using either the File > Export to Plexus Analysis… option or using the icon in the toolbar (Fig. 1A,B). No additional settings prior the export is required.
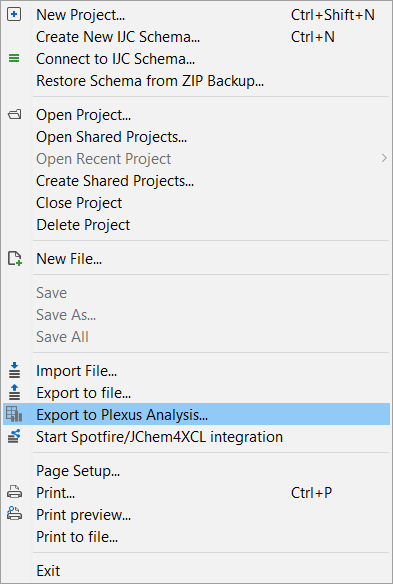

Figure 1A Figure 1B
Export to Plexus Analysis is controlled by ROLE_EXPORT_DATA. Only users who have this role assigned can perform the export.
It is possible to export the whole data trees or in case you have a result set displayed in a view, only this result set is exported. To export a complete data tree just select a data tree node in the project view and continue by following one of the options above. To export only a subset of the data, it is necessary to perform a query to display the result set in a view and then follow one of the options above (Fig. 2) to open the Export to Plexus Analysis window (Fig. 3) where you can define the URL of Plexus Analysis server and the fields to be exported.
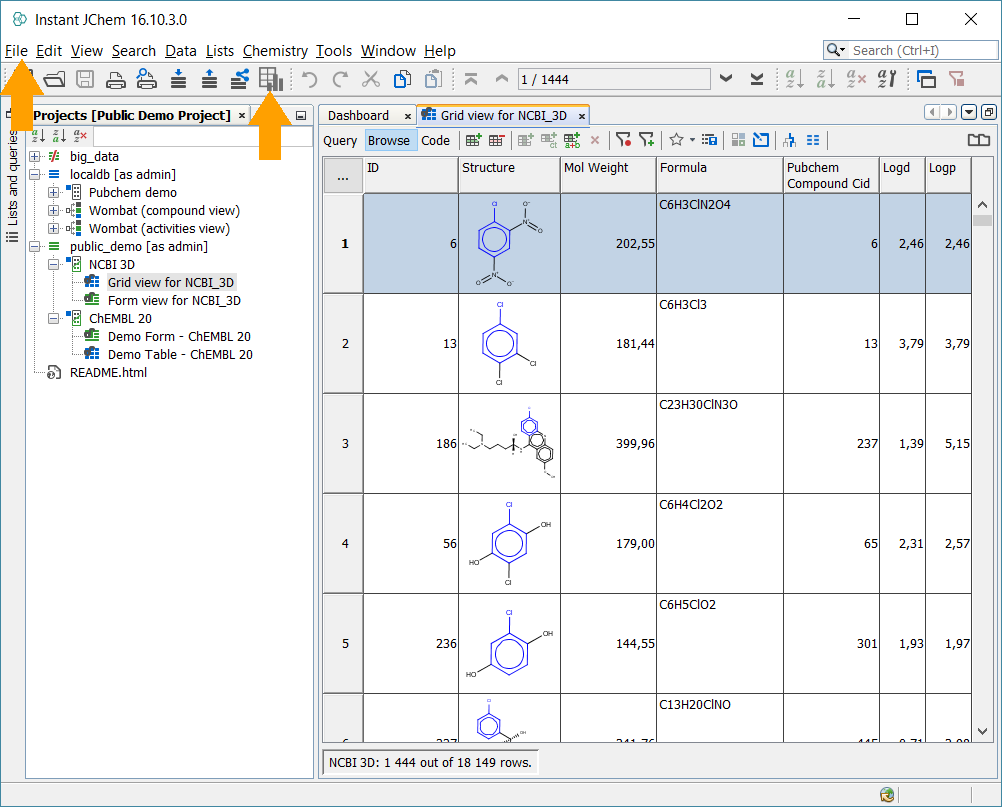
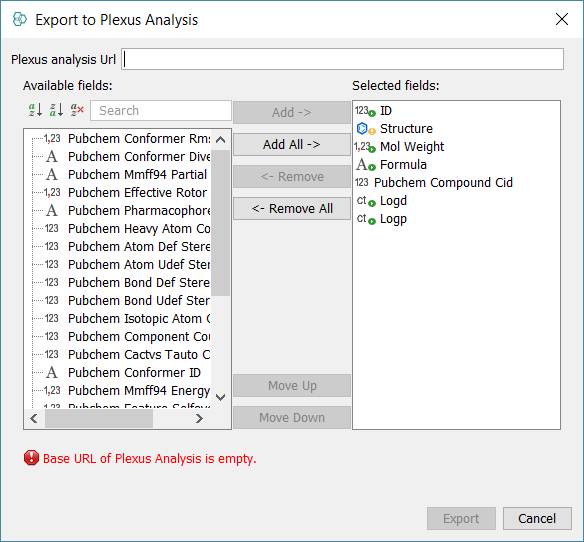
Figure 2 Figure 3
This wizard works similarly to the Export to file… dialogue. In the left side all the fields available to export are displayed while on the right side you can see the ones which are currently selected. Fields available in the child data tables are also displayed. In the top there is a window to define the Plexus Analysis URL. It is possible to use also Plexus Analysis demo server maintained by ChemAxon, to obtain access to the demo page, please contact the sales team.
Please keep in mind that selecting two or more widgets/fields in a view will pre-select these fields in the export dialogue for you. Selecting one or none field will add all available fields to the selected fields column.
When the
Export
button is pushed, the defined data selection is transferred to the Plexus Analysis. This process is indicated by an infinite progress bar in the bottom right column of Instant JChem window (Fig. 4).

Figure 4
At the same time, a the Plexus Analysis page is opened in the web browser and the data upload is indicated (Fig. 5).

Figure 5
When the upload is completed, a new sheet is available in Plexus Analysis for data visualization such as histograms, scatter plots and trend lines (Fig. 6). To learn more how to use Plexus Analysis, please look into the documentation.
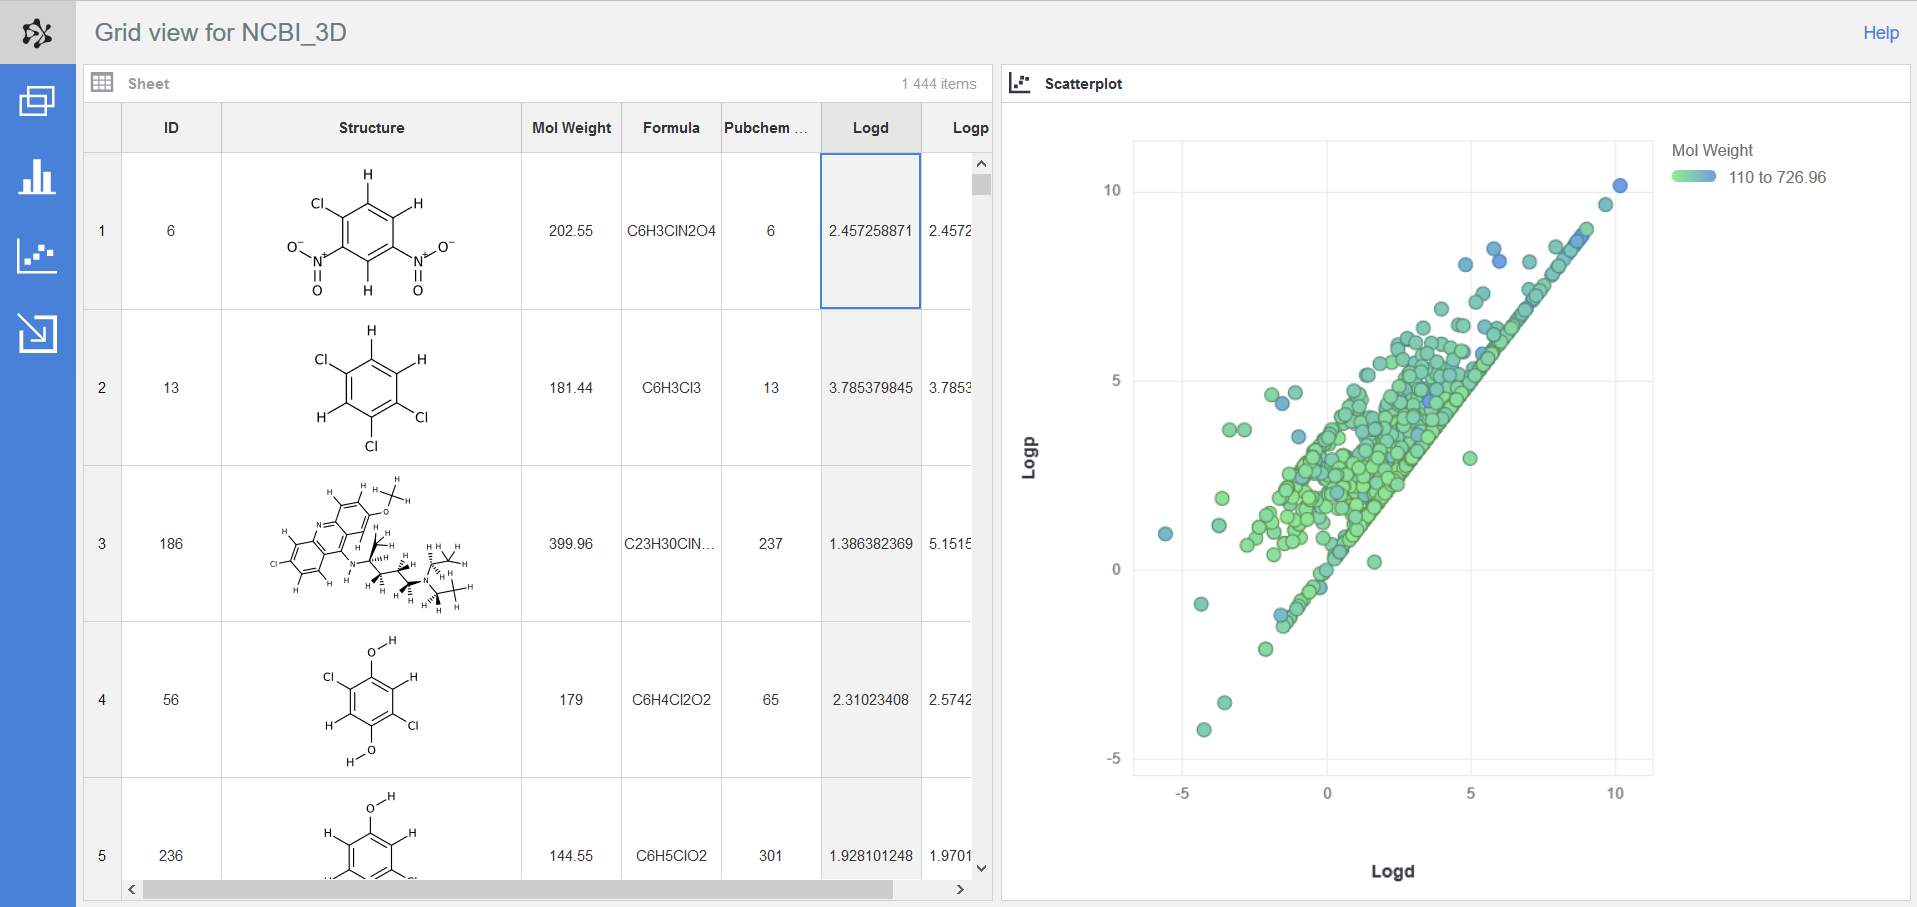
Figure 6