Conditional Formatting Step by Step Guide
This pages provides an example of how to apply conditional formatting to a form or grid view. It provides a basic guide, and assumes you are using a pre-existing template.
Load same data
This example uses the demo data that is provided with IJC. You of course will probably be doing this with your own data.
-
File->New Project
-
Choose IJC Project (local database with demo data).
-
Find the PubChem demo data tree in the projects window.
-
R-click on it and choose 'New View...'.
-
Select 'Default grid view' as the view type and give the view a name.
-
The grid view will open in the main window.
Conditionally format the Mol Weight column
Here we apply traffic light formatting to the molecular weight field. We want to display values less than 400 as green, those between 400 and 500 as yellow and those greater than 500 as red.
-
Select the Mol Weight column and click on the Conditional formatting button (
 )in the toolbar. The Conditional Formatting dialog will open.
-
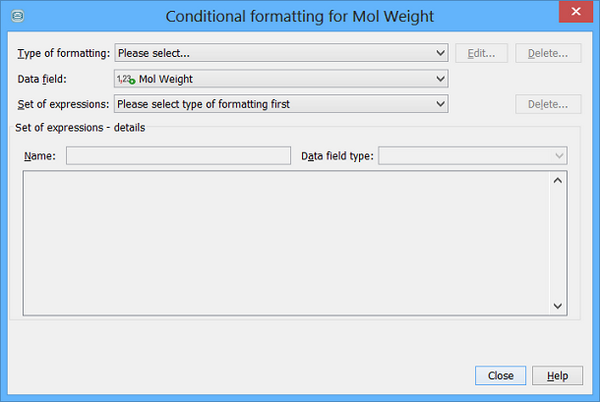
For the type of formatting select 'Create a new from "Traffic lights" template...'. The new type of formatting dialog will appear.
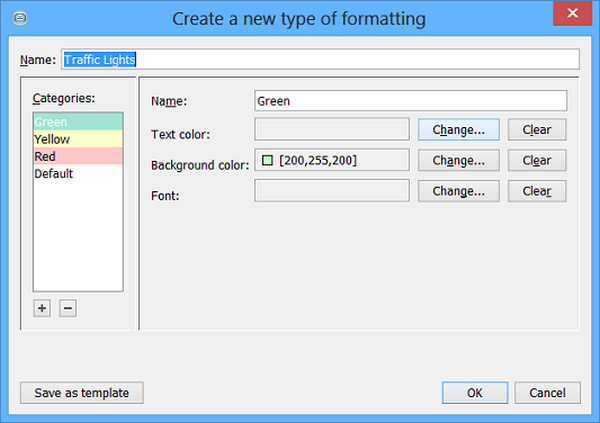
We will use the default traffic lights formatting so just click OK, but you could change the formatting characteristics if you wanted.
-
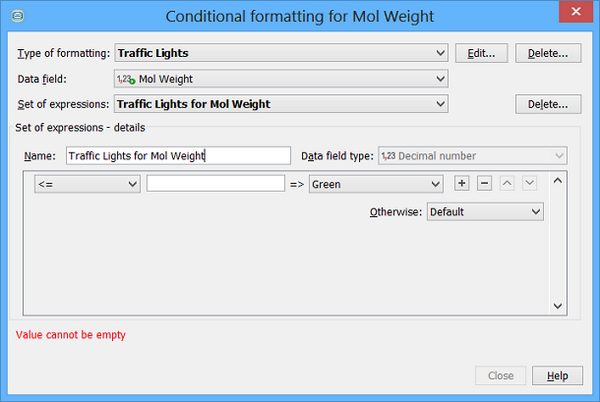
The conditional formatting dialog will update to show that it now using the traffic lights type of formatting.
-
You can optionally change the name from the default. This name identifies the type of formatting in the grid view so that it can be used again when you conditionally format additional columns. But the default name is OK.
-
You could change the data field whose values are used to conditionally format our Mol Weight column. This allows you to format one column using the values of a different field. But we don't need that so we leave the data field unchanged.
-
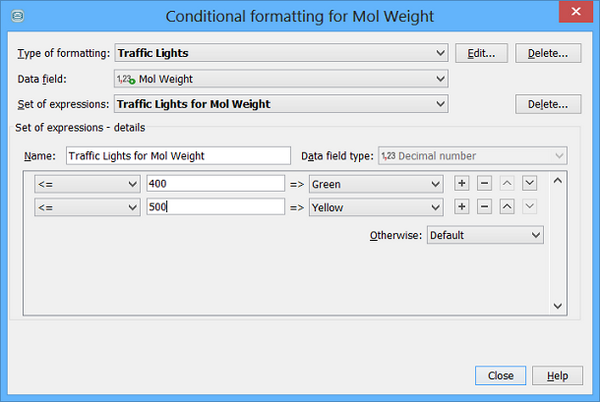
Specify '400' as the value for the first rule, and leave the outcome as 'Green'. This rule means that values are tested and if they are less than or equal to 400 then they are assigned to the Green bin of the Traffic Lights rule set.
-
Add another rule by pressing the '+' button and for this rule specify '500' as the value and 'Yellow' as the outcome. This means that if the value has failed the previous test then it will be tested against this rule and if it passes then the value will be assigned to the 'Yellow' bin.
-
Finally specify 'Red' for the 'Otherwise' test. This means that values failing all the previous tests will be assigned to the Red bin. The dialog should now look like this:
-
Click on the Close button and you will now see your traffic lights conditional formatting applied to the Mol Weight column.
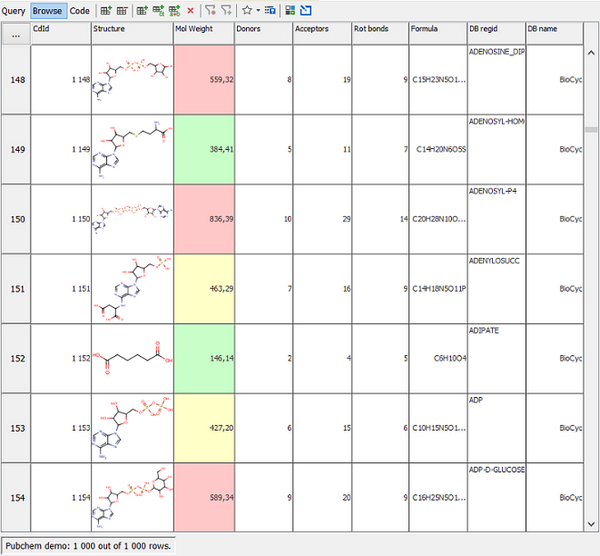
Conditionally format the Donors column
Here we apply the same traffic light formatting to the Donors column. Of course the rules will be different, but the process is much the same.
-
Select the Donors column and click on the Conditional formatting button in the toolbar. The Conditional Formatting dialog will open.
-
For the type of formatting select 'Traffic lights'. This selects the existing traffic lights type of formatting that you created when formatting the Mol Weight field. This type of formatting is associated with and stored with the grid view so it can be re-used when formatting any column in that grid view. Do not choose 'Create a new from "Traffic lights" template...' as this would create a second duplicate type of formatting for traffic lights. You would only want to do this if you wanted a different set of bins or formatting characteristics. The new type of formatting dialog will appear. We will use the default formatting so just click OK, but you could change the formatting characteristics if you wanted.
-
Now for Set of Expressions choose 'Create a new expressions set..'. This allows you to create a new set of rules and apply them to the traffic lights type of formatting.
-
Specify '5' as the value for the first rule, and leave the outcome as 'Green'.
-
Add another rule by pressing the '+' button and for this rule specify '8' as the value and 'Yellow' as the outcome.
-
Finally specify 'Red' for the 'Otherwise' test.
-
Click on the 'Close button and you will now see your traffic lights conditional formatting applied to the Donors column.
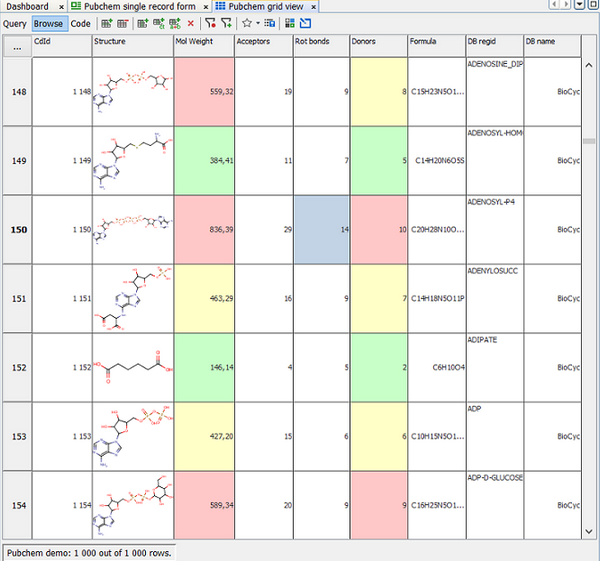
Conditionally formatting a form view
The same process applies to conditionally formatting widgets in the form view. Just select the widget, or the column of a table widget and go through the same process.