IJC tutorial: Building more complex relational data models
Overview
In the previous tutorial "Building relational forms", the use of several many to one relationship's were explored in order to set up a simple parent child arrangement using a unique (parent) and foreign key column (child) (Molecules / Biological results). In this tutorial we aim to show how to build more complex data models using entities to construct datatrees. In this way, we should explain the use of primary and foreign keys, not null and unique constraints and the choice of relationship types available and their judicial use - we assume you might not be a DBA, rather a Chemist with a need to set up your own robust systems. Also, other more advanced features like the use of a simple calculated field, Chemical terms field and a simple insert fired trigger (which updates) are included in order to help appreciate how these objects might also be implemented and used.
We will model five entities in our schema and build from these entities two separate data trees. The first datatree might be referred to as a simple "Medicinal Chemist's research" database which stores molecules and documents and Chemist's information with control of access driven by the document contents. The second datatree is a "Chemicals requisitions" database or inventory which tracks substance usage. In both cases, the end result will be a form based system that reflects these basic needs and that are built from the same entity data sources, which also will help to exemplify the difference between an entity and a datatree. Both examples are generic and deliberately simple and aim to show how to use IJC to get you started to build your own real world systems. A central theme in these examples is the use of many to many relationships and the associated 'mapping' or 'junction' tables which assist in defining many to many relationships between entities. Here the distinction is made as to whether these 'intermediate' tables, should be visible or not. This is exemplified in each datatree example. The first example is set up using two IJC m:n relationship. Neither of the mapping tables are available for promotion - this is acceptable for this model, we do not need to visualise the mapping. The second example employs two 1:n relationship with a separately defined and visible mapping/junction table (that is subsequently promoteable and used in the datatree and form) - the model suggests it should be visible.
We expect (eventually) you might choose your own molecule data source for this exercise, but we adopt again the 2D PubChem SDF as our structures data source. All other data is purely contrived by us for the purposes of demonstration! We also use the local derby database for the purposes of demonstration, the Oracle / MySQL approaches are essentially similar using the Instant JChem interface.
There may be some slight differences in RDBMS constraints
SimpleDataModelv2.png
Files for this example can be found here: 2D . 3D .
Create Project & Schema connection
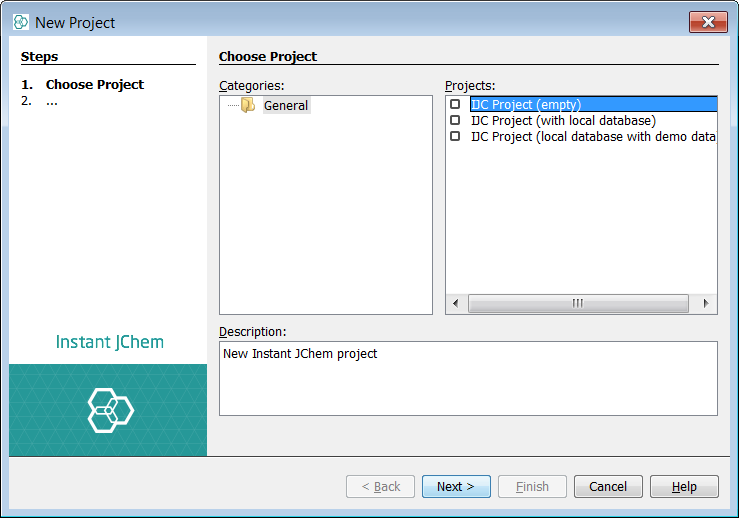
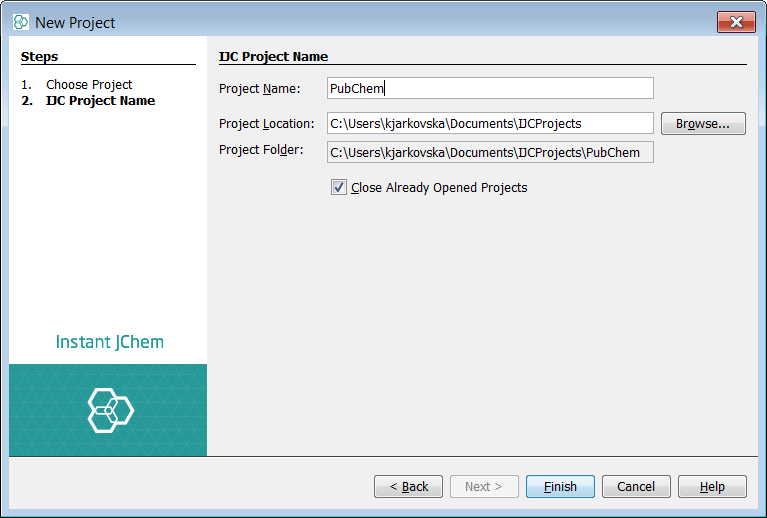
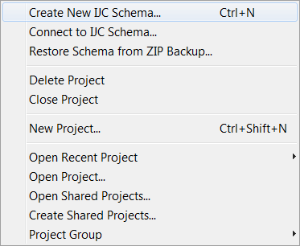
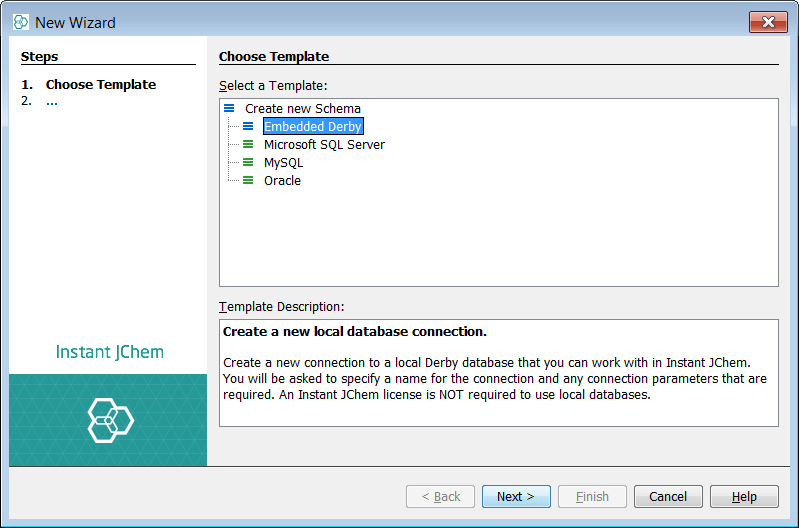
First create a new project container. Use File -> New Project... menu entry or appropriate icon in the toolbar (shortcut - Ctrl+Shift+N). Create a new project and choose IJC Project (empty). Next name your project (PubChem) and select Finish. Next, right click in the project window and select Create New IJC Schema..., choose Embedded Derby for this example and finally name your schema (PubChem).
Create a structure and standard based entities
In our examples, we will need a structures table for both data trees and the choice of which table type to use needs careful consideration, which is discussed further here. For now we will use a JChem structures table which can be administered in all three RDBMS, directly from IJC and does not rely upon the cartridge technology being present - clearly if this was large system, then use of a cartridge table would be advised. Right click on the schema node and select Edit schema. Select the entities tab and right click in the entities area and select New Structure entity (table). Accept the default name of "Molecules" and select finish. Next, we would like to create four standard entities named : "Documents", "Chemists", "Requisitions" and "Sample_Lots". For each case, select the entities tab and right click in the entities area and select New Standard entity (table).
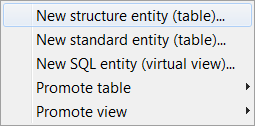
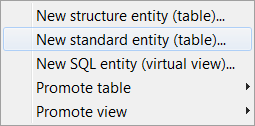
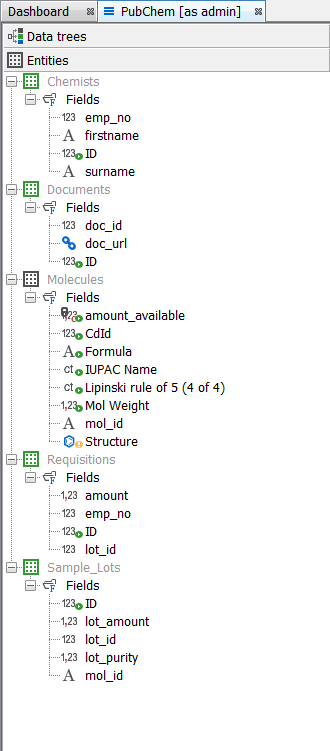
Expand each entity and you should now see the following in your schema.
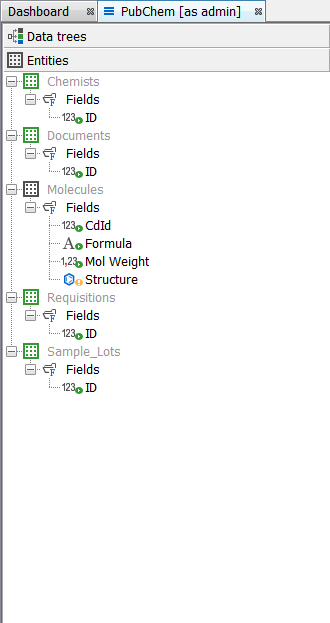
Now we are in a position to begin to build up our data model using the schema editor. In order to add new fields to our entities we should right click on our target entity and choose the field type to add. We will add mainly standard fields, but also a chemical terms field and a calculated field.
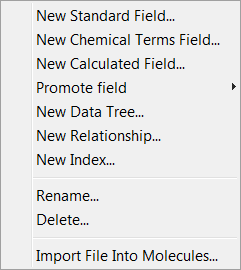
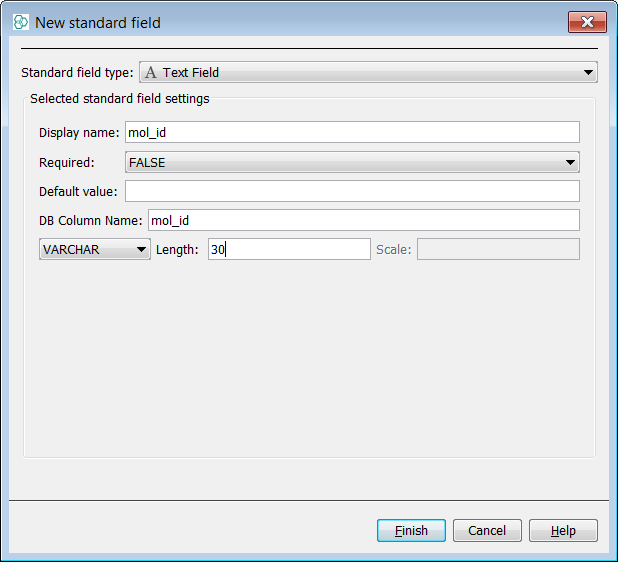
For the molecules table the primary field key is automatically the cd_id field. For all the other standard entities the primary key is the id field. Both cd_id and id are populated using internal sequences. Now lets add the following additional fields:
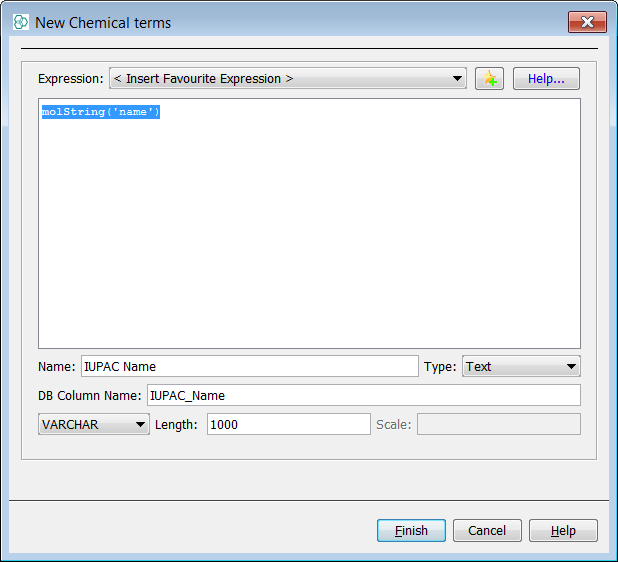
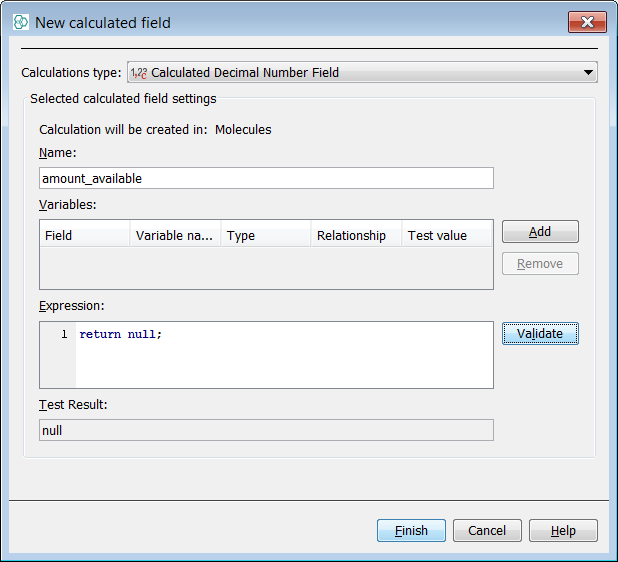
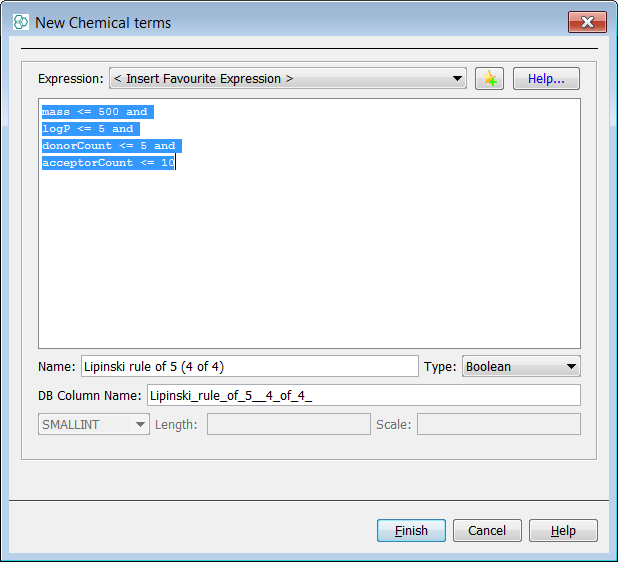
Molecules: Note for the calculated field use "return null;" in the expression for now. IUPAC and Lipinski chemical terms are used.
-
Name: mol_id, Type: Text Field, Size: 30
-
Name: iupac, Type: Chem terms text field, Size: n/a
-
Name: available_amount, Type: Calc field decimal number, Size: n/a
-
Name: drug_like, Type: Chem terms boolean field, Size: n/a
Chemists: These are all standard fields.
-
Name: emp_no, Type: Integer Field, Size: n/a
-
Name: firstname, Type: Text Field, Size: 100
-
Name: surname, Type: Text Field, Size: 100
Documents: These are standard fields and the second is type URL.
-
Name: doc_id, Type: Integer Field, Size: n/a
-
Name: doc_url, Type: URL Field, Size: 250 (static)
Requisitions: These are all standard fields.
-
Name: emp_no, Type: Integer Field, Size: n/a
-
Name: lot_id, Type: Integer Field, Size: n/a
-
Name: amount, Type: Decimal Field, Size: n/a
Sample_Lots: These are all standard fields.
-
Name: lot_id, Type: Integer Field, Size: n/a
-
Name: mol_id, Type: Text Field, Size: 30
-
Name: lot_amount, Type: Decimal Field, Size: n/a
-
Name: lot_purity, Type: Decimal Field, Size: n/a
Your set of five entities in the schema editor should now look identical to the screenshots below.
Apply relationships and constraints - build the model rule basis
The data structures that constitute our schema are completed and almost ready to be built into the two datatrees. Before assembling the datatrees we should first apply any relationships and required integrity constraints. The majority of this can be achieved directly via the IJC interface. First we should apply any unique constraints. Right click on the field of choice and select New index.... Ensure the unique keys tick box is selected for each case below - default names should suffice.
-
molecules.mol_id
-
chemists.emp_no
-
documents.doc_id
-
sample_lots.lot_id
It would be ideal to place a composite unique index on the Requisitions (lot_id,emp_no) table but this is not possible in the current IJC. Also this may be slightly different syntax for the three different RDBMS.
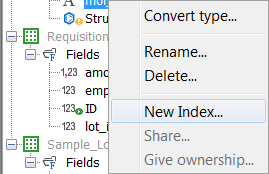
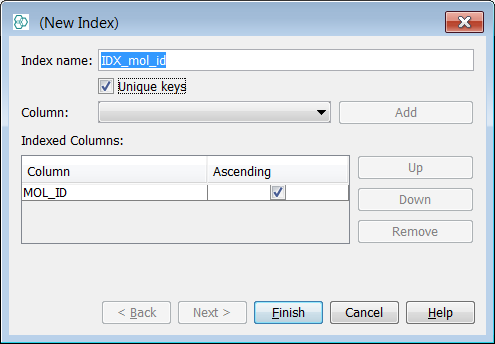
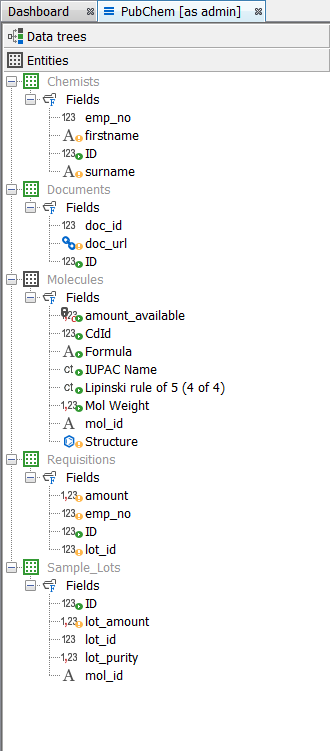
It is also good practice to make use of NOT NULL constraints. These can be set per field by select the field and set the Required drop down box to TRUE. We will apply this rule for the following. Note an Orange exclamation means successfully applied.
-
requisitions.emp_no, requisitions.lot_id & requisitions.amount
-
chemists.firstname & chemists.surname
-
documents.doc_url
-
sample_lots.lot_amount
Next we will place the relationships between our entities using IJC. We will place two many to many (m:n) relationships for datatree A. The associated junction/mapping tables will not be visible for display in the datatree. We will place three one to many (1:n) relationships for datatree B. Two of these will link to the same table thus making it a junction/mapping table, but with an important difference it is visible for promotion in a datatree and is bindable to a form.
In fact, you can right click on any entity to invoke the menu to select New relationship..., which will allow you to create a relationship between any of the entities listed in the schema.
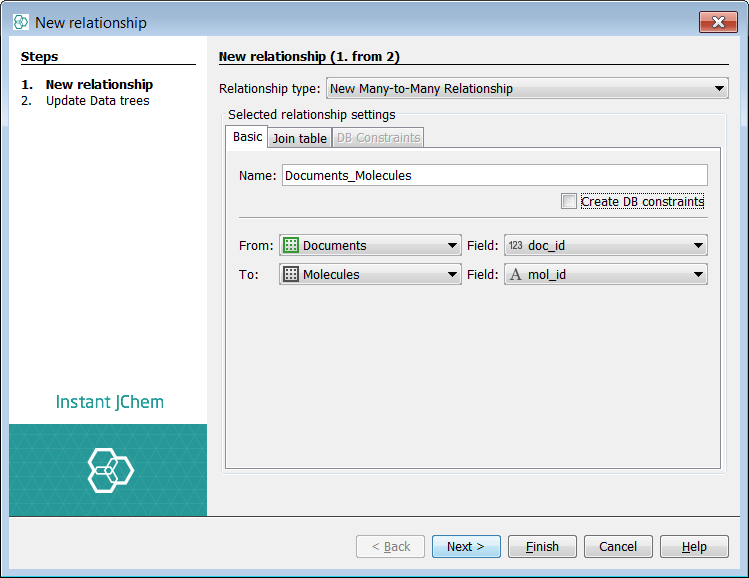
Right click on the "Documents" entity and choose New relationship. In the wizard choose New Many-to-Many relationship. Select From documents.doc_id To molecules.mol_id, select Finish. (Untick Create DB constraints).
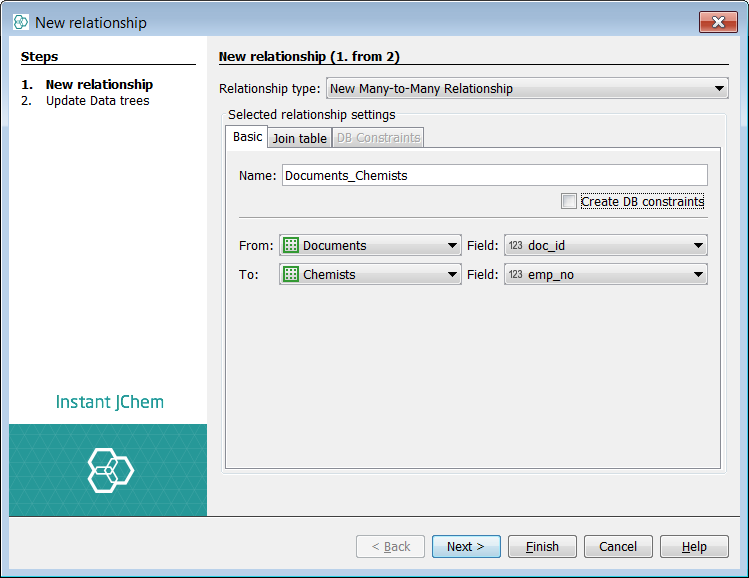
Right click on the "Documents" entity and choose New relationship. In the wizard choose New Many-to-Many relationship. Select From documents.doc_id To chemists.emp_no, select Finish. (Untick Create DB constraints).
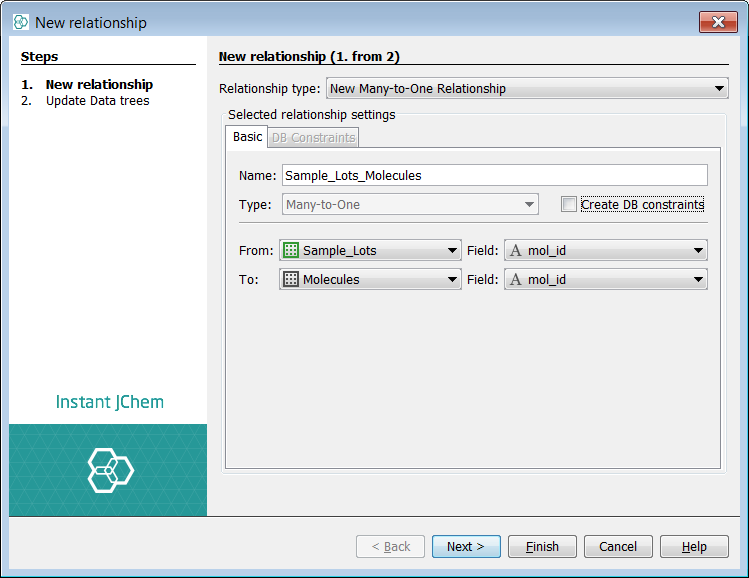
Next we can add our three many-to-one relationships to complete our data model. The first one we should create between sample_lots.mol_id and molecules.mol_id which says "a molecule can have many lots". Right click on "Molecules" and select New relationship, select New Many-to-One Relationship and configure as per screenshot, ensuring the relationship is the correct way round ('many' end is defined first).
With the next two relationships, we will effectively set up our mapping table. Create a many-to-one relationship between requistions.emp_no and chemists.emp_no. Create a many to one relationship between requistions.lot_id and sample_lots.lot_id. (In both cases, you can right click on requisitions entity and select New relationship). We can see that requisitions (or orders) is our natural mapping table and stores instances of sample usage much like a log.
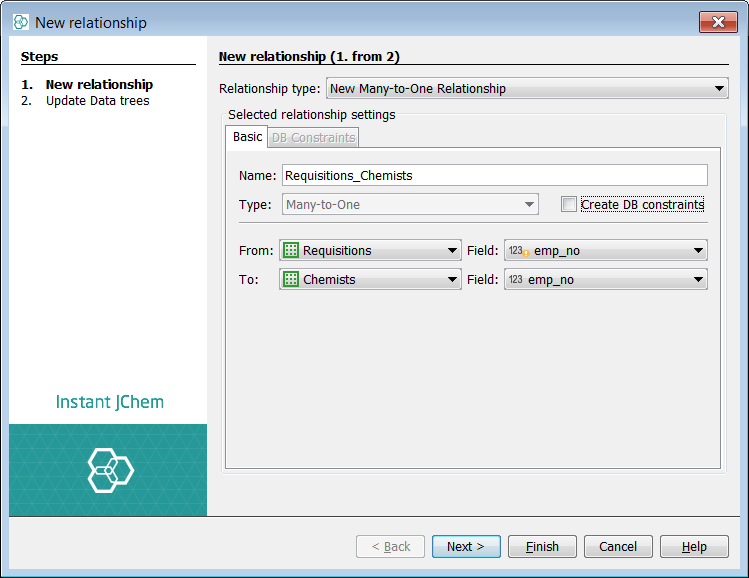
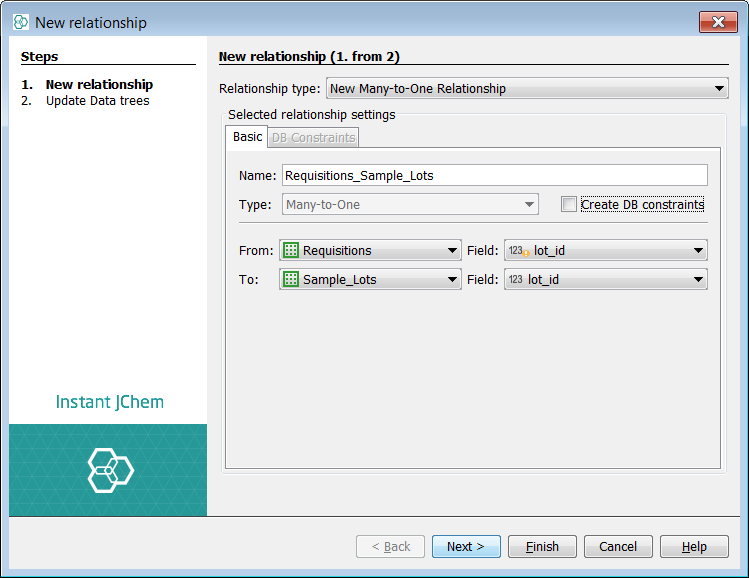
If you choose Next instead of Finish in the New relationship wizard, you will get a 'There are no entities with a relationship to the datatree's root entity.' red warning message, as you have no data trees to update in this step.
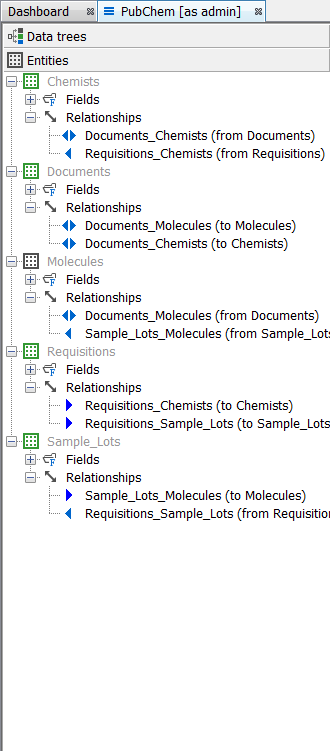
Your set of five entities in the schema editor should now look identical to the screenshots below.
Add some molecules data...
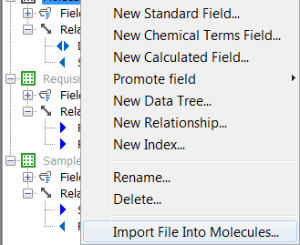
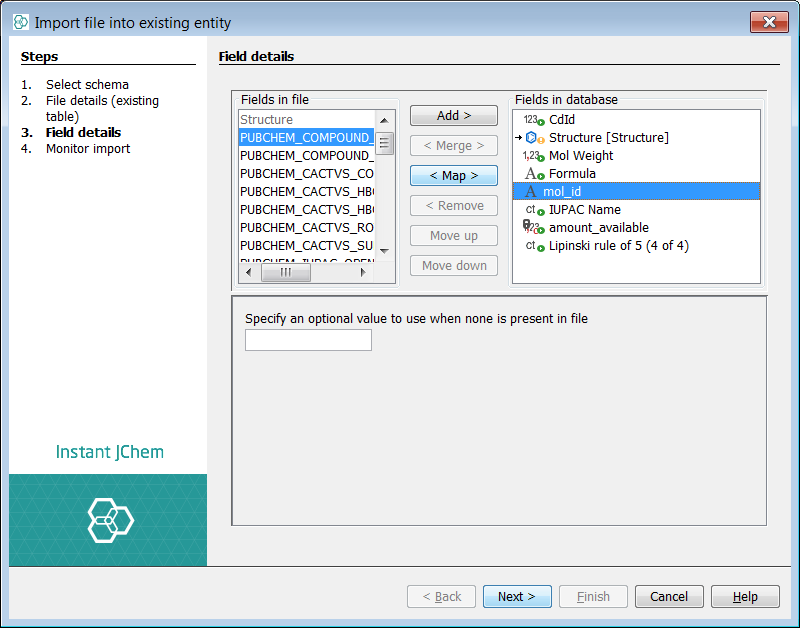
In the entities tab, right click on the entity "Molecules" using the Import File Into X... and select the SDF file. Select Next. Remove all suggested fields using remove button. Then Map PUBCHEM_COMPOUND_CID to the Molecules.mol_id. Select Next again and the import commences, finally select Finish once completed. You can use whatever molecules data source you like... other data is easier to add after the datatree construction, using an IJC form...
Assemble a "supporting" datatree
It is useful to have a datatree with the molecules as the root node for easy search, since our other two datatrees will limit access based upon the defined relationships. In the schema editor in the datatree tab, right click and select New data tree from entity..., select "Molecules" and Standard data tree wizard opens. Select "Molecules", click Next and tick the checkboxes next to the child entities (Documents and Sample_Lots) to include them in the datatree, then Finish. You should see the "Molecules" datatree now exists and contains both Documents and Sample_Lots.
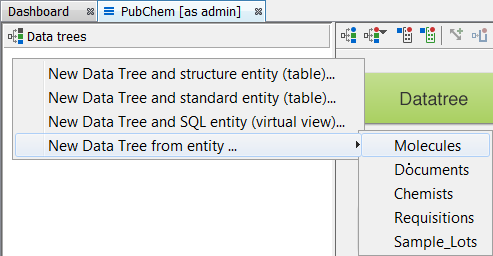
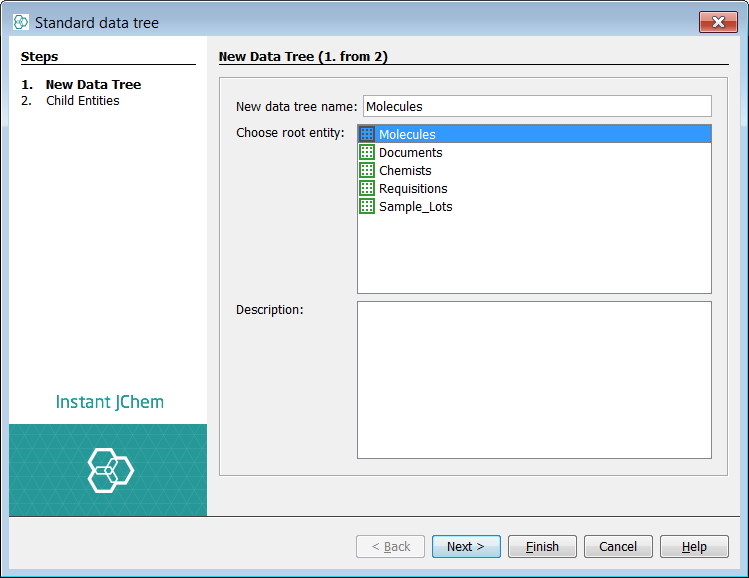
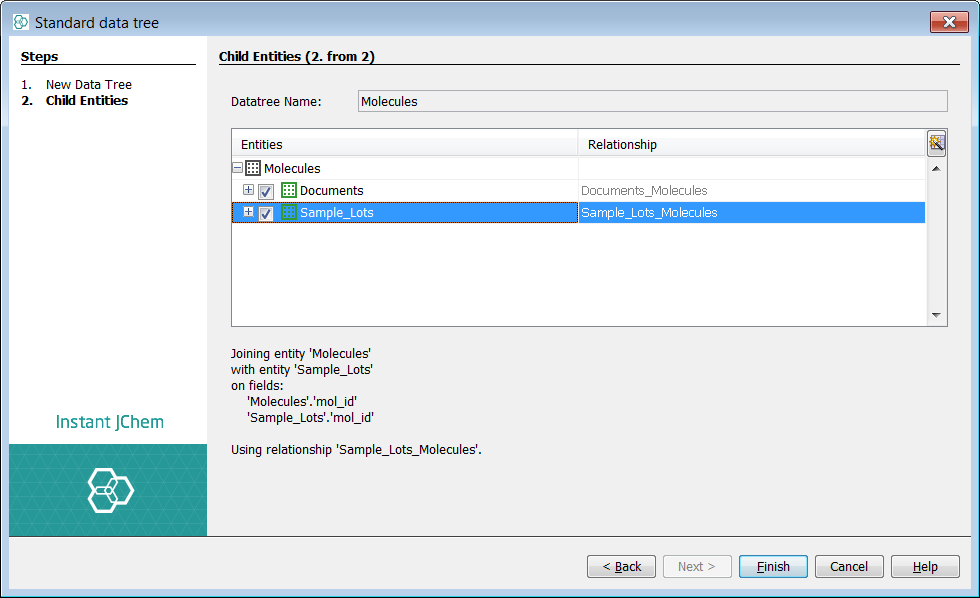
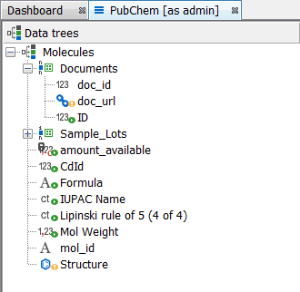
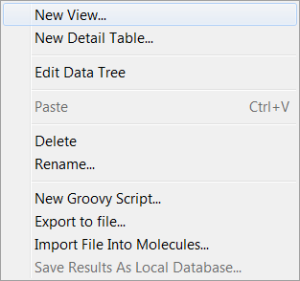
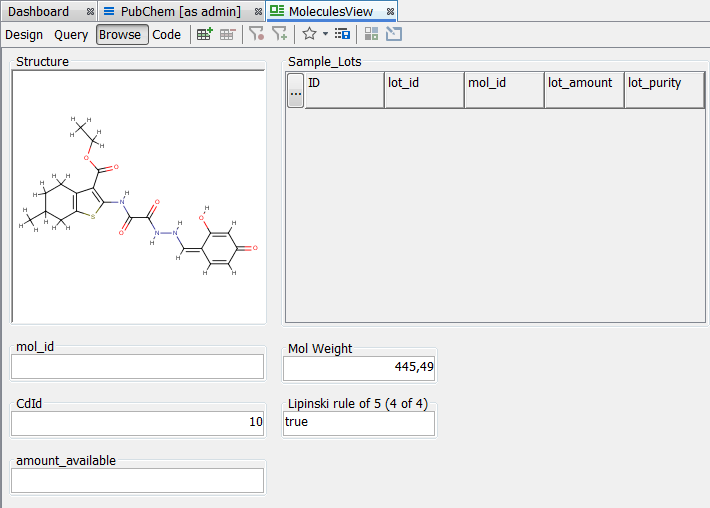
Next we should add a form to our datatree. Right click on the datatree node and select New View.... Select Empty form view and name the view appropriately, for example "MoleculesView" - select Finish. On the new form add all the "Molecules" fields and bind a table widget to the "Sample_Lots". You will need this supporting datatree later!
Assemble datatree - "Med Chem research"
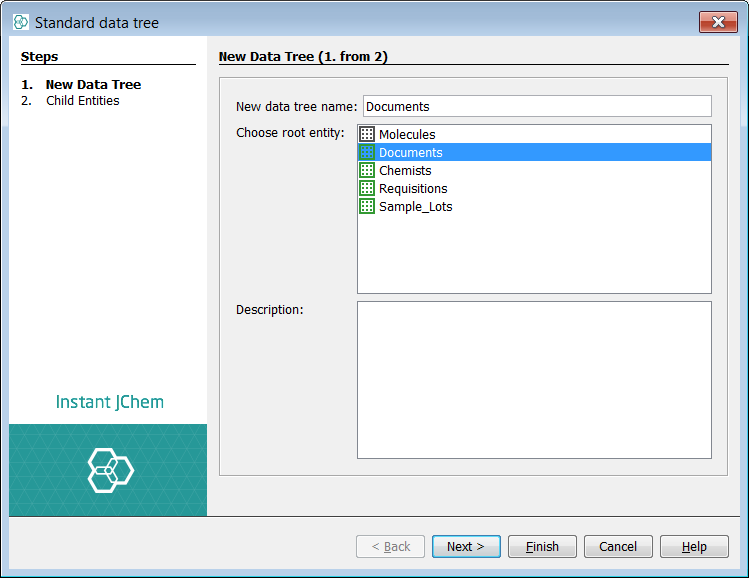
We can now assemble the first of our datatrees. For this datatree we wish to make the "Documents" entity the root node with two child entity "Chemists" and "Molecules". In the schema editor in the datatree tab, right click and select New data tree from entity ..., select "Documents" and then Next. In the next step, select the checkboxes next to the child entities (Chemists and Molecules) to include them in the datatree, then Finish. - you should see the "Documents" datatree now exists and contains both Chemists and Molecules.
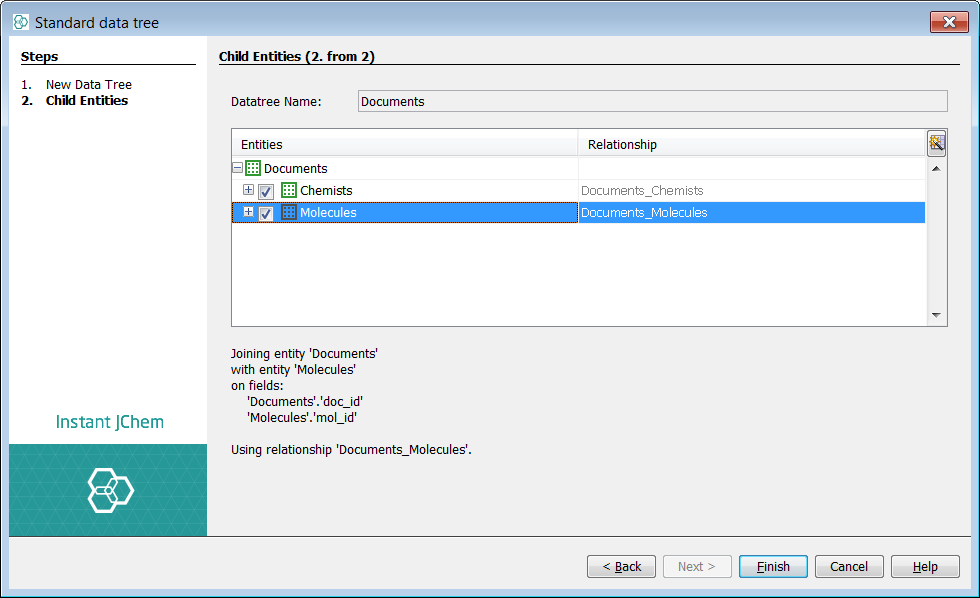
Finally your data tree should look like below and is also now visible directly under the schema node in the Project explorer window.

Configure form and add data - "Med Chem research"
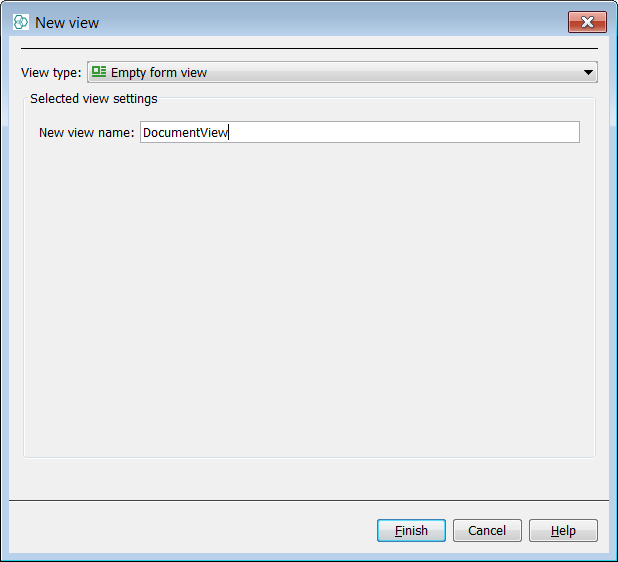
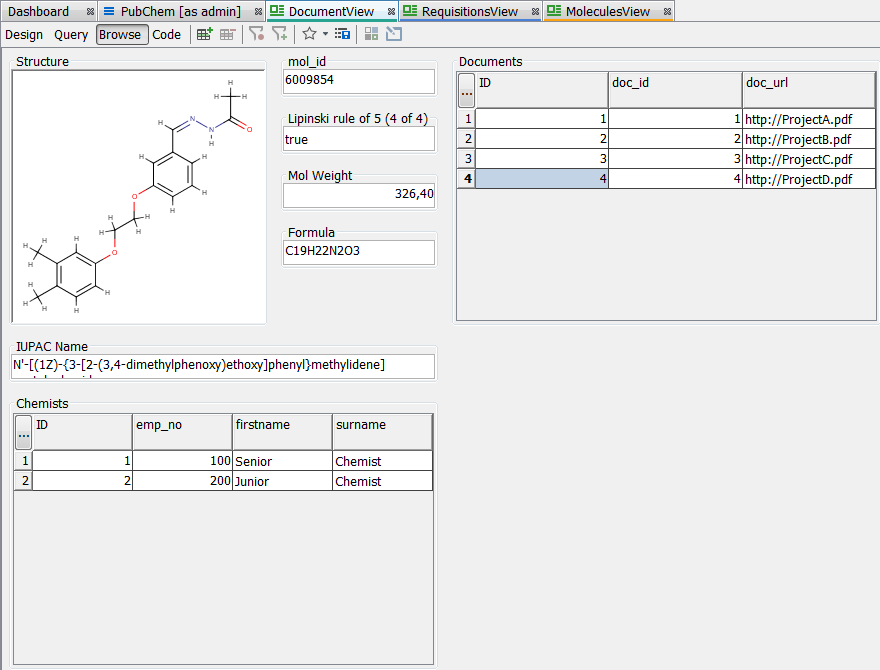
Next we should add a form to our datatree. Right click on the datatree node and select New View.... Select Empty form view and name the view appropriately, for example "DocumentView" - select Finish.
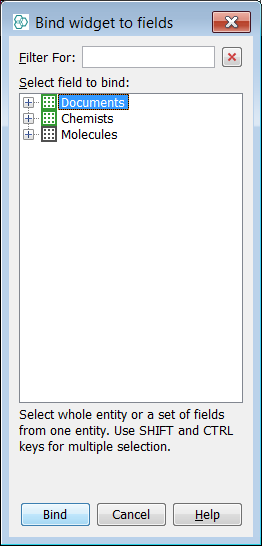
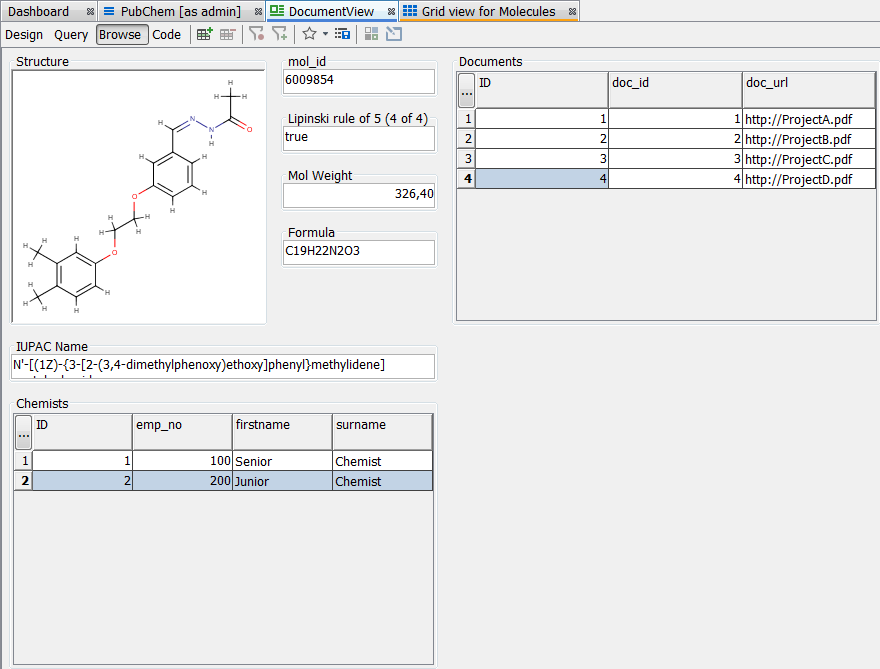
You will see the new form "DocumentView" under the datatree in the project explorer and it will also auto open after creation. Now lets add some widgets to the form and bind them to the entities that constitute the datatree. Drag a table widget on to the form and bind it to "Documents". Repeat for "Chemists". Drag a MolPane widget on to the form and it should autobind to the Structure column of the "Molecules" table. Drag a single line text field on to the form and bind to the "Molecules.mol_id". Repeat for the Lipinski drug like field, molweight, formula and IUPAC name. Use the right click customize options for each widget to enhance your form.
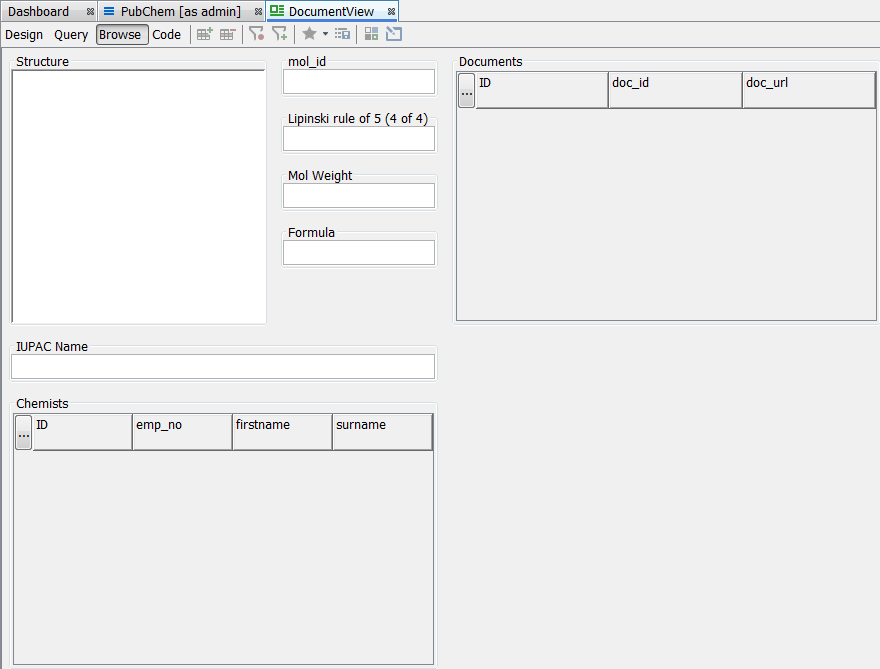
You will notice that although you have added some molecules previously none are currently visible in the Browse mode. This is because the root node "Documents" entity is the query target and is currently not populated. First we need to add some rows to the documents table and then configure the 'invisible mappings' between "Documents" and "Chemists"/"Molecules" so that we associate both Chemists and molecules with the published location.
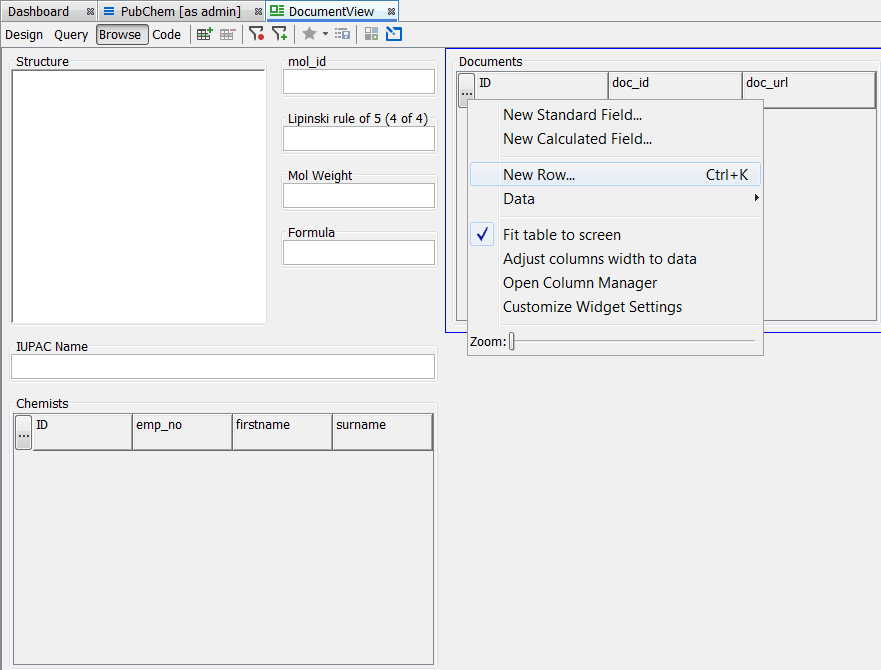
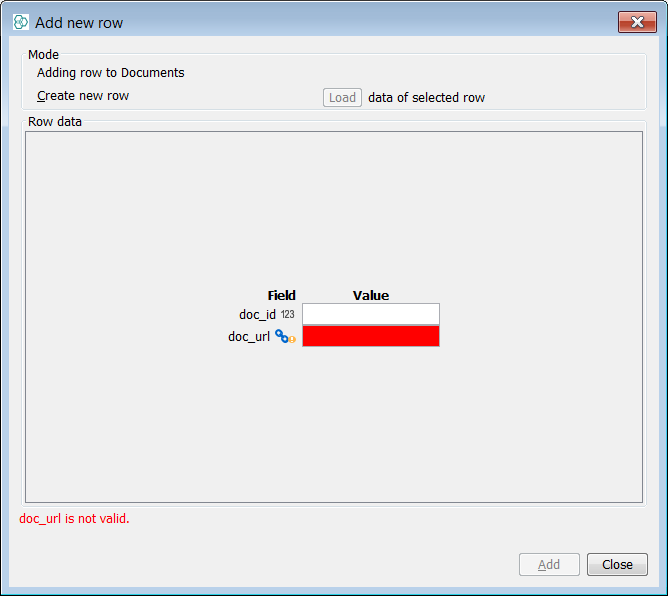
First lets add some documents. Left click on the documents entity and then select the add new row icon (or click the ... button in the top left corner of the widget, or use Ctrl+K). Add four rows using a suitable doc_id (1..4) and URL (red means a value must be provided). For each of the four document rows we can now configure the associated Chemists and Molecules. (All the molecules already exist, but the Chemist's do not, but indeed could be pre-loaded prior to this configuration).
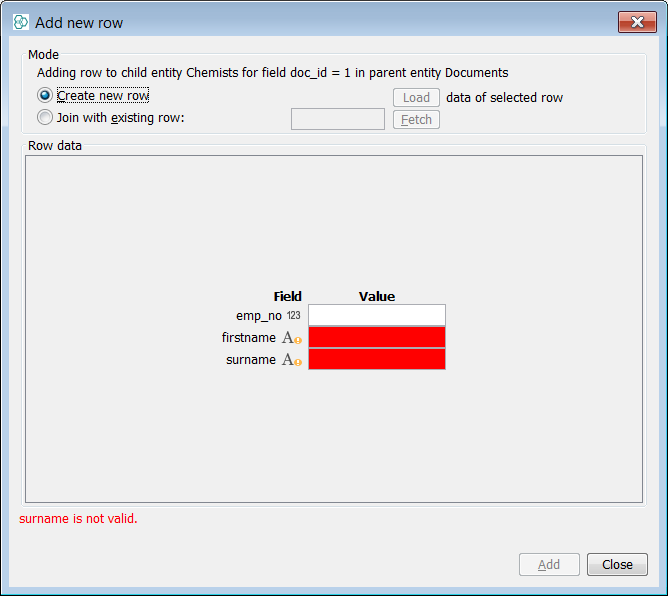
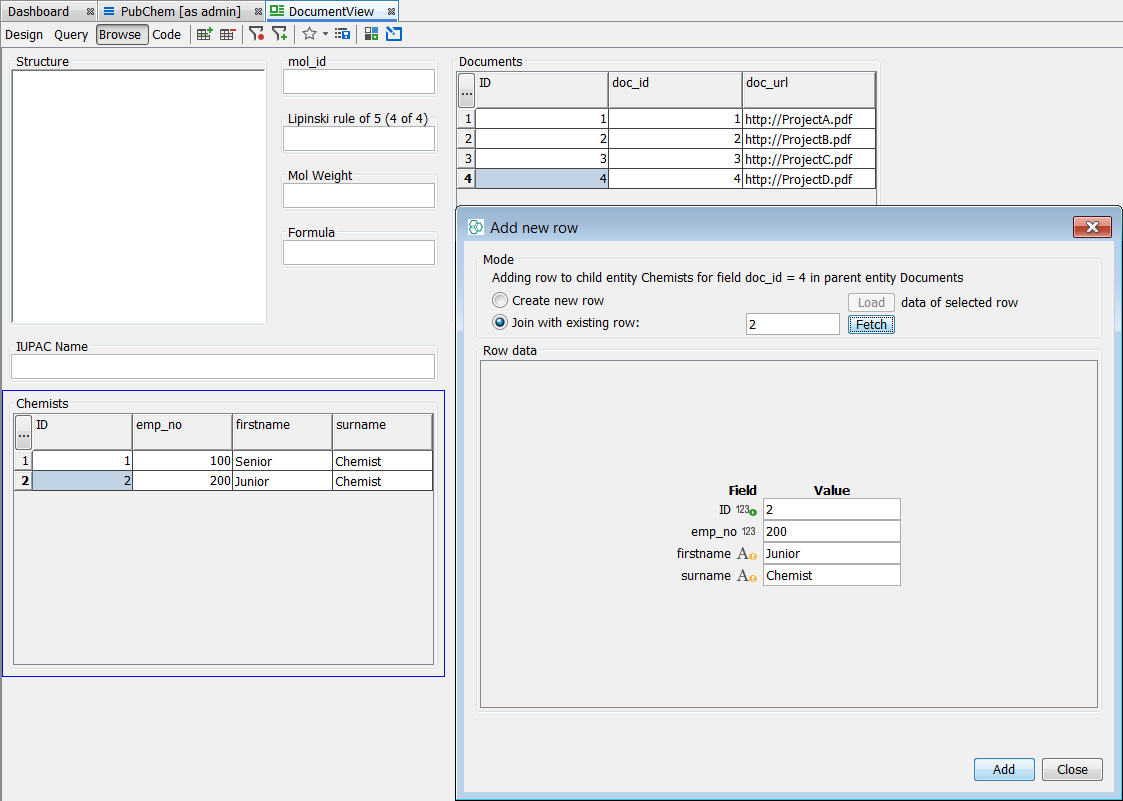
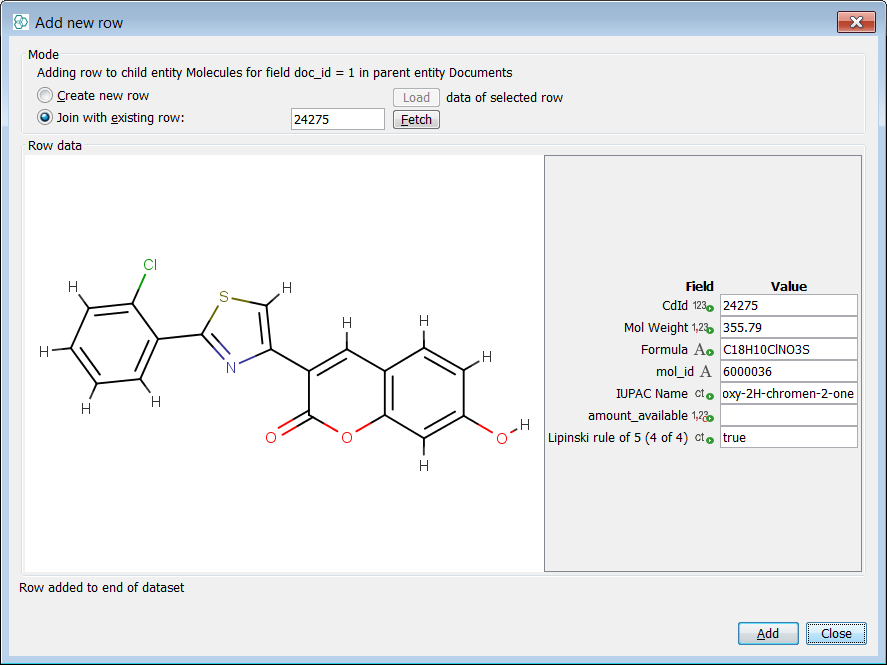
Select the first row in the "Documents". Now select the "Chemists" entity and add new row. You can now add a new row or obtain an existing row to be associated with the "Documents" first row. In this first case we will add the rows 100, "Senior", "Chemist" and 200, "Junior", "Chemist". Select the second row in "Documents". Select "Chemists" and add new row. This time we associate the first "Senior" by using the select existing row and then fetch button. Select the third row in "Documents". Select "Chemists" and add new row. This time we associate the second "Junior" by using the select existing row and then fetch button. For the fourth row we associate both rows in the same way. You will notice that you need to use the 'ID' field with the fetch button in order to obtain the row to associate, the emp_no is a passenger field, which is hopefully more meaningful to the viewer.
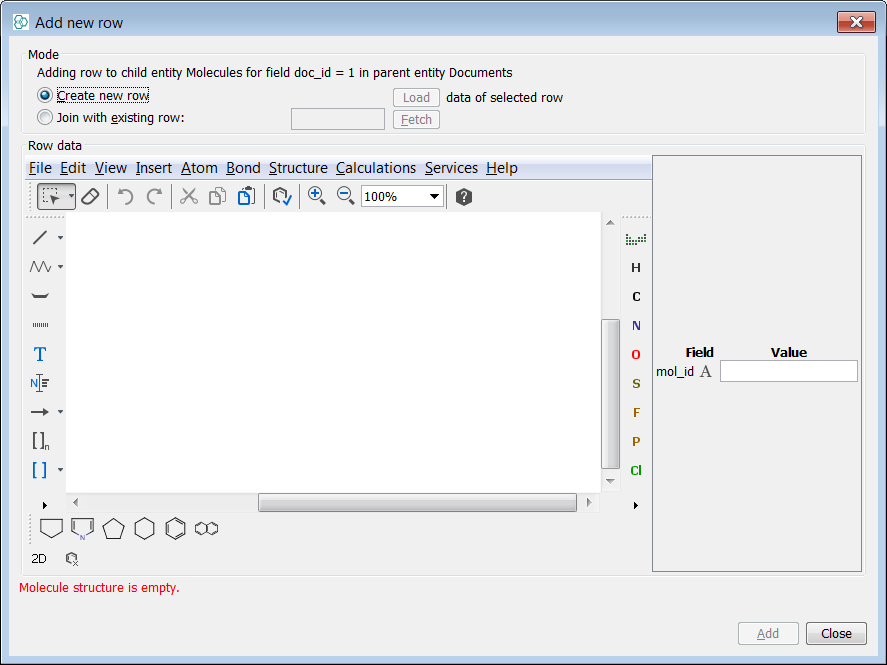
Select the first row in the "Documents". Now select the "Molecules" entity (Structure) and add new row. You can now add a new row or obtain an existing row to be associated with the "Documents" first row. In this case all the molecules are already loaded but we need to use the cd_id to fetch associated rows.
You can use the supporting datatree with the Molecules as root node with both mol_id and cd_id visible in order to help you appreciate what you are mapping!
Select the second row in "Documents". Select "Molecules" (Structure) and add new row. Associate some molecule rows by using the select existing row and then fetch button. Select the third and subsequently the fourth row in "Documents". Select "Molecules" (Structure) and add new row. Associate some molecule rows by using the select existing row and then fetch button. The "Molecules.mol_id" is a passenger field, which should be more meaningful to the viewer.
The final form can be seen below...what is visible is driven by row selection in the the "Documents" entity...
Assemble datatree - "Chemical requisitions"
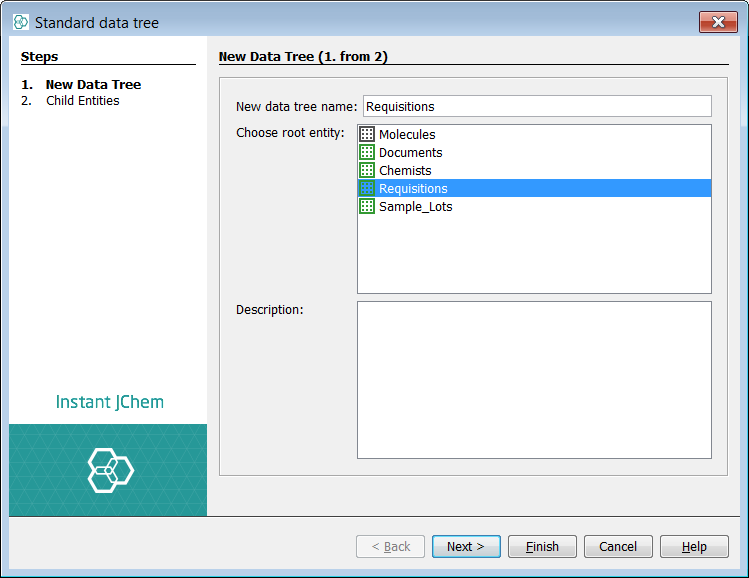
We can now assemble the second of our datatrees - note it will be independent of the first in terms of query state. For this data tree we wish to make the "Requisitions" entity the root node with two child entity "Chemists" and "Sample_Lots". There is also a third relationship to consider between "Molecules" and "Sample_Lots". In the schema editor in the data tree tab, right click and select New data tree from entity ..., select "Requisitions" and then Next. In the next step, select the checkboxes next to the child entities (Chemists and Sample_Lots) to include them in the datatree, then Finish. - you should see the "Requisitions" datatree now exists and contains both Chemists and Sample_Lots.
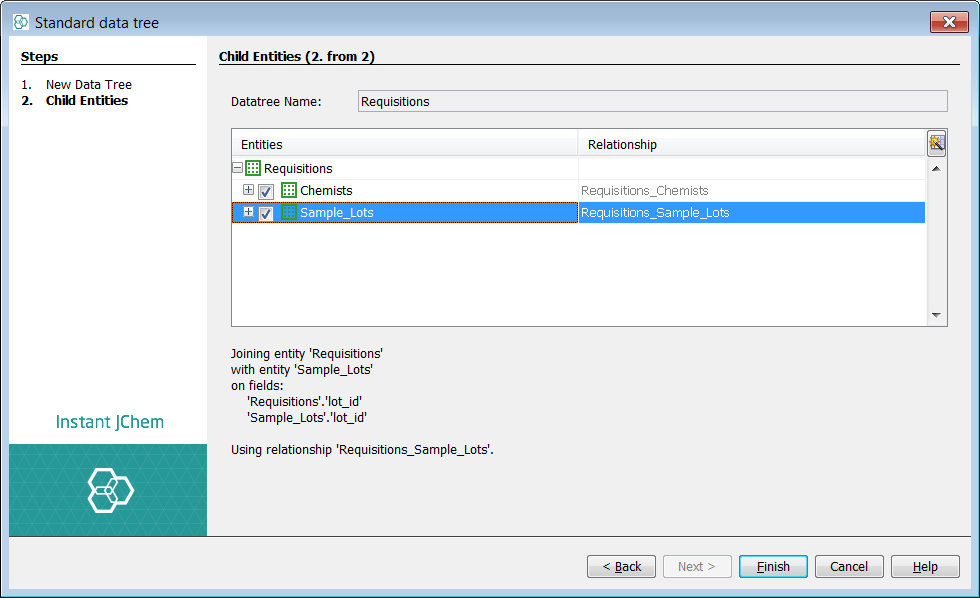
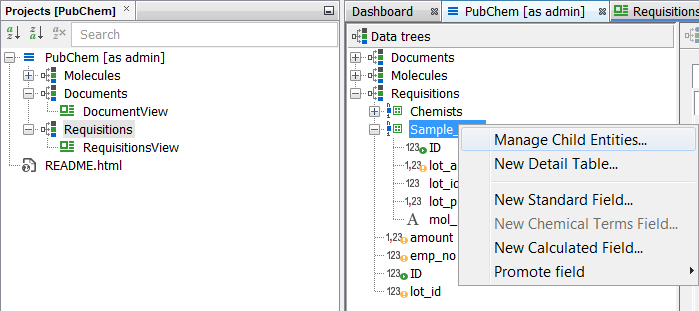
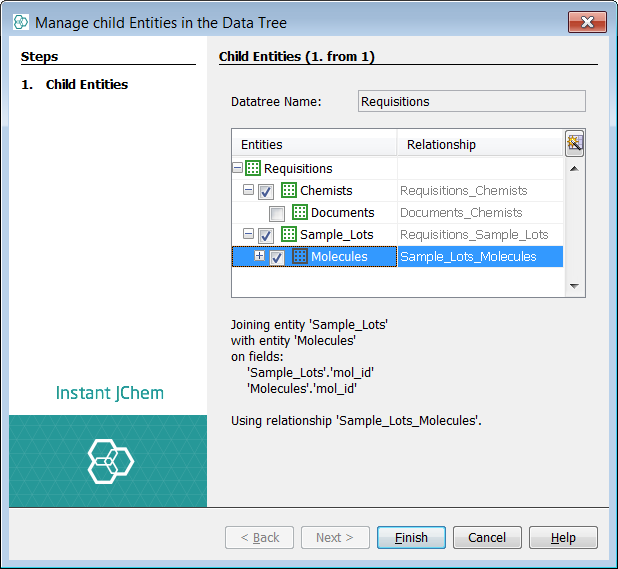
Now, you need to include the "Molecules" in the data tree. In the schema editor in the data tree tab, right click on the "Sample_Lots" and select Manage Child Entities... In the following window, select the checkbox next to "Molecules" to include them in the data tree and click Finish.
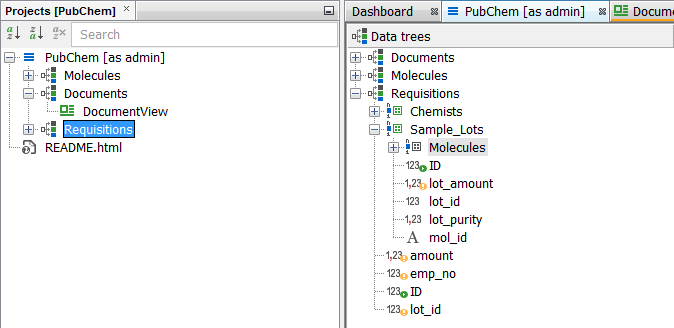
Finally your data tree should look like below and is also now visible directly under the schema node in the Project explorer window.
Configure form and add data - "Chemical requisitions"
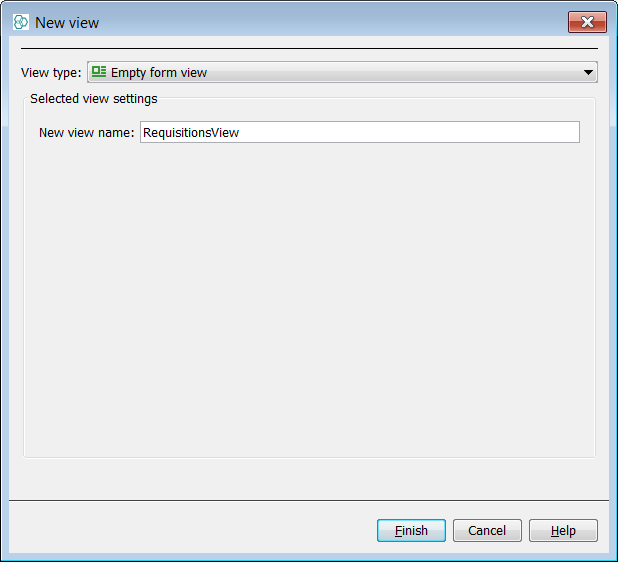
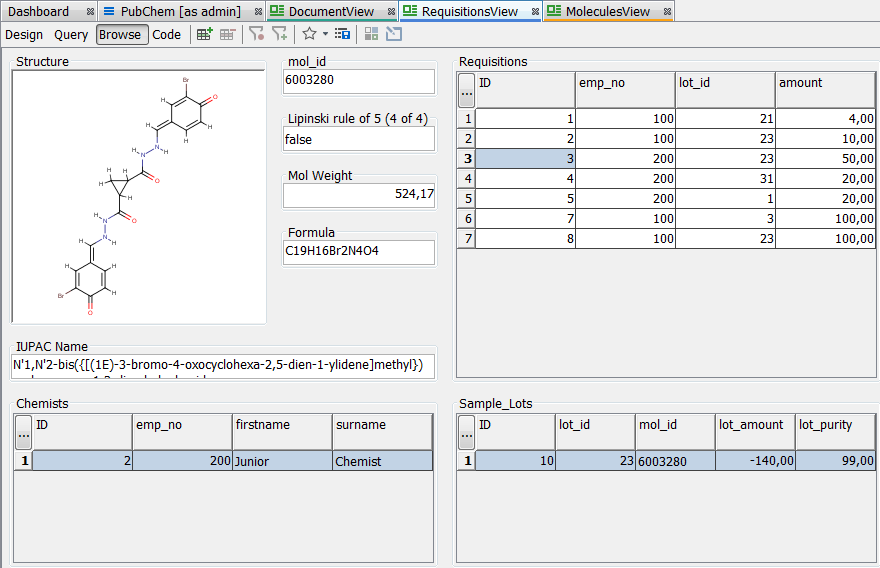
Next we should add a form to our datatree. Right click on the datatree node and select New View.... Select Empty form view and name the view appropriately, for example "RequisitionsView" - select Finish.
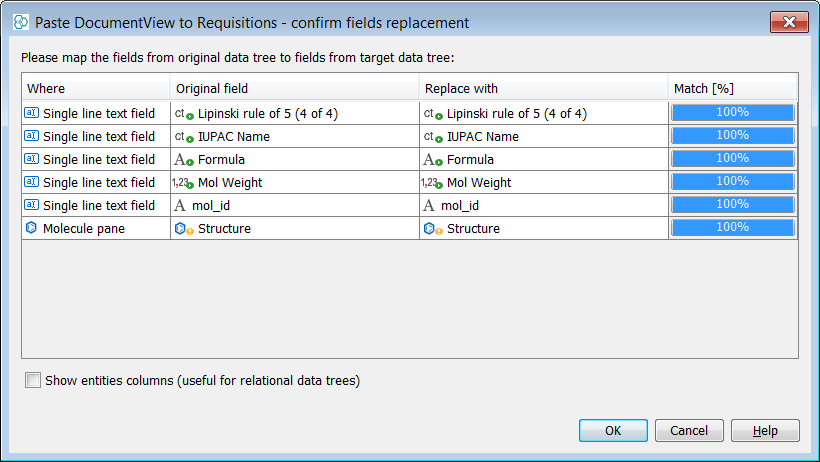
You will see the new form "RequisitionsView" under the datatree in the project explorer and it will also auto open after creation. Now lets add some widgets to the form and bind them to the entities that constitute the datatree. Drag a table widget on to the form and bind it to "Requisitions". Repeat for "Chemists" and "Sample_Lots". You can copy and paste all the form widget configuration for Molecules from "DocumentsView" to "RequisitionsView"! You should see a 100% mapping for all fields. Use the right click customize options for each widget to enhance your form. In addition the "Molecules.amount_available" field has been bound to a single line text widget.
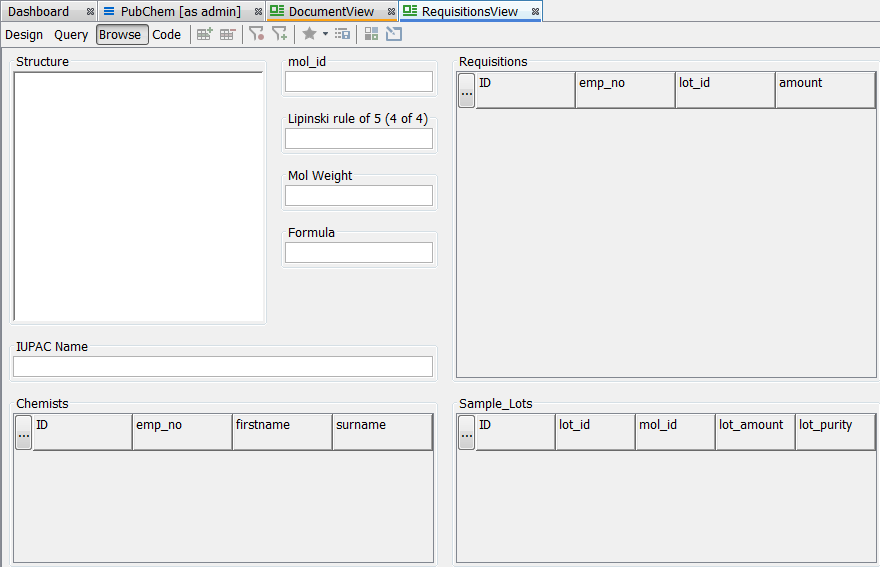
Similar to the first example, you will notice that although you have added some molecules previously and also now some Chemist's information nothing is currently visible in the Browse mode. This is because the root node "Requisitions" entity is the query target and is currently not populated. First we need to add some rows to the "Requisitions" table but first we should pre-populate "Sample_Lots" since the lot should exist before it is obtained as a requisition!
Again, it is handy, indeed required to have a separate "Molecules" datatree (with "Molecules" as root node) to support you in reading and writing data in an administrative capacity.
Add some sample lots for some selected molecules using this datatree! Here you can cycle through the parent molecules and add child lot data [We briefly described how to create this datatree above!].
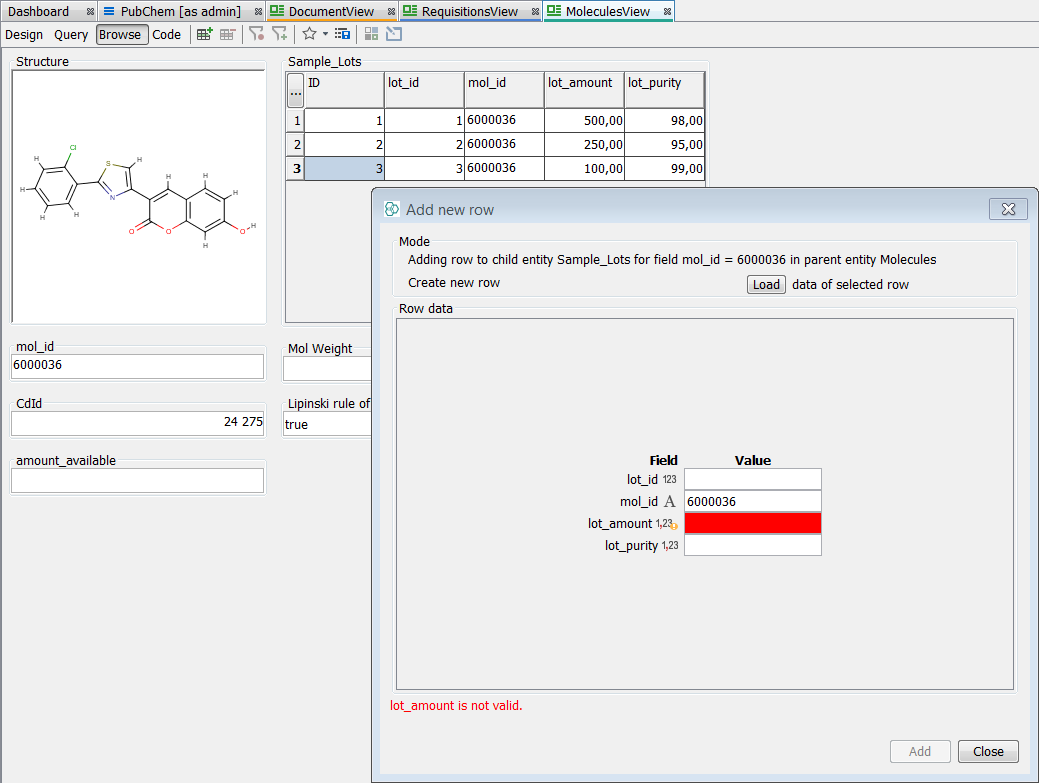
In order to complete this example to satisfaction, we should now wish to create two more objects before we commence with adding data to "Requisitions" or placing orders. First, we will add some simple "Groovy" code to the calculated field "Molecules.amount_available" which simply sums over all lots for that molecule. We then have a slightly more dynamic set up! Second, we can place a simple trigger on the "Requistions" table so that once an order is placed (insert) then the correct amount is decremented from the correct Sample_Lots record.
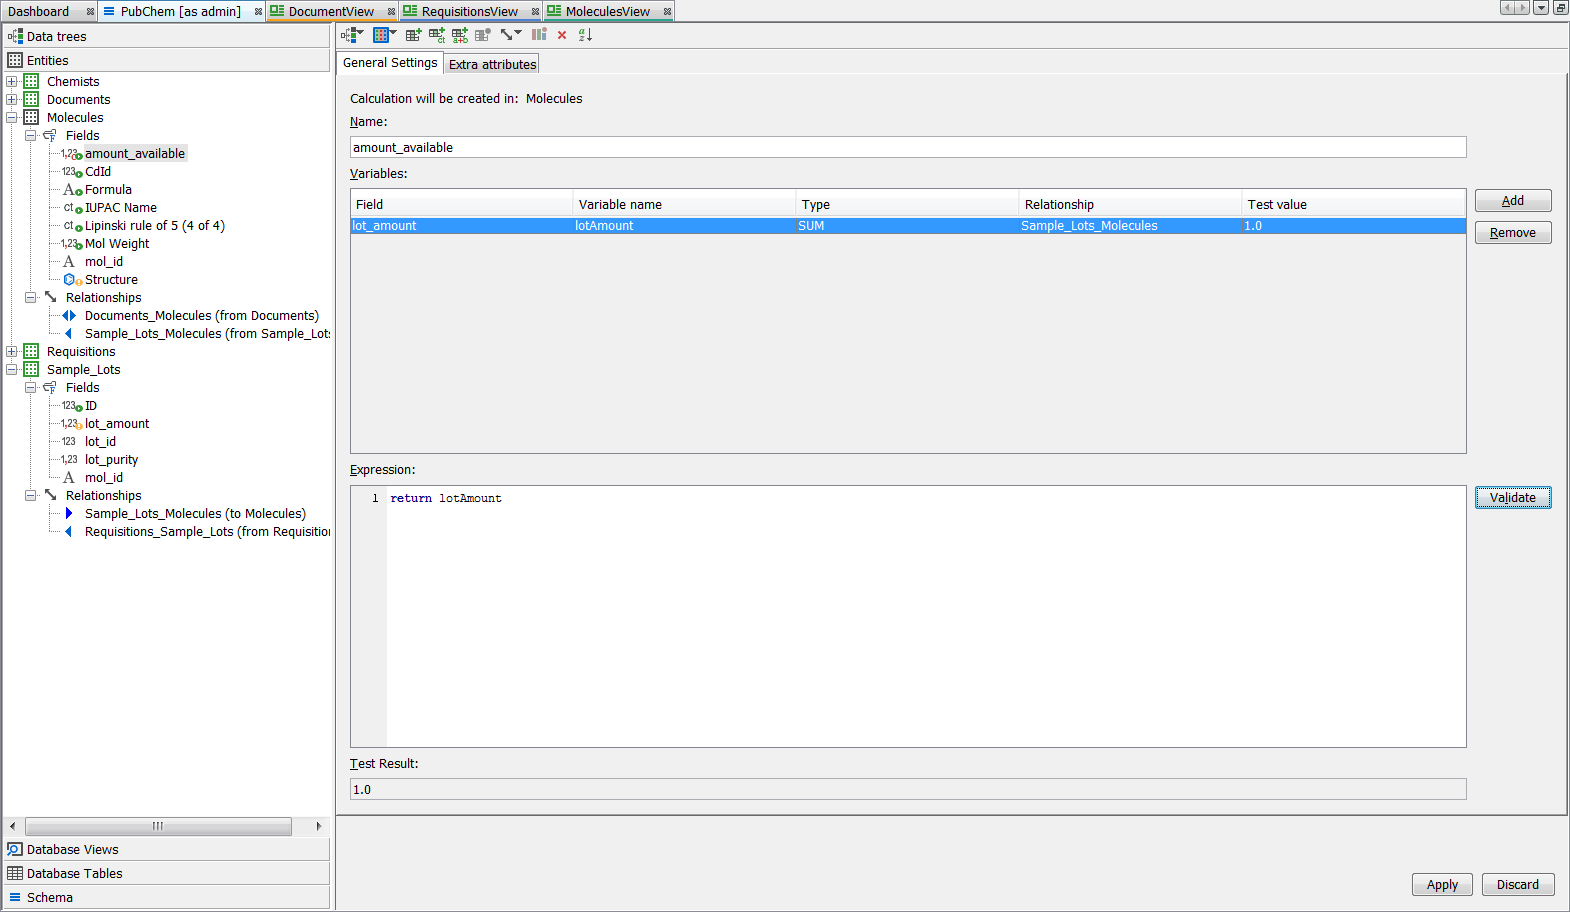
Right click on the schema node and select Edit schema. At the entity level select the "Molecules.amount_available" field. You should see the view below.
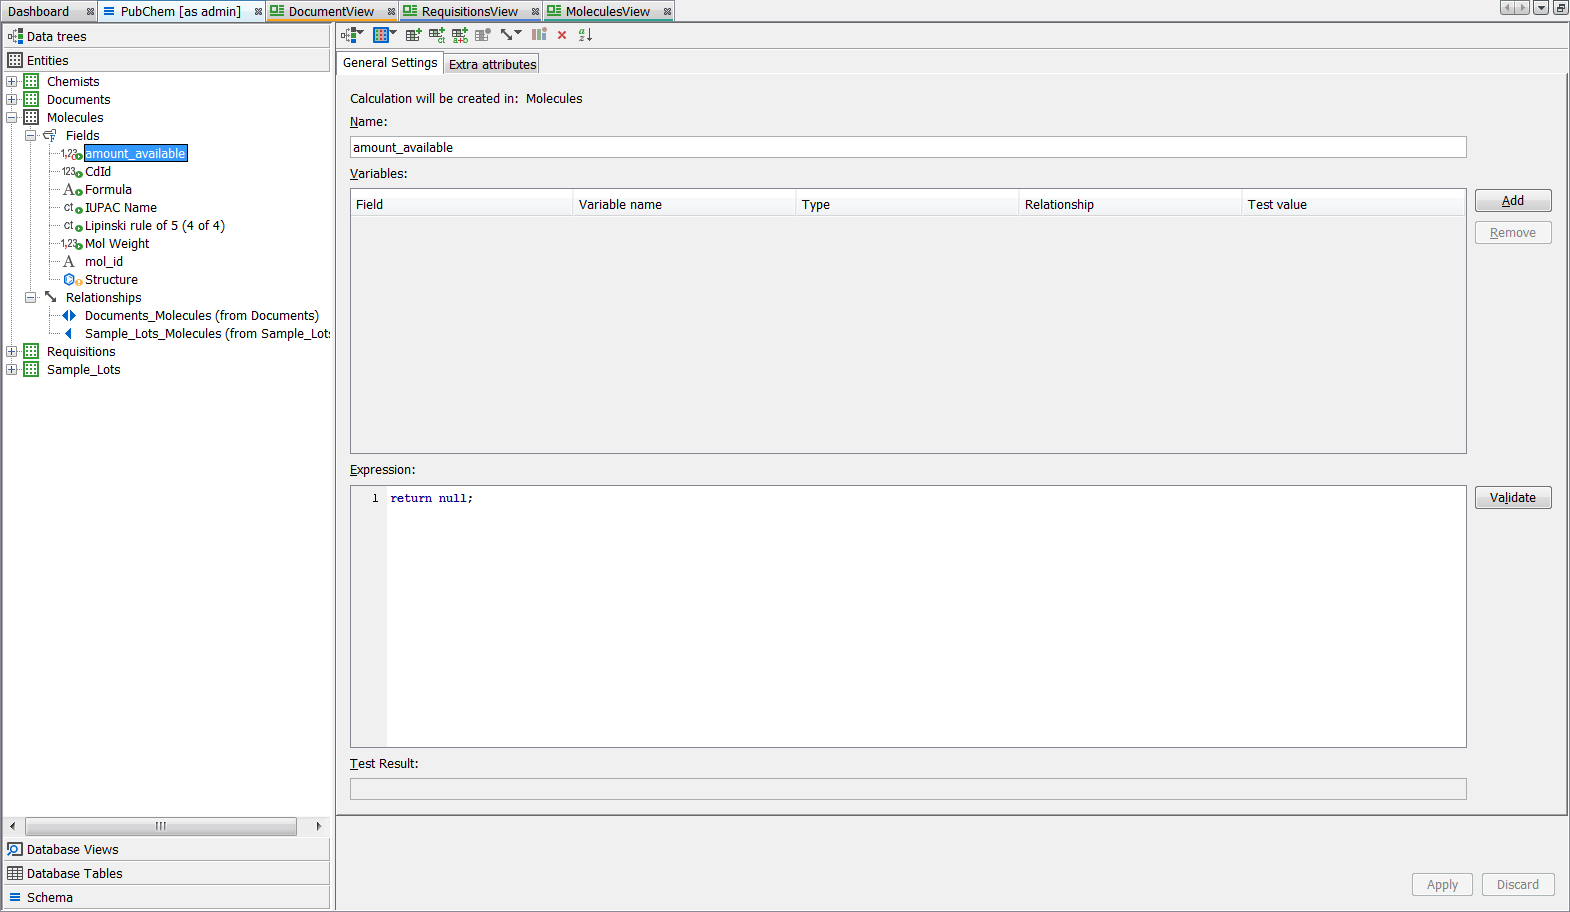
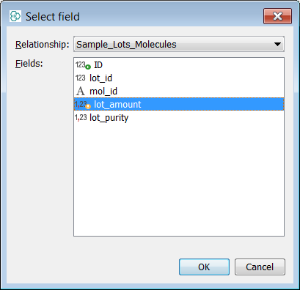
Now we need to add an expression which sums all the child records "Sample_Lots.amount" values for any given parent "Molecules.mol_id". First Add a new variable. Select the "Sample_Lots.lot_amount" over the relationship, Sample_Lots_Molecules. Change the type from single to sum. Now simply add an expression to return the generated variable name. Validate and Apply. (Visual checking is easiest in the supporting "Molecules" datatree.) Please see the following page on calculated fields .
Now we should like to add an RDBMS trigger to the "Requisitions" entity. Triggers cannot be added via Instant JChem but need to be directly added using an RDBMS interface. Please see these help pages on triggers . For this case we use a derby RDBMS and so at the ij prompt add the following trigger.
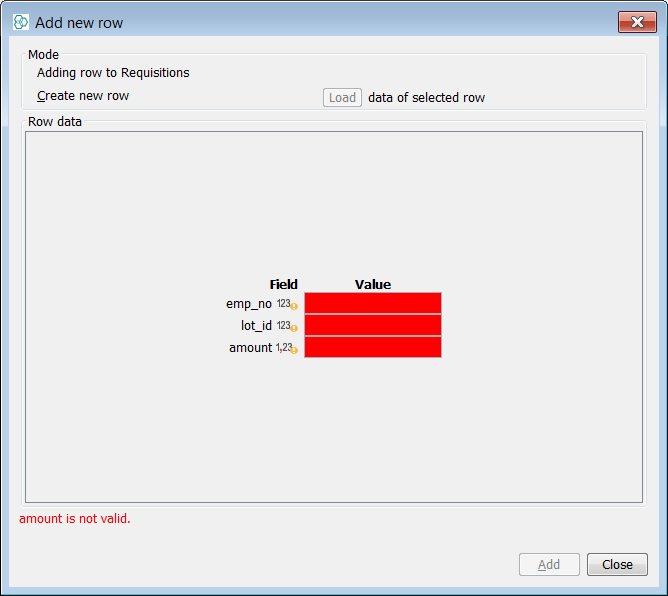
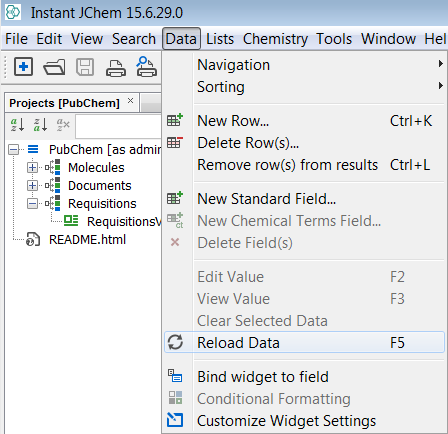
CREATE TRIGGER requisitions_instrg AFTER INSERT ON requisitions REFERENCING NEW AS newrow FOR EACH ROW MODE DB2SQL UPDATE Sample_Lots SET lot_amount = lot_amount - newrow.amount WHERE lot_id = newrow.lot_id; Finally, you can now add rows to the "Requisitions" entity similar to place orders in the "live" version. Left click on the "Requisitions" entity and then add new row. Add some rows, which represent Chemist's ordering amounts from specific lots of a particular molecule. In order to see the effects on the calculated field and the decrement on Sample_Lots you will need to refresh by using Reload Data.
Notice you can easily interchange between form views which can assist you since you can access "Supporting" datatrees and obtain required data for inserts during open transactions or editing entity data via widgets on a different form.
Congratulations
Congratulations! You have just just built some datatrees from more complex data model, by learning :
-
How to create project & schema.
-
How to create and modify entities using the schema editor.
-
How to create relationships and constraints to build your data model using the schema editor.
-
How to construct different data trees from a single source data model.
-
Simple building and use of forms for your datatrees.
-
Use of a calculated field and a simple trigger.
-
Use of a supporting datatrees during administration / setup.