Cherry Picking Lists
Introduction
A really helpful and ultimately cool feature in the Instant JChem Desktop is the Cherry picking functionality which will allow you to compile a bespoke list of your favourite and therapeutically relevant molecules from various entity and query sources from within your schemas data trees. You can easily modify, control and publish your cherry hit lists of molecules to colleagues as required.
To help you to get using the new Cherry picking features as quickly as possible this guide is described in three sections:
-
How to pick your initial favourite 'Cherry' molecules and add them into the working list or 'basket'
-
How to save a current working list of Cherry molecules as a permanent list or 'punnet'
-
How to manage and change and interact with sets of many permanent lists ('punnets' to extend the metaphor!)
Picking Cherry Molecules
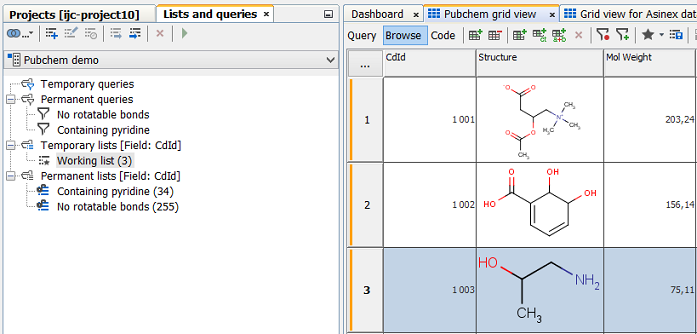
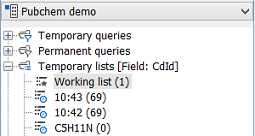
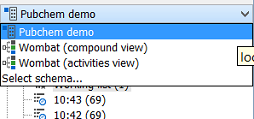
The first thing you will notice is the new cherry picking 'basket' or 'working list' which can be found under the temporary list node in the Lists and Queries window. You can tell it is the working list by the gold star icon and you will also notice a similar related icon in the tool bar. This gold star button serves to toggle molecules from the current working list and is also a drop down box giving more options discussed below. Any working list is within the scope of a single entity. This means that you can cherry pick molecules from an root entity and they will appear in the same working list. If it is focused on some child entity widget, it fold the related record from root entity on the working list. Data across entities and data trees can be consolidated by using list logic on saved permanent lists. An important thing to note is that the working list exists for the current session only and should be saved to permanent before exit.
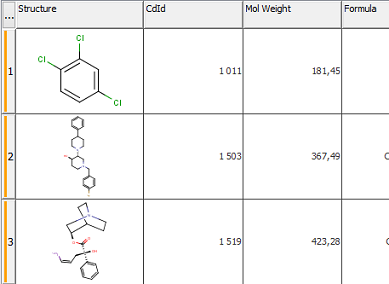
You can add and remove your favourite molecules to the working list basket in several ways, from both the grid and the form views. Once the molecule you wish to add is selected, you can 'toggle' it in the working list by either using the 'Ctrl & D' short cut keys or by pressing (to the left) the gold star icon in the tool bar. Subsequent use of these controls will then remove the molecule from the working list. Each molecule that exists in the working list is marked up with a vertical orange bar in the grid view and table widget on forms. The star icon is the method that can be used to indicate a picked cherry from the form view (empty star means record is not in working list).

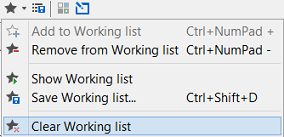
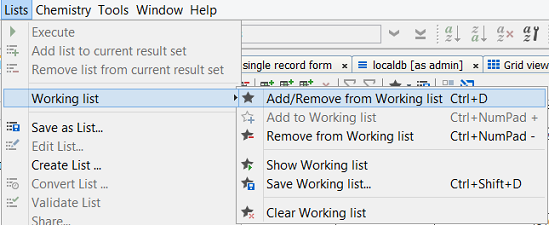
If you select a record which is marked up in this way the gold star icon will light up indicating it is already in your working list or 'favourites' and you can press it to remove the molecule. If you select a record which is not marked up, you can only see the star outline and you can press it to light it up and add the molecule. You can also add and remove molecules to the working list from the drop down box (to the right) or from the lists menu. You can see the two options 'Add to working list' and 'Remove from working list' for this.


Each time you add a new molecule you will see the working list count and contents increment and when removed, decrement accordingly. From the grid view or indeed the MolMatrix widget, on a form view you can select and add multiple molecules to the working list basket in one go, by selecting each record followed by 'Ctrl' after each molecule and once all selected 'Ctrl D' will add the set to the basket. You can also remove the entire previous selection added by 'Ctrl D' toggle again. In order to view all the contents of the basket, simply double click on the working list and it's contents are placed in focus for viewing in the grid view - they will all be marked up with the vertical Orange bar. Alternatively you can view the contents of the working list by selecting the 'Show working list' from the drop down or right click or List menu options. If you wish to go back to the main data view and see all molecules, select QUERY mode and 'view all' and the entire source set will be re-instated.
With your initial use of the cherry picking features you might decide to 'restart' on the current working list... The 'Clear working list' option is available if you right click on the working list and it is also available in the drop down options. This does what is says and removes the contents of the working list basket back to zero molecules. You can see below that there are several ways in which to access the operations associated with cherry picking discussed on this page.
To summarise: Access add, remove, show, save and clear from the tool bar drop down and from the Lists and working list menu option.
Boxing up the cherries
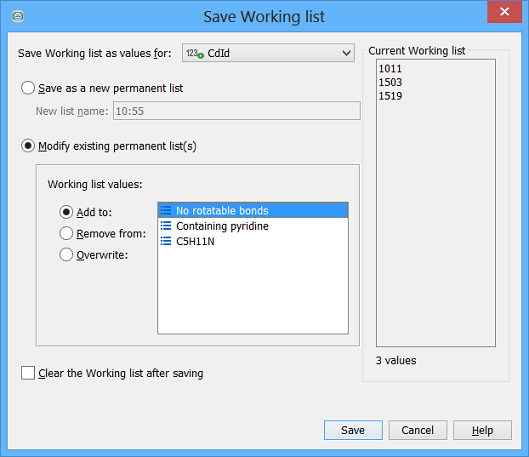
Once you have selected all the molecules that you want to add to the working list you can now save them to a separate permanent list, which will then appear under the permanent list node of the Lists and Queries window. You can do this with a keyboard short cut, 'Ctrl shift D' or by selecting 'Save working list' either from the drop down or the right click menus. You will then be presented with a dialog with a number of options to consider. The drop down box at the top of the dialog allows you to choose the data item field to use in the list as the key identifier. The default field for this is cd_id and is useful, but you will likely have your own internal identifier for this. On the right you can see a panel that displays the currently select field values for the working list - for tempoarary list such as working list this is always cd_id. If you intend to create a new list you can amend the new list name in the text box provided and then create the list.
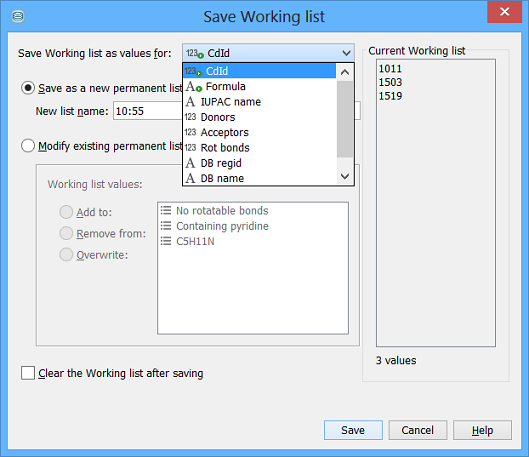
If other permanent lists already exist, it is possible to 'add to', 'remove from' or 'overwrite' a selected permanent list using the current working list. Finally, at the bottom is the 'Clear the working list after saving' which when ticked will clear the working list after having saved it. Select SAVE to execute the actions chosen in the dialog.
Other available Standard list functions
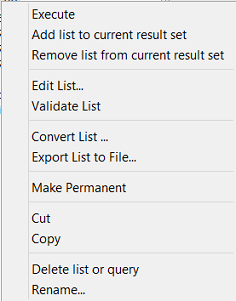
Some further useful list operation functions are available from the right click menu of the working list and are listed and then explained briefly below. A lot of these functions are common to all lists in Instant JChem.
-
Add list to current result set - this function will add the working list to the current focus set.
-
Remove list from current result set - this function will remove the working list from the current focus set.
-
Edit list - you can modify the items in your list - this updates the list and does not update the field.
-
Validate list - this is the equivalent of running the query for the list to refresh.
-
Convert list - you can convert your working list to a permanent list & rename or choose a new ID key if required.
-
Export list to file - currently your selected primary key for the list will be exported to a text file.
-
Copy function - you can then paste your list into the permanent or temporary list & rename if required.
To summarise: Access add, remove, show, save and clear and additionally the standard functions, edit, validate, convert, export and copy.
