Administration GUI
Administration GUI of Compliance Checker allows users with administrator privileges to execute the following:
-
Update legislation's Database.
-
Monitor running services.
-
Check default categories and create / edit user defined levels.
-
Search in Database update history.
-
Search in Batch check history.
-
Search in Single check history.
-
Create and edit report templates.
Login
Administration GUI is available after login as administrator on the web GUI of Compliance Checker and clicking on the Administration button in the upper right corner.

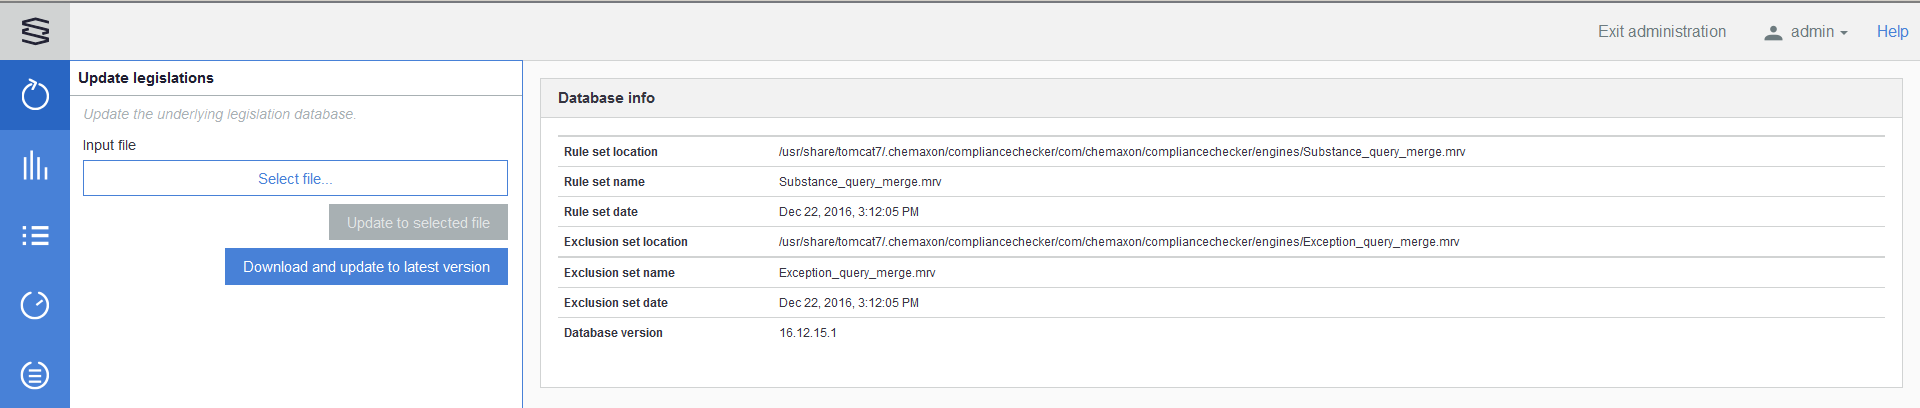
Update legislations
When the Knowledge Base version is not up to date then users and the admins get a warning message:

Admins can update the legislations from the Administration page by clicking on the ![]() Update legislations button.
Update legislations button.
Actual legislations are covered by a rule set and an exclusion set which are sets of special chemical query structures confirming the actually valid relevant legal rules.
The scope of the legal relevancy depends on the scope of the Compliance Checker license you have.
Two ways are provided for the update:
Manual DB update
You can execute the update by selecting the necessary jar file containing the rule set and the exclusion set, and clicking on Update to selected file button.
Automatic DB update
After setting up an update server, users and admins get a warning message when a new DB version is available.
Admins can update the Knowledge Base automatically by clicking on the Download and update to latest version button.
System monitor
Click ![]() to open the System monitor page where you can check the actual status of the system and the running services.
to open the System monitor page where you can check the actual status of the system and the running services.
System status
The System status shows the details of the MongoDB, the System user, the Eureka services, the Config service and Settings. There are settings which can be applied only after restart and another group of settings that can be changed on the fly. If the latter settings were changed, they should be reloaded by clicking on the Reload settings from config file button.
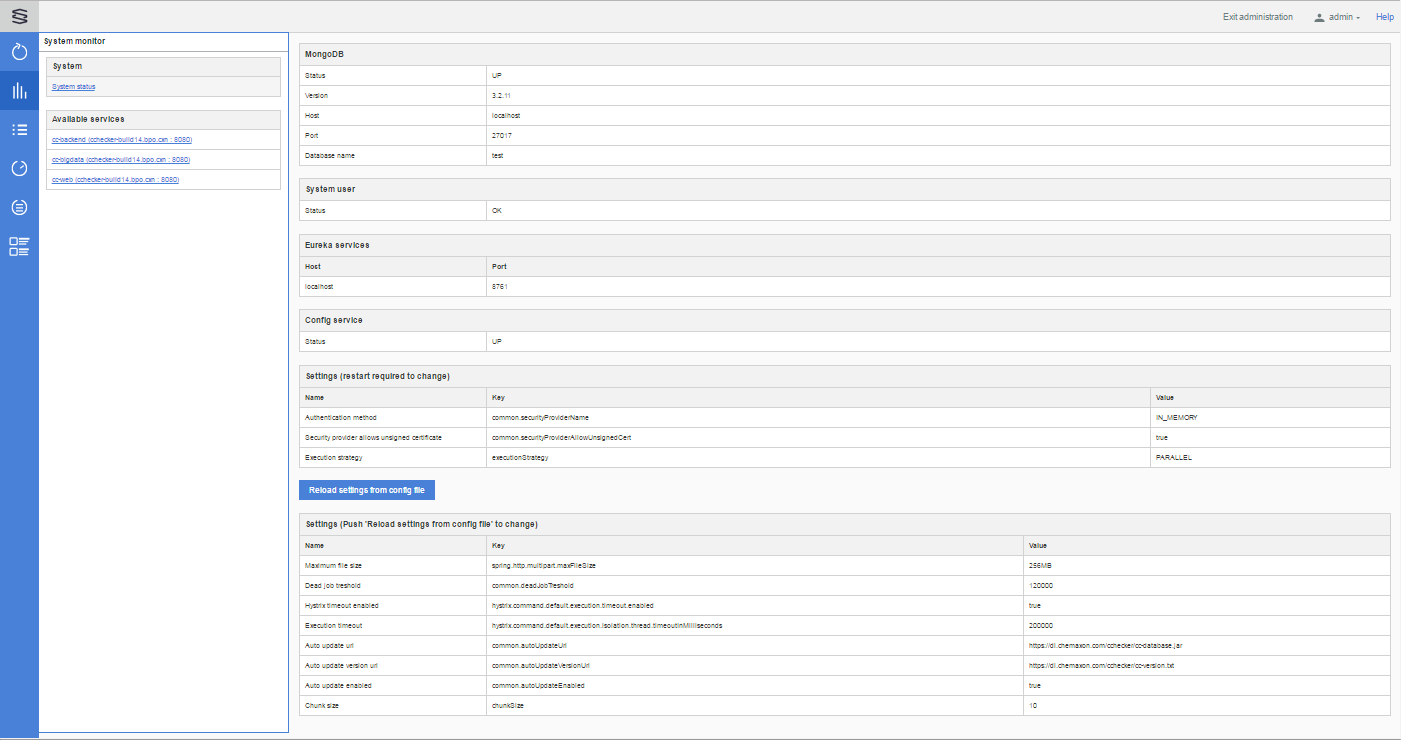
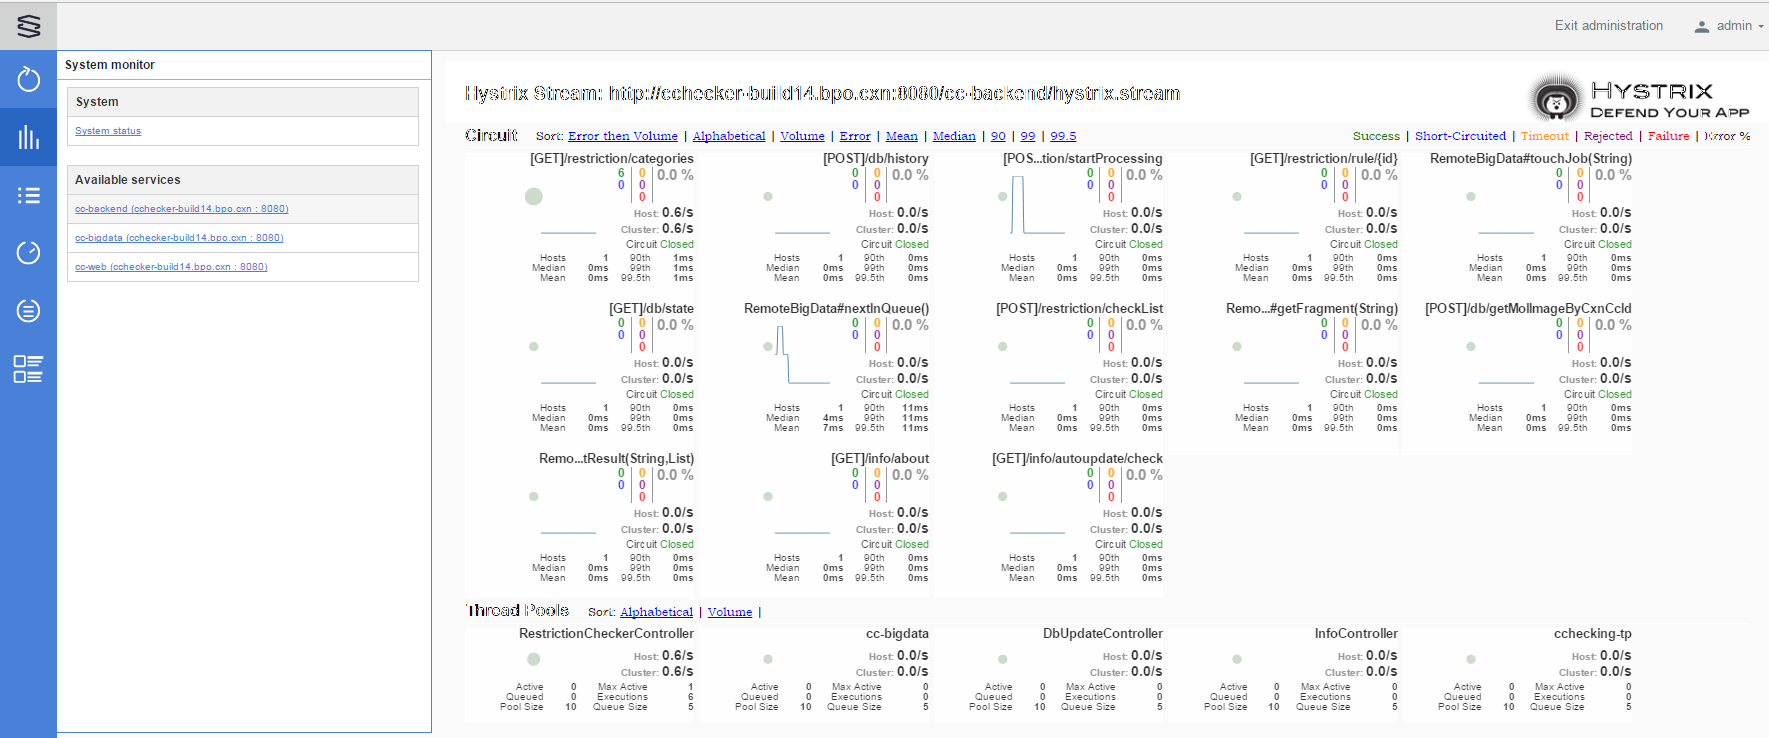
Available services
Three types of services can be monitored here:
-
cc-backend
-
cc-bigdata
-
cc-web
Check level editor
Click ![]() to open the Check level editor page.
to open the Check level editor page.
This page lists the Available categories in three groups:
-
Countries
-
Groups and associations
-
User defined levels
-
These Countries and User defined levels will be displayed on the Compliance Checker User Interface in the Regulation categories section as 'Available countries' and as 'Available check levels'.

Default categories
Countries
The displayed 'Countries' are in accordance with your license file.
Here you can check which regulations are included in the individual countries.
You can clone the available countries and the created clone will become a new User defined level.
Editing or deleting 'Countries' is not available.
Groups and associations
The displayed 'Groups and associations' are in accordance with your license file.
Here you can check which regulations are included in each individual group.
You can clone the available 'Groups and associations'. The created clone will be a new User defined level.
Editing or deleting 'Groups and associations' is not available.
User defined levels
'User defined levels' can be created, edited and deleted as well.
-
Create: creates a new level, named and defined by the admin.
-
Edit: opens the Edit level page displaying the actual composition of the selected 'User defined level' and makes possible to make changes.
-
Delete: deletes the selected 'User defined level'.
-
Create new Level
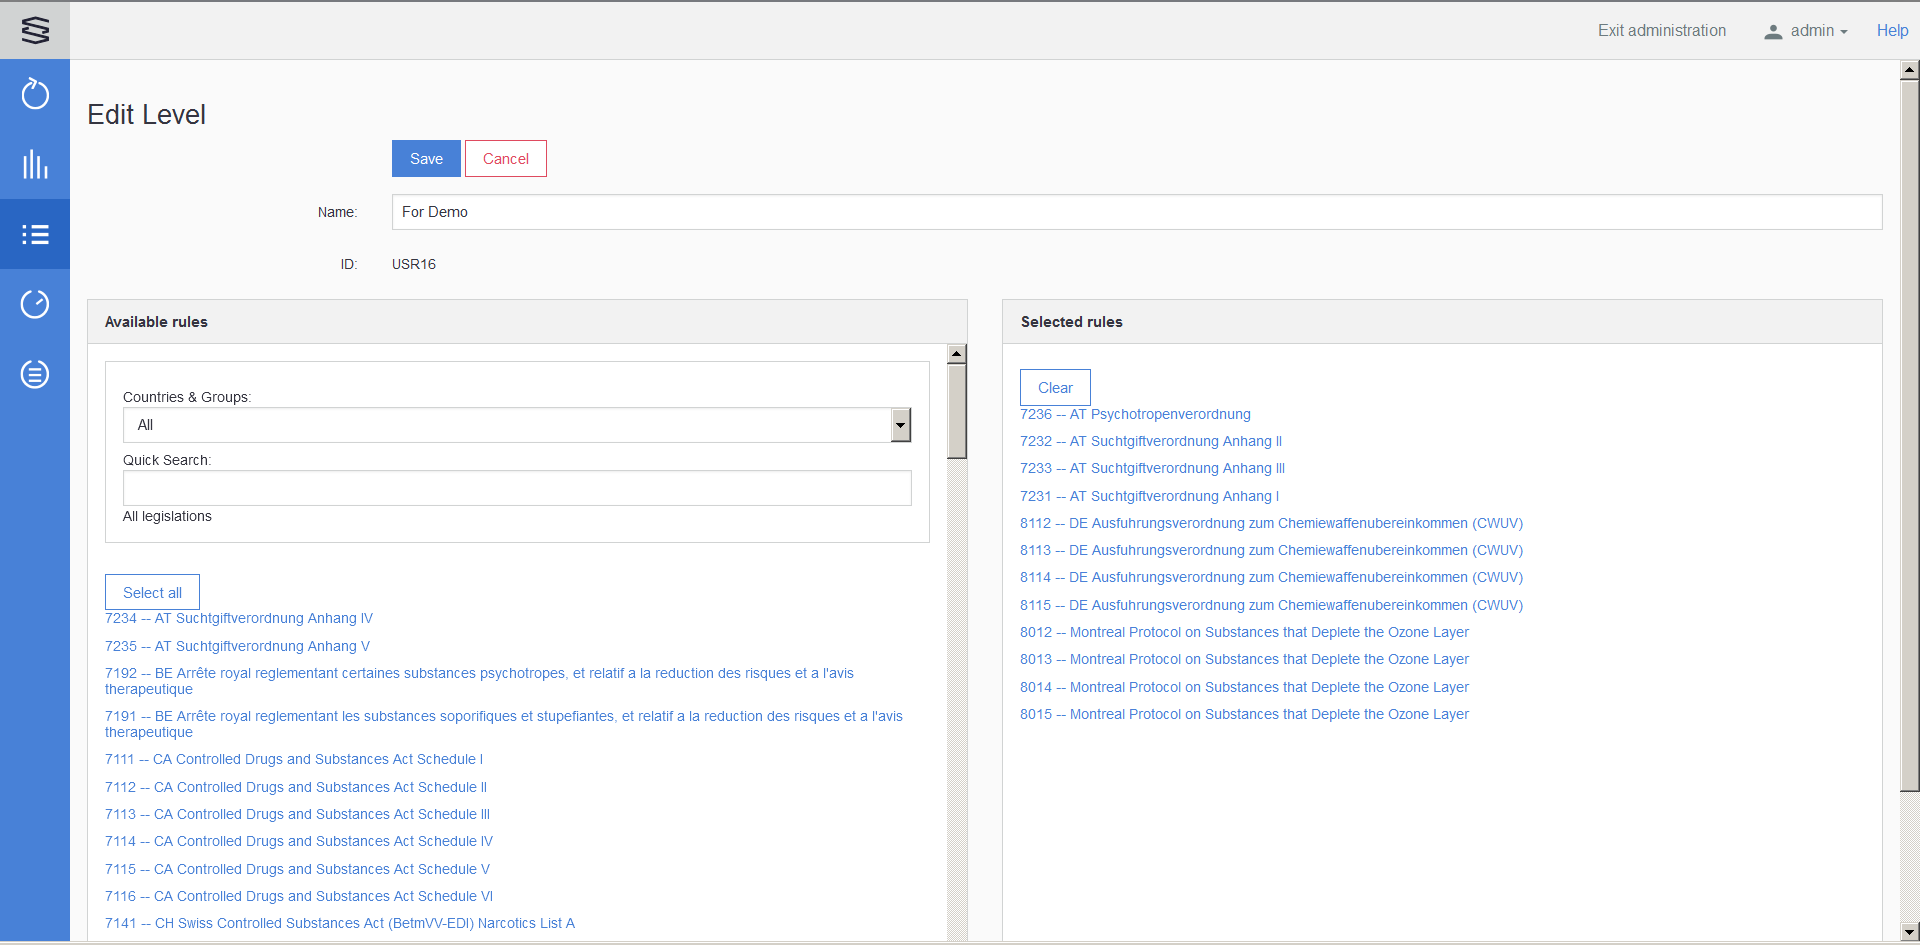
The Create new level button on the page showing the Available categories opens the Create new Level page.
To narrow the search in the Available rules you can use the Countries & Groups drop-down and/or the Quick search field.
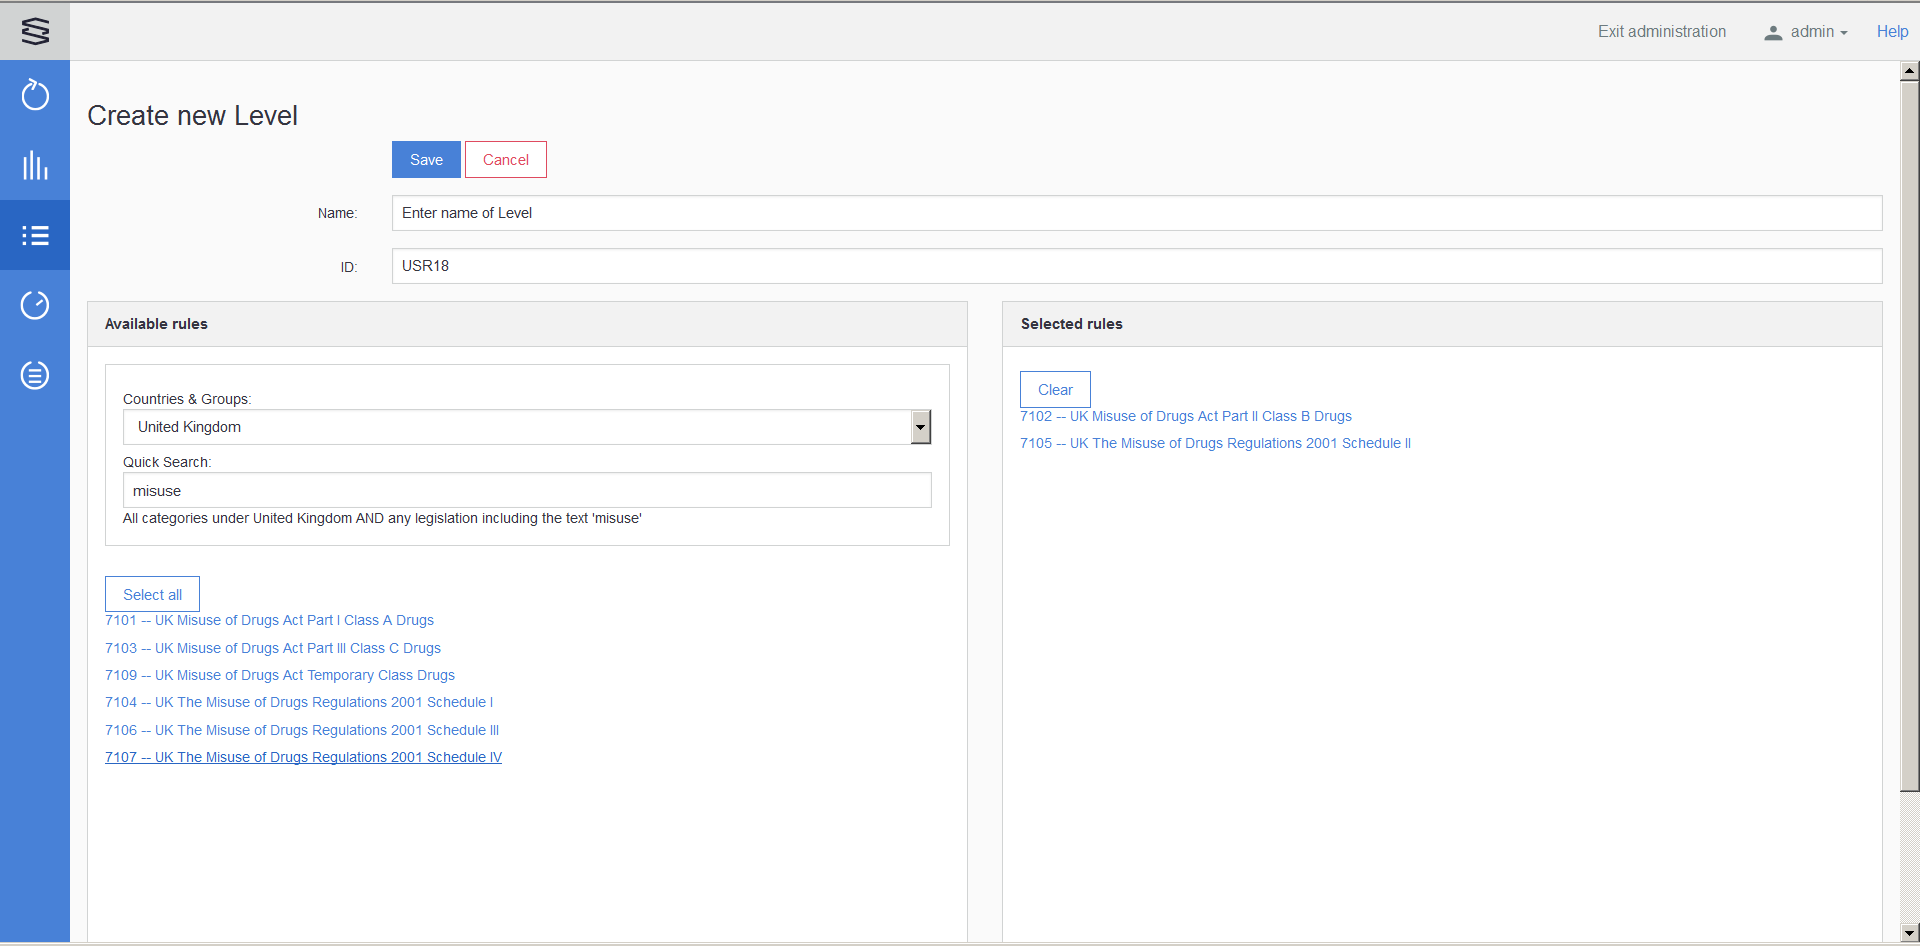
Name: enter the name of the new level
ID: unique identifier
Available rules: By default, all the rules are listed here. Two filters are provided to help to select the needed rules for the new level. The set values of these two filters are combined and taken into account with AND logic.
Countries & Groups: one country or group or association can be selected
Quick Search: text filtering is available here
Select all: moves all pre-filtered rules to the right side Selected rules panel
Selected rules: lists the already selected rules
Clear: moves all selected rules back to the left side Available rules panel
Save: saves the new level
Cancel: cancels the creation of the new level
Edit Level
When you click on one of the User defined levels you can check which legislations are included in this definition.
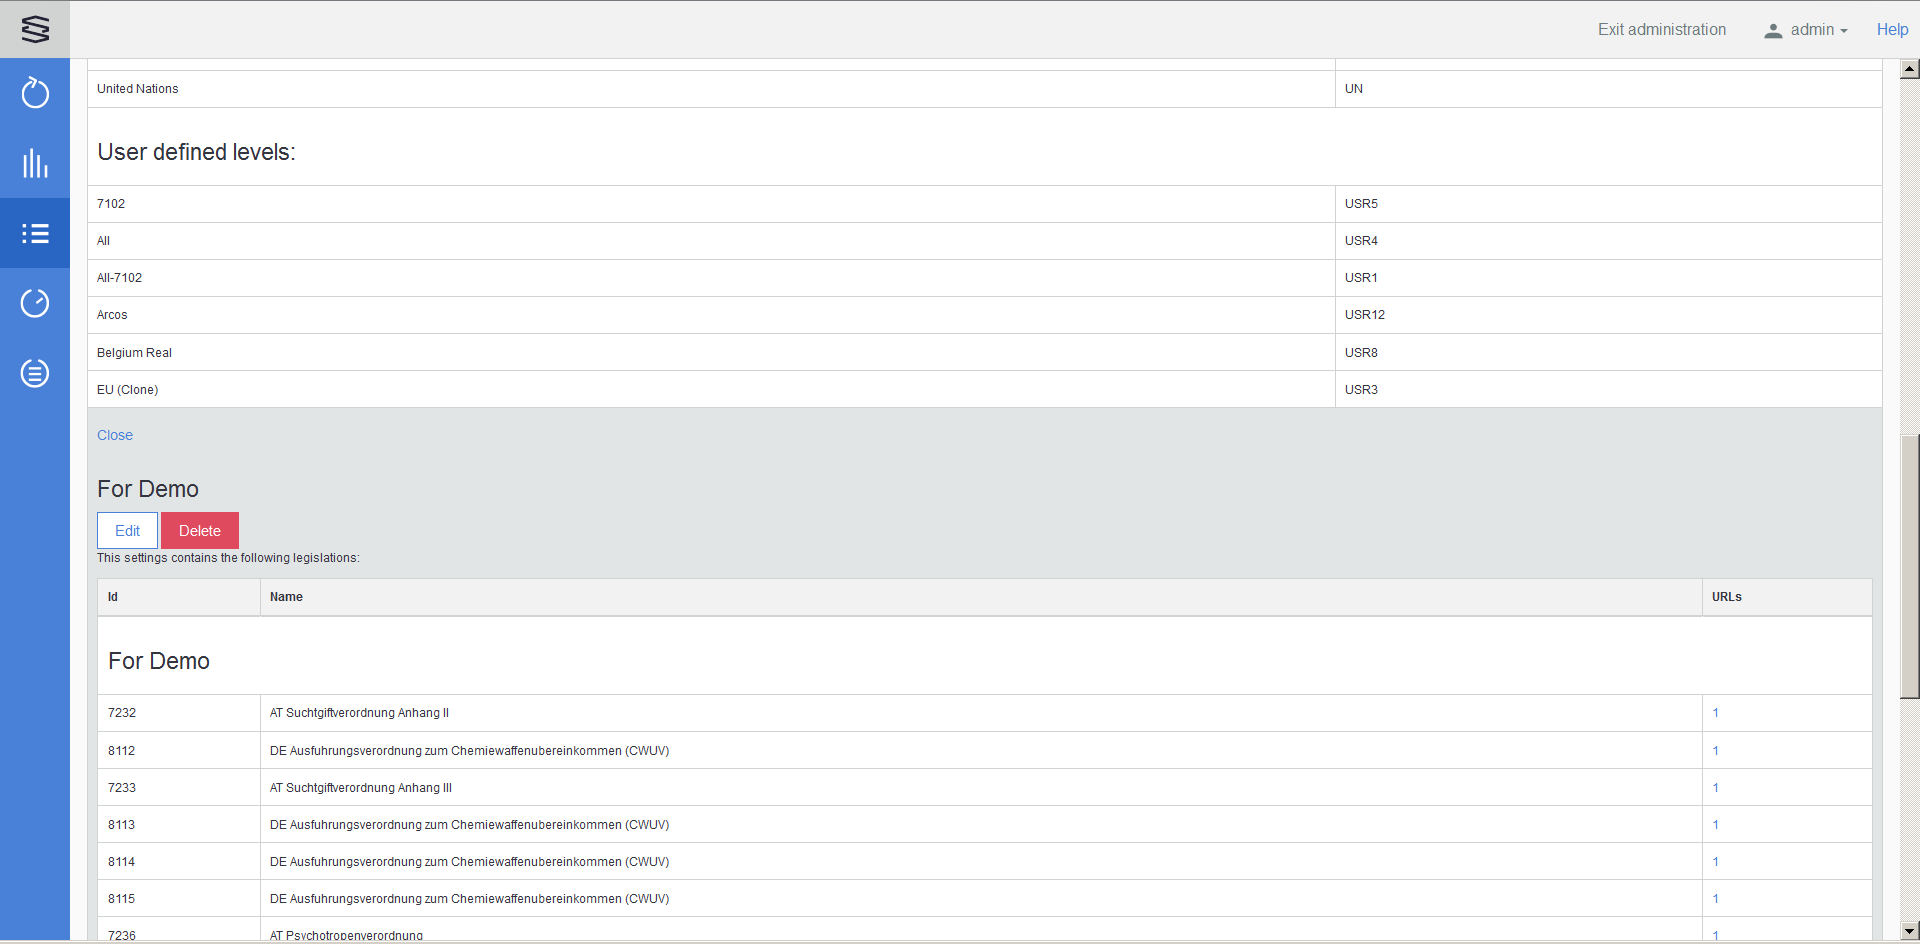
There are 3 available options: Close, Edit and Delete this level.
Close: Closes this level's drop-down
Edit: Opens the Edit level page displaying the actual composition of the selected User defined level and makes possible to make changes in the selected rules.
After the changes you have to click on the Save button to save these changes. Clicking on the Cancel button or opening another page results in to discarding the changes.
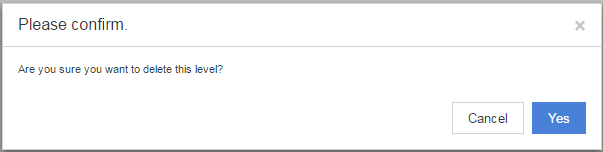
Delete
To delete the selected User defined level. This has a confirmation pop-up:
Database update history
Clicking on the ![]() History button on the left navigation bar opens the History page. Selecting the Database update history tab the updates are listed and they can be searched.
History button on the left navigation bar opens the History page. Selecting the Database update history tab the updates are listed and they can be searched.
The following filters are available to narrow the search:
Legislation code (from-to numbers)
Update date (from-to dates)
Substance ID (from-to numbers)
Legislation name (free text search)
Update type (ADD/UPDATE/DELETE drop-down)
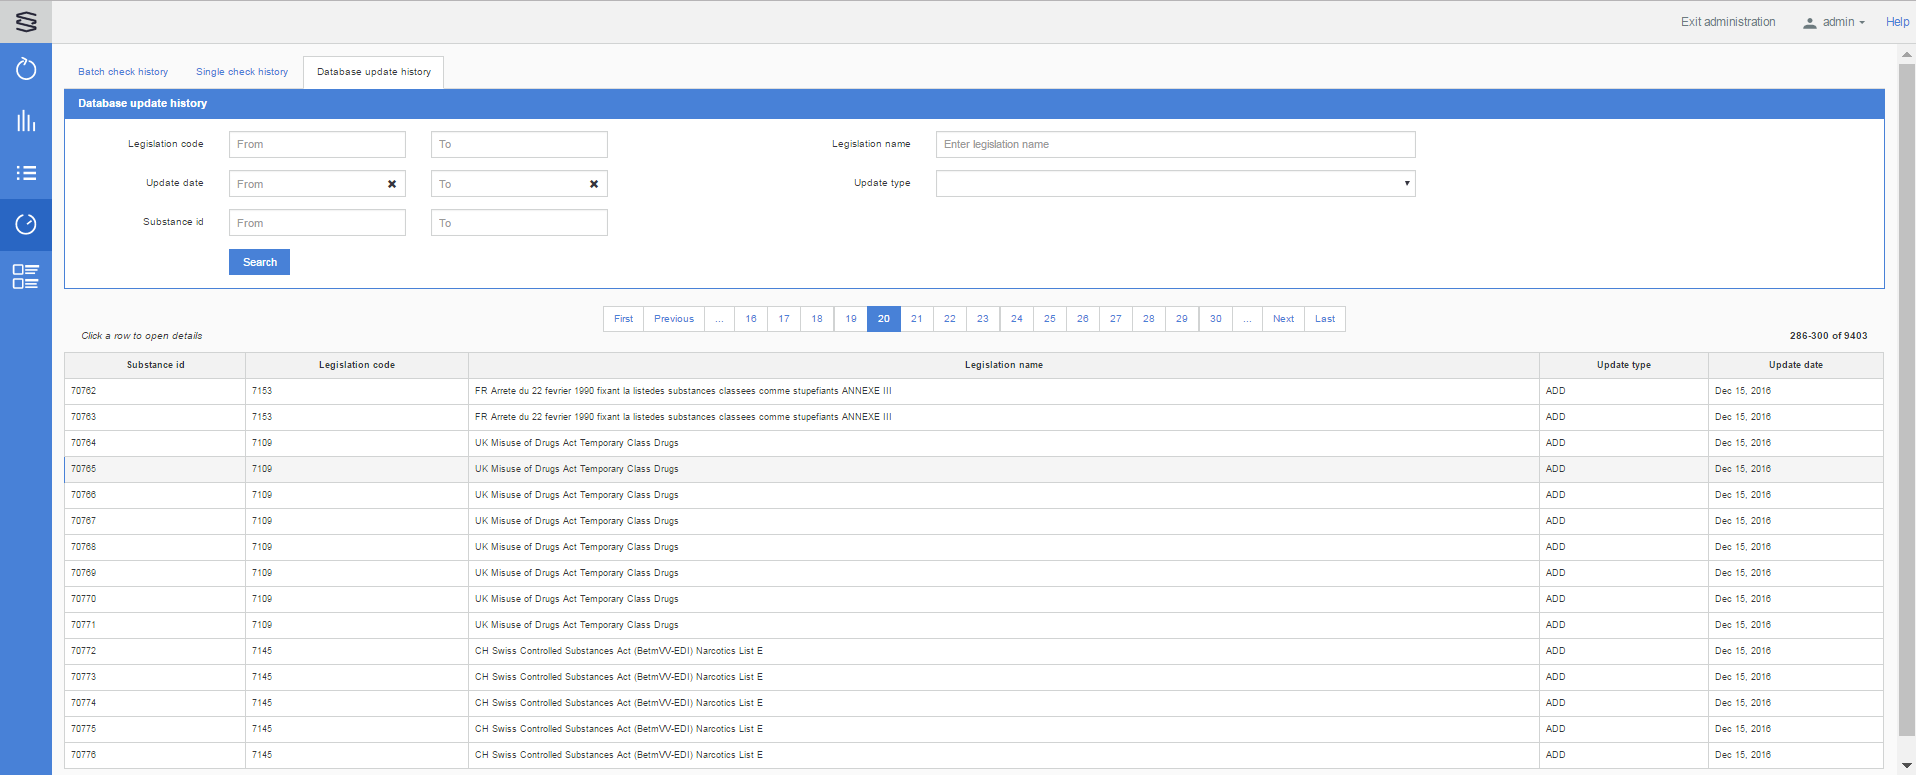
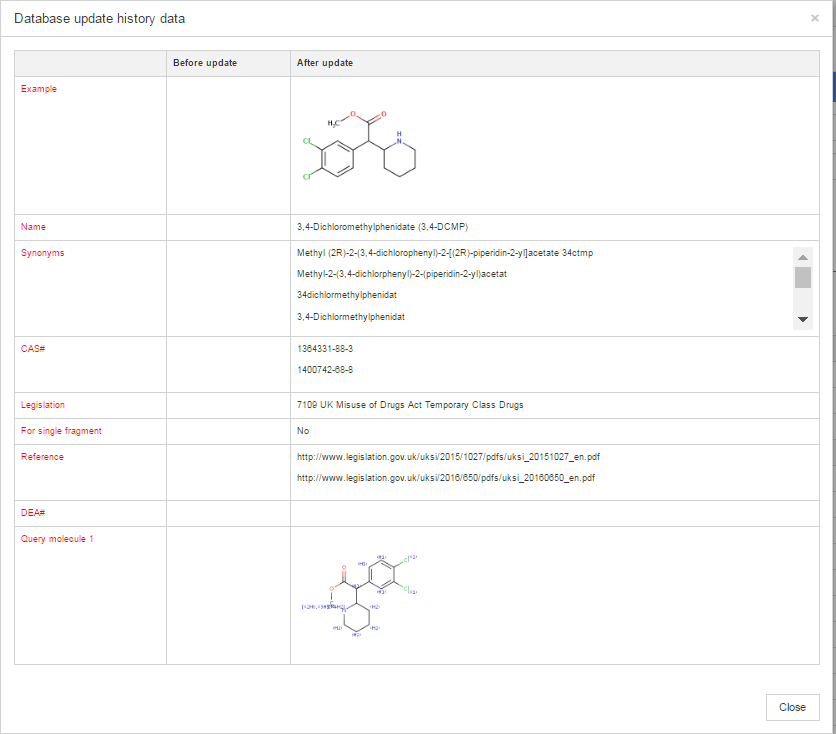
This table is sorted by the Substance id and clicking on a line opens the Database update history data popup with the details: Example, Name, Synonyms, CAS#, Legislation, Reference, DEA# and the Query molecule. Titles of modifications are highlighted in red.
Batch check history
Clicking on the ![]() History button on the left navigation bar opens the History page. Selecting the Batch check history tab the latest Batch checks are listed.
History button on the left navigation bar opens the History page. Selecting the Batch check history tab the latest Batch checks are listed.
Data of earlier batch checks can be searched and their generated reports can be downloaded.
The following filtering parameters can be set on the input panel to narrow the search:
-
User name
-
File name
-
Upload starting date (from-to dates)
-
Below that a table of the latest results sorted by their Upload started date. Above the last column the actually displayed row numbers of total are shown.
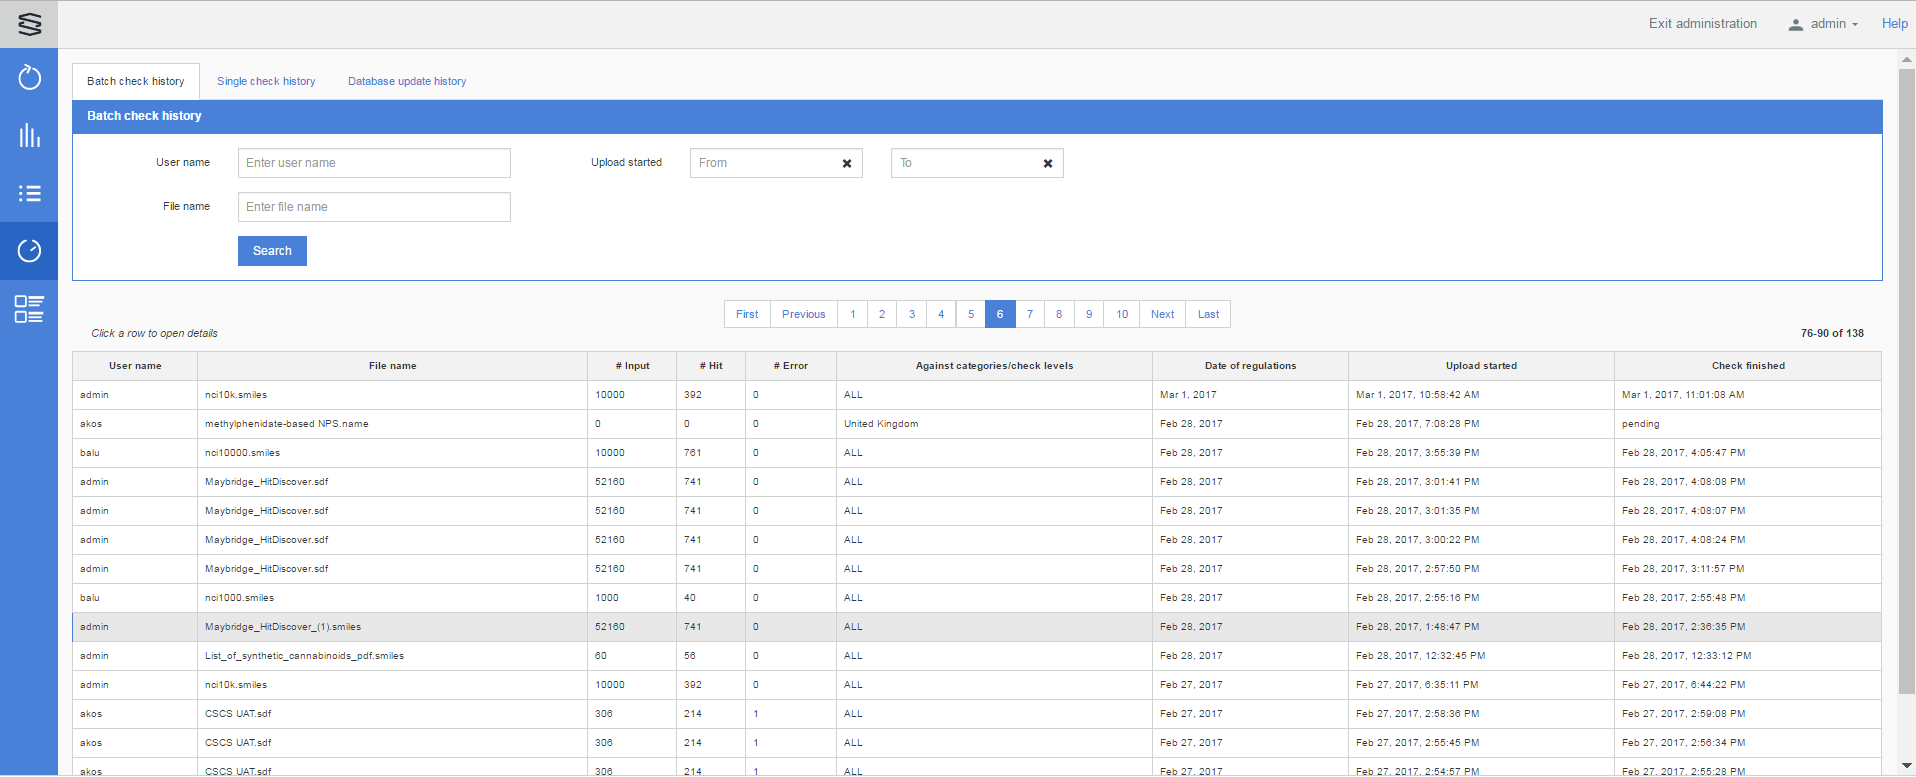
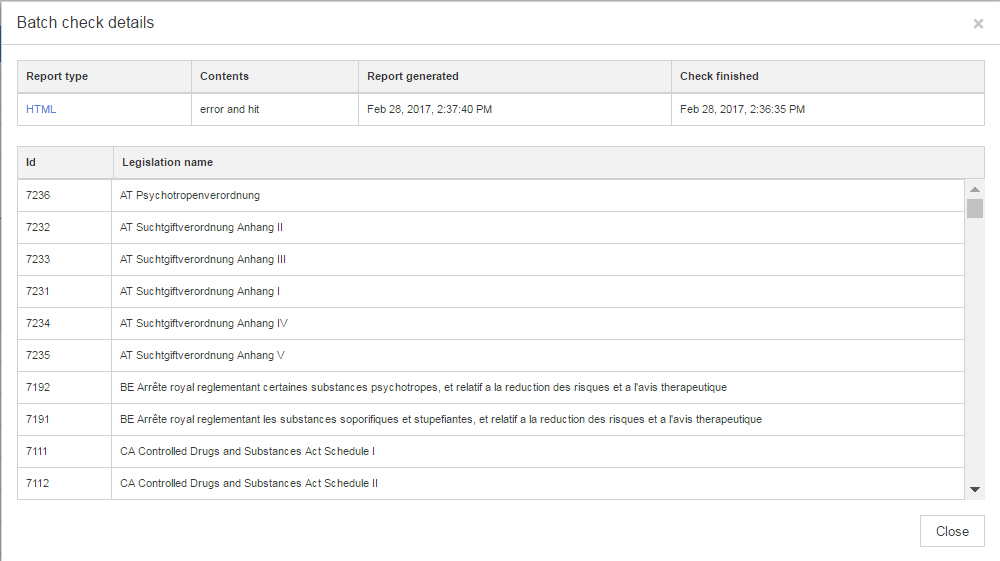
Clicking on a row the Batch check details popup is displayed from where the generated reports can be downloaded.
Delete Batch check history
In the application.properties file the batch.cleanup.scheduler function can be configured to periodically delete the Batch check history, the reports and the uploaded files from the server.
Settings of batch.cleanup.scheduler can be modified according to the following examples:
# Enables to schedule the removal of all batch report related data from the database.# The value should be a cron-like expression, which extends the usual UN*X definition to include triggers# on the second as well as minute, hour, day of month, month and day of week.# Example patterns:# "0 0 * * * *" = the top of every hour of every day.# "*/10 * * * * *" = every ten seconds.# "0 0 8-10 * * *" = 8, 9 and 10 o'clock of every day.# "0 * 6,19 * * *" = 6:00 AM and 7:00 PM every day.# "0 0/30 8-10 * * *" = 8:00, 8:30, 9:00, 9:30 and 10 o'clock every day.# "0 0 9-17 * * MON-FRI" = on the hour nine-to-five weekdays# "0 0 0 25 12 ?" = every Christmas Day at midnight# batch.cleanup.scheduler=0 0/30 15-17 * * *
Single check history
Clicking on the ![]() History button on the left navigation bar opens the History page. Selecting the Single check history tab the latest Single checks are listed.
History button on the left navigation bar opens the History page. Selecting the Single check history tab the latest Single checks are listed.
Data of earlier single checks can be searched and their generated reports can be downloaded.
The following filtering parameters can be set on the input panel to narrow the search:
-
User name
-
Check date (from-to dates)
-
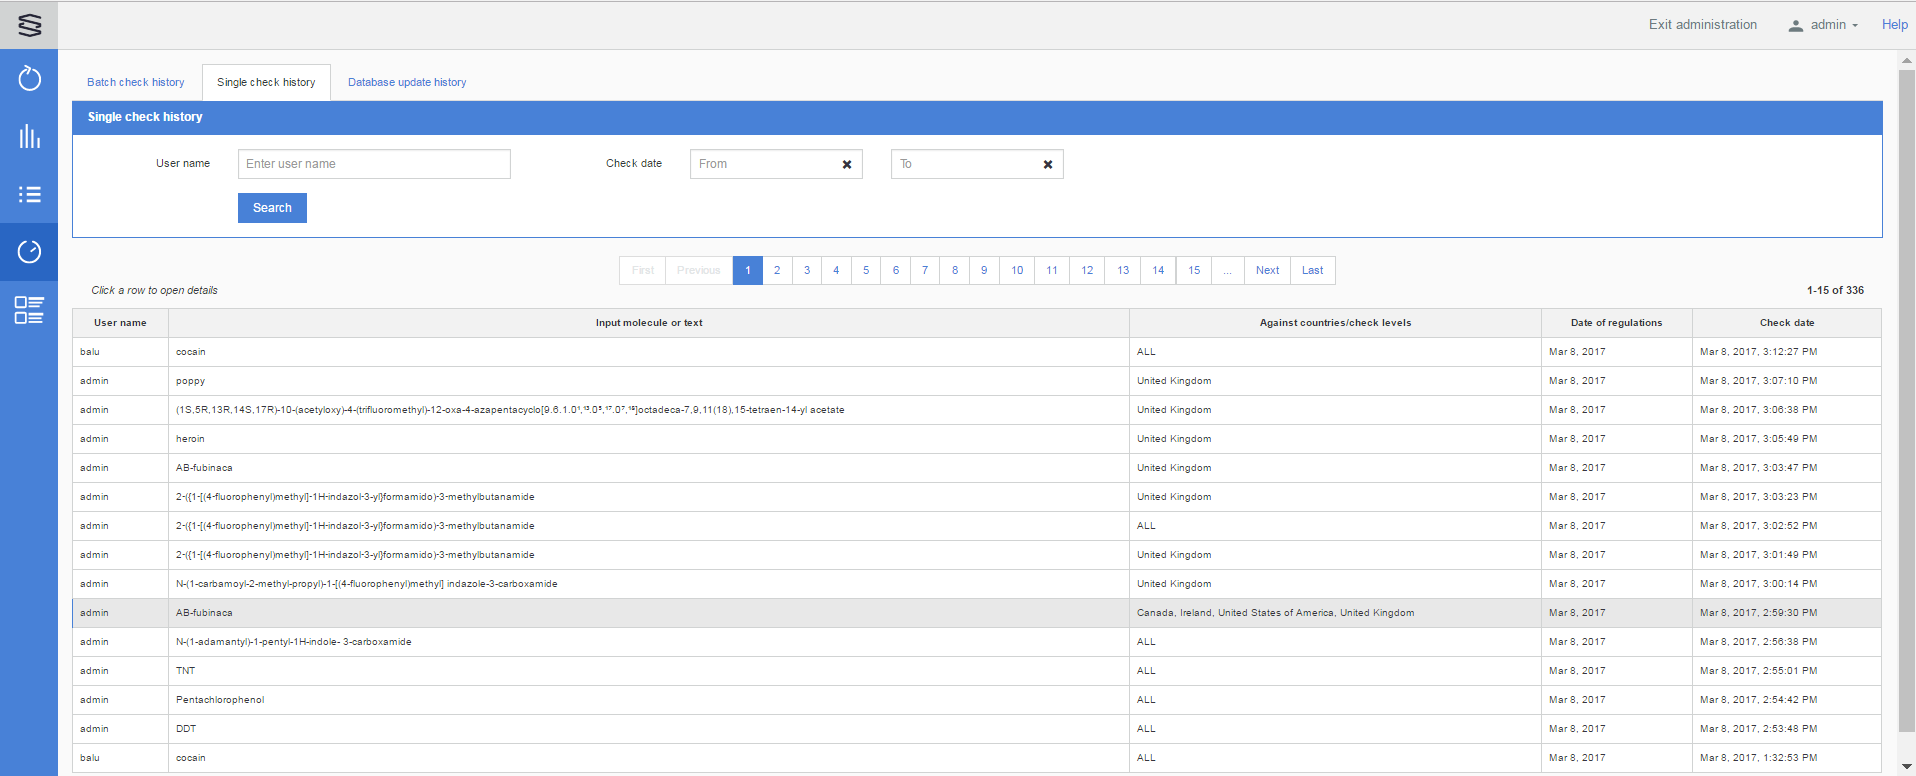
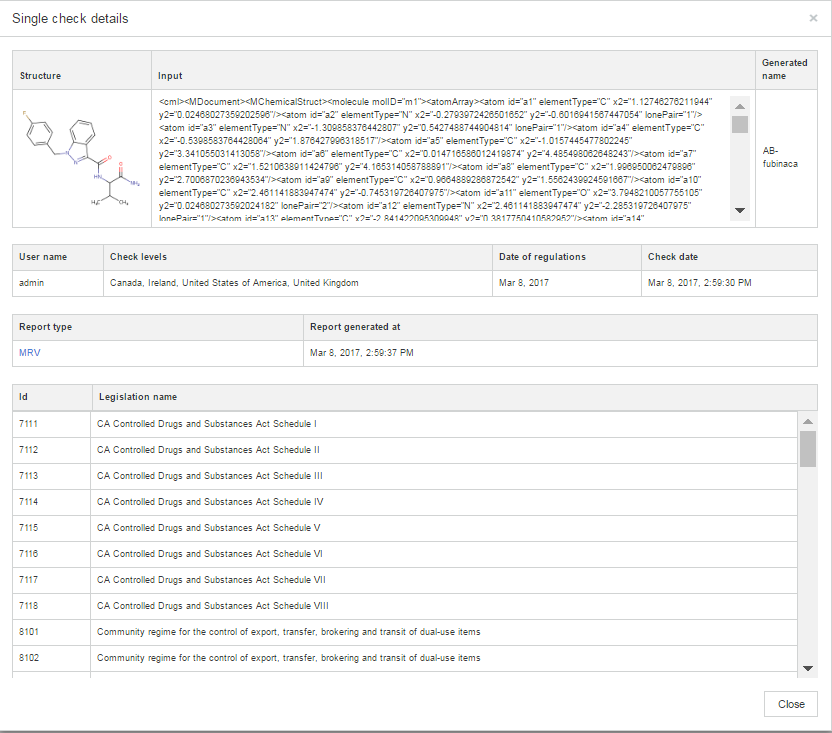
Clicking on a row the Single check details popup is displayed from where the generated reports can be downloaded.
Report template editor
Admins can create and customize Report templates from the Administration page by clicking on the ![]() Report template button.
Report template button.
The available Report templates are listed on the left side in the Report templates panel.
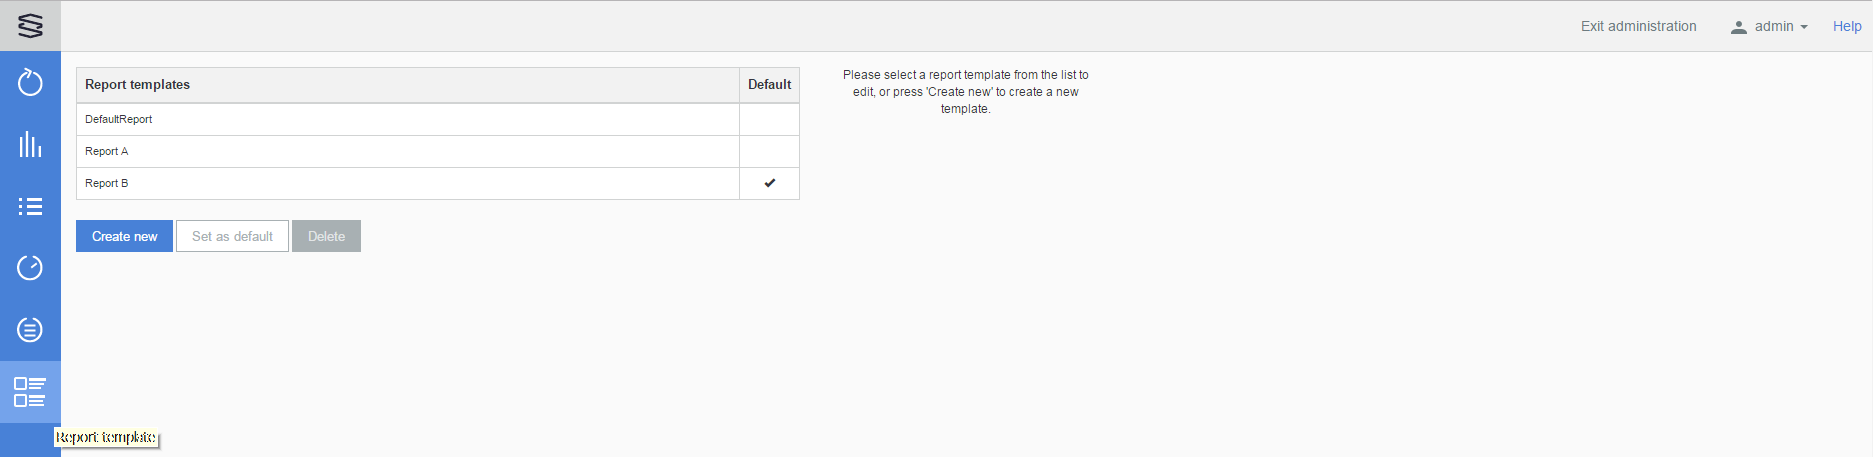
Selecting a Report template from the list it's content will appear on the right side. The default template can be selected by clicking the Set as default button and will be marked with a checkbox on the Report templates panel.
The templates can be deleted - except the Default template.
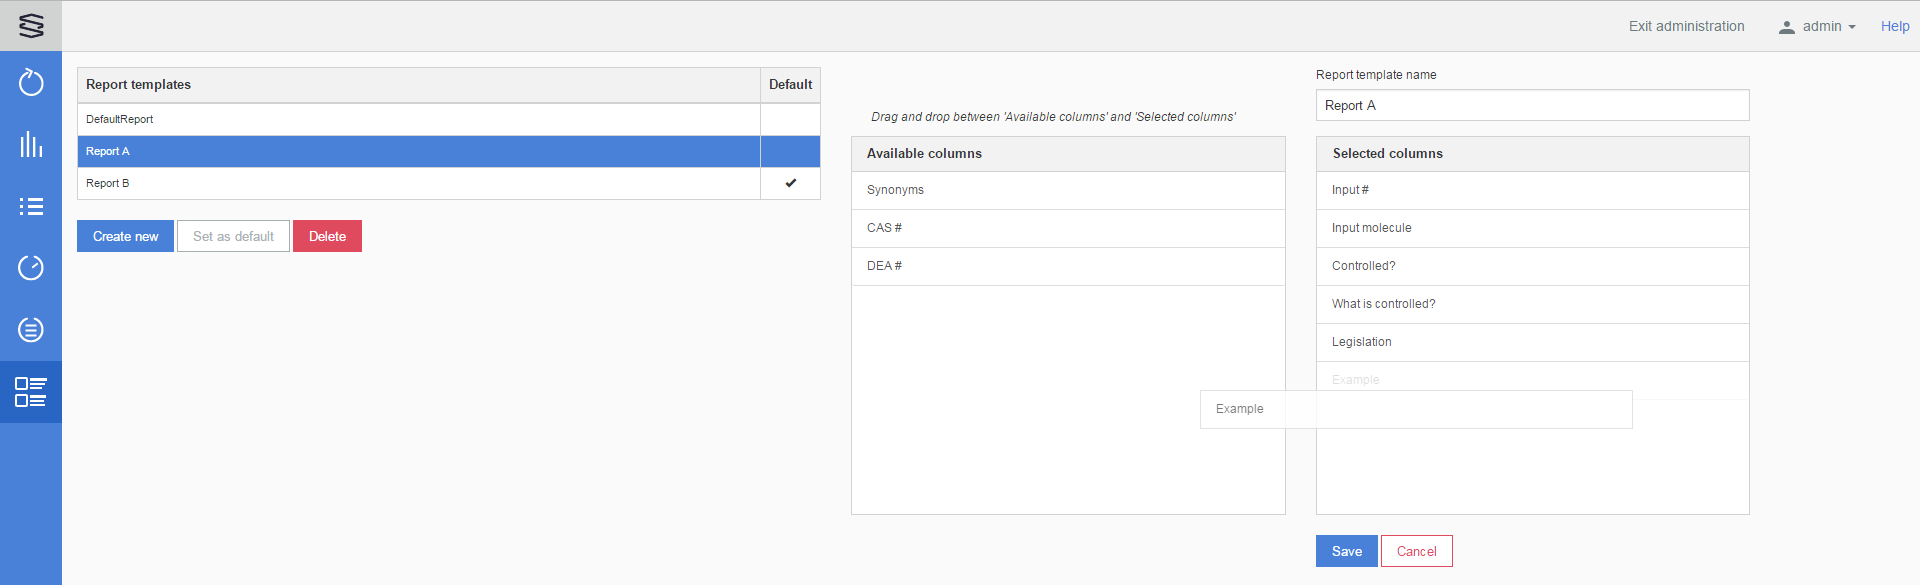
New templates can be created by clicking the Create new button and drag-and-drop the required fields from the Available columns to the Selected columns panel. The order of these columns can be modified also by dragging. After adding a Report template name the template has to be saved. After clicking the Save button the new template will be listed in the Report templates panel.
The listed templates can be edited and modified the same way as above. After editing the template it has to be Saved.
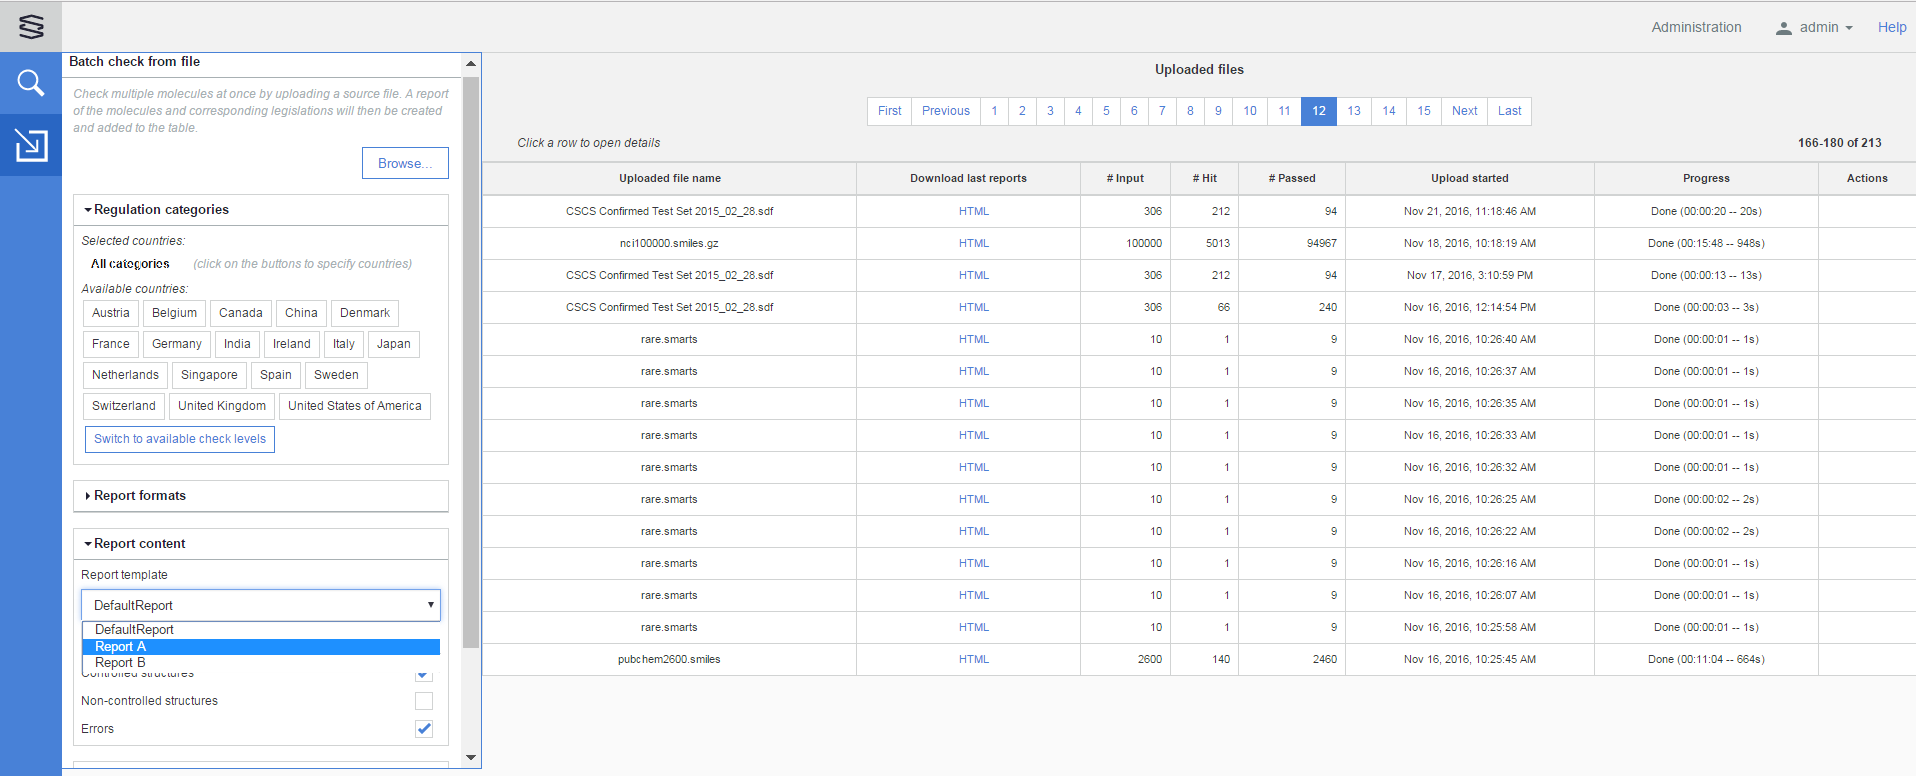
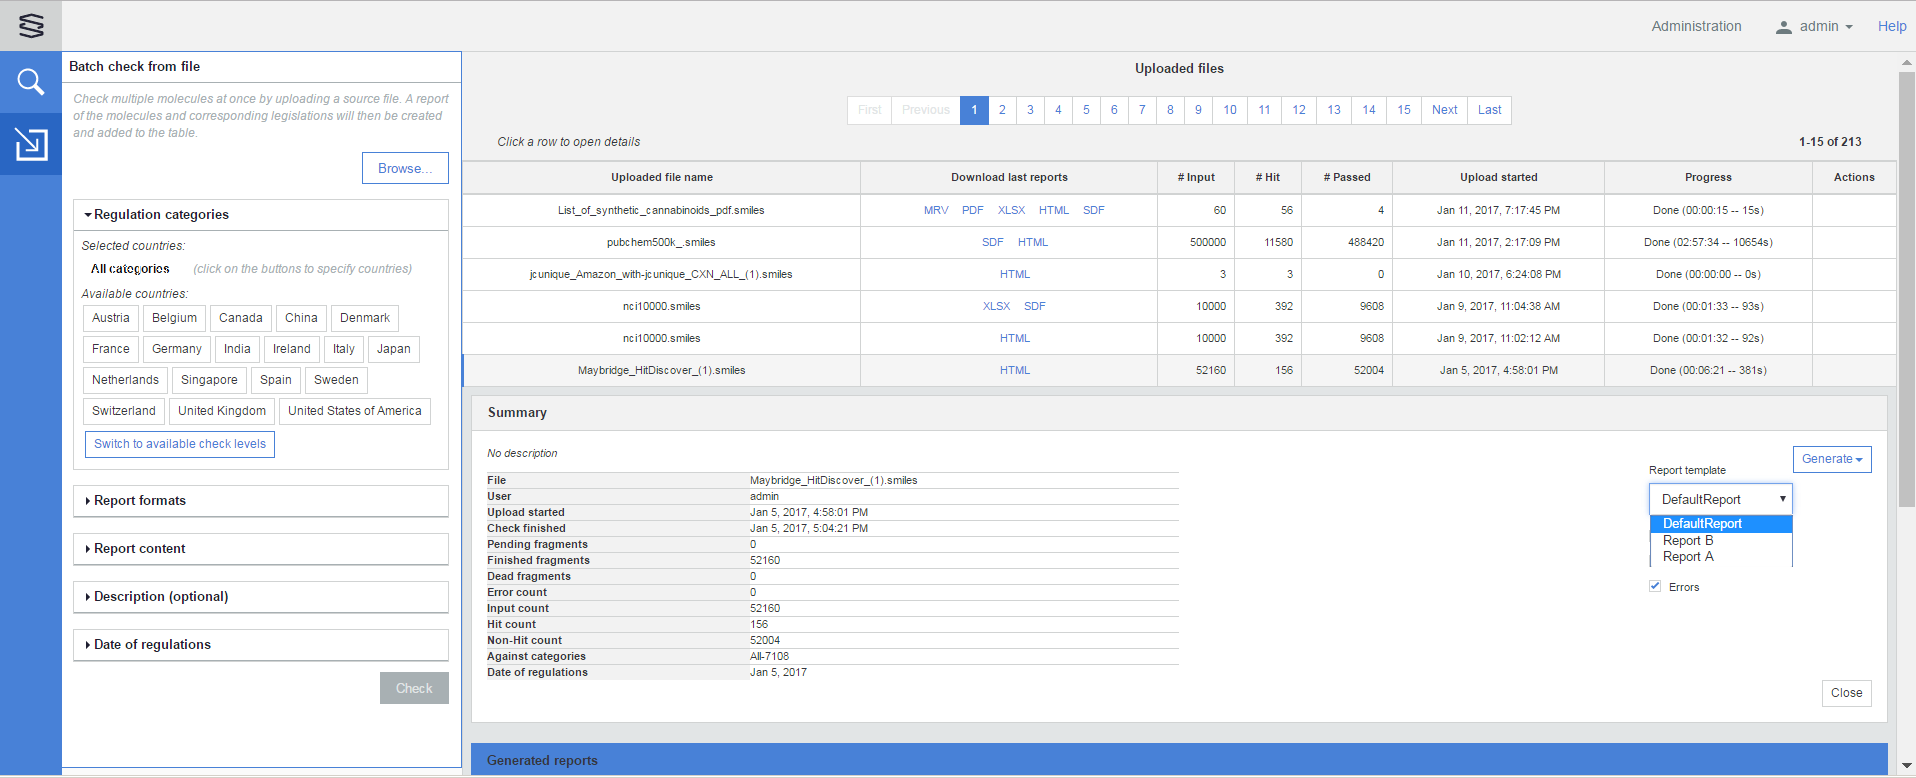
Before starting a Batch check users can select a template from the Report template dropdown list :
And also before generating a new report from an earlier Batch check:
Selection of a Report template is not available for Single check, so the report will be generated according to the default Report template.
Integration API
To check molecules listed in a file against regulations, the Compliance Checker API was developed with three endpoints:
1. <host>/cc-bigdata/filecheck/upload
This is a POST method. It uploads a file containing molecules and creates a job which executes the checks for each structure.
It has four parameters:
- file (mandatory): The file that contains the molecules to be checked.
- categories: Array of category ids which defines the regulations. Leaving it empty results in checking against all regulations.
- date: Should be set in case molecules need to be checked against past regulations. Expected date format is 'yyyyMMdd'. Leaving it empty is the same as setting today's date.
- description (optional): Short description can be provided for the input.
The output elements of the response:
- jobId: The identifier of the job created to process the input file.
- url: The url where the information of the generated job can be requested from.
- description: Constant description message 'Use this ID or the URL to access your job status and information'.
2. - <host>/cc-bigdata/filecheck/job/{id}
This is a POST method. It submits a report generation request for a given job.
It has five parameters:
- id: The id of the job to generate the report for.
- containsErrors: Defines whether the report should contain unsuccessful checks (true/false).
- containsHits: Defines whether the report should contain regulated molecules (true/false).
- containsPasses: Defines whether the report should contain not regulated molecules (true/false).
- formats: Array of requested report formats. Accepted values: PDF, HTML, SDF, MRV, XLSX, JSON.
3. <host>/cc-bigdata/filecheck/job/{id}
This is a GET method. Returns status information about the given job.
It has one parameter:
- id: The id of the job which we would like to get the status information of.
The output elements of the response:
- status: Status of the job. Possible values: FINISHED, PENDING, FAILED, IN_PROGRESS.
- percentage: Percentage of checked molecules.
- inputSize: Number of all molecules.
- hitCount: Number of regulated molecules.
- errorCount: Number of unsuccessful checks.
- passedCount: Number of not regulated molecules.
- reports: An array of reports generated for the given job.
reports has five fields:
- format: Format of the report. Possible values: PDF, HTML, SDF, MRV, XLSX, JSON.
- reportContent: The content of the report that has been selected before generation.
Possible values: 'full', 'hit only', 'certificate only', 'error only', 'result only', 'error and hit', 'error and passed', 'summary only'
- generated: Timestamp of the report generation.
- state: Status of the report. Possible values: FINISHED, PENDING, FAILED, IN_PROGRESS.
- url: Url of the report where it can be downloaded from.
To invoke these endpoints admin privileges are needed.
A Swagger UI for these endpoints is also available at <host>/cc-bigdata/file-api.