Editing Data Trees
Editing Data Trees
Data Trees are created in the Data Tree Editor. They are also created during RDF import . Prior to editing a Data Tree in the Schema Editor, all Entities and Relationships must be present..
For more information about Data Trees look at
Creating a Data Tree from an existing entity
Your Data Tree may already exist. If so it will be located under the Schema node in the Projects window and in the Data Trees tab of the Schema Editor. If not you will need to create it. To do this:
-
Open the schema editor by double clicking on the schema node in the projects window, or right clicking on it and choosing 'Edit Schema'.
-
Go to the Data Trees tab in the Schema Editor.
-
Click on the 'New Data Tree' icon in the toolbar (
 )
) -
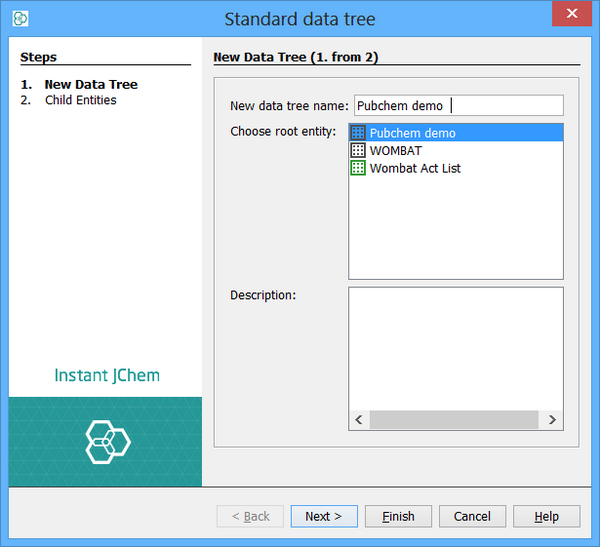
Specify the Entity that will be the root element of the Data Tree.
-
Specify a display name for the Data Tree. Typically this will be the display name of the root Entity, but does not have to be.

Creating a Data Tree and a new entity
You can also create a new Data Tree when you create a new Entity. Most often you would want to do this, but you can just create an entity without its own Data Tree if the Entity is only ever going to be used as a child vertex of a Data Tree.
To create an Entity together with its own Data Tree go to the Data Trees tab and use the second and third icons in the Schema Editor toolbar (  ,
,  ). The new Entity dialog will appear. Specify the details and the Entity and Data Tree will be created.
Editing an existing Data Tree
Adding a child vertex
-
Select the vertex to which the child is to added.
-
Click on the 'Manage Chlid Entities' icon in the toolbar:

-
The Manage Chlid Entities wizard will open.
-
Choose the child entity that will be linked with the parent vertex. IJC will offer all entities that have a relationship to the parent vertex. Please note, that there can be multiple relationships defined between the parent vertex and an entity. All of them will be offered by IJC, which means that one entity can be listed several times, but each time the new Chlid Entities will be based on a different relationship.
-
Click 'Finish' and the child entities will be added.
Removing a child vertex
-
Select the vertex which is to be removed.
-
Click on the 'Delete' icon in the toolbar:
 .
. -
A confirm dialog will open.
-
Click 'OK' and the child entities will be removed.
The Relationship and child Entity are unaffected. They are not deleted, just the item removed from this Data Tree.
Create detail table
A common activity is to create a new detail Entity (table) for an existing master Entity. To do this you would need to do these 3 steps:
-
Create the new Entity
-
Create the Relationship between the 2 Entities
-
Add the Chlid Entities to the Data Tree.
Whilst all these steps are necessary, it is a bit laborious to go through these steps each time. IJC provides a simplified approach to doing this by allowing a detail table to be created in a single step. This is the 'Create detail table...' action that is available from the right click popup menu of the Data Tree in the projects window and in the Data Trees tab of the Schema Editor. This action will open a one step wizard that contains the commonly used options for this process:
-
The name to be used for the table and entity
-
The table type (JChem or Standard)
-
If a JChem table then the type of contents (molecules, reactions, any structures), and the JChem property table name.
-
The relationship type (one-to-one, one-to-many, many-to-one, many-to-many)
-
The relationship name All other settings are generated from default values or derived from the values you have specified.
As default or derived values are used for several settings then this approach is not as flexible as the 3-step approach. You will need to use the 3-step approach if the settings used are not what you require.