Standard Fields
Standard fields are those that contains normal text, numeric, date or boolean data. The values are provided by the user (or imported from a data file) and can usually be edited if you have sufficient access rights.
IJC also has three other types of field:
-
Chemical Terms Fields (for structure based predictions)
-
URL Fields (for incorporating data located outside IJC)
-
Calculated Fields (for calculations)
To add a new standard field:
A new standard field can be added by any of these methods:
-
In the Schema Editor
-
Using the new standard field icon in the toolbar (
 )
) -
Using the appropriate item in the popup menu that appears when you right click on an entity, or other appropriate places.
-
-
Using the 'New Standard Field...' item from the Data menu
-
In the Grid View
-
In Design mode of the Form View
Starting to create other fields is also done in the same way as standard fields.
First, specify where the new Field is required by making the Entity to which you want the Field adding active. The 'New Field' actions will only be active in the correct context (when it is explicit which Entity the field is to be added to). In the Views this is automatic. In the Schema Editor select the Entity from the Entities tab of the Schema Editor's explorer located on the left side in the main window.
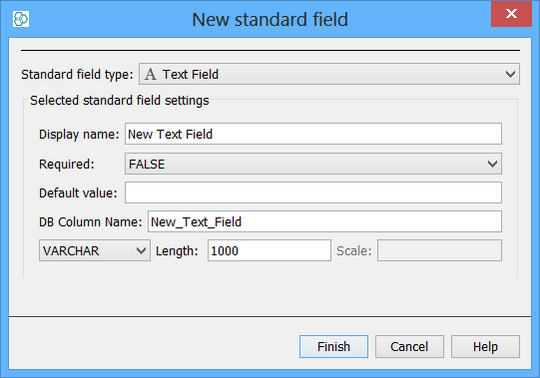
The New Standard Field dialog opens to guide you through the process:
Step 1.
Specify field details:
-
In the Data Type drop-down menu, select a data type for the new field. Various text and numeric data types are supported, see the table below for details.
-
Under Selected Standard Field Settings, specify the following settings:
-
Field Name: Enter a field name.
-
Required: Select TRUE or FALSE to specify whether the field is required.
-
Discrete set of values: Select whether the contents of the field are defined as a small number of discrete values.
-
Default value: Enter a default value for the field (optional).
No default value can be defined for binary fields and list fields.
-
DB column name: Enter a name for the column that will be created in the database.
-
Column definition: Optionally change the data type definition of the database column (choices will depend on the field type and the database you are using and will include values like: REAL, INTEGER, VARCHAR, CLOB).
-
Length: Enter the character length of the given field (only applies to certain column types).
-
Scale: Specify the amount of storage that is required for the decimal places of a number (only applies to certain column types).
Many of the field details will already be provided for you, such as Field Name and DB Column Name. Also, depending on the chosen data type, various options may be deactivated.
-
The following table lists the various data types supported for creating a standard field:
|
icons |
descriptions |
|
|
Create a New Integer field. For data containing whole numbers. |
|
|
Create a New Decimal number field. For data containing numbers with decimal values. |
|
|
Create a New Text field. For data containing text. |
|
|
Create a New Text Array field (a list of values). For data containing a list of text values. |
|
|
Create a New Date field. For data containing dates. |
|
|
Create a New Boolean field. For data containing true/false values. |
|
|
Create a New Binary field. For small images etc. URL fields are better suited for large files. |


Step 2.
Complete the addition of the field:
-
Click Finish. The new field is generated and a corresponding field node displays in the Schema Editor under the selected entity.
Text Field
Text field supports formatting of the text in RTF and HTML format. This is however limited only to widgets, where corresponding text renderer has been selected. By default, that is Plain Text.
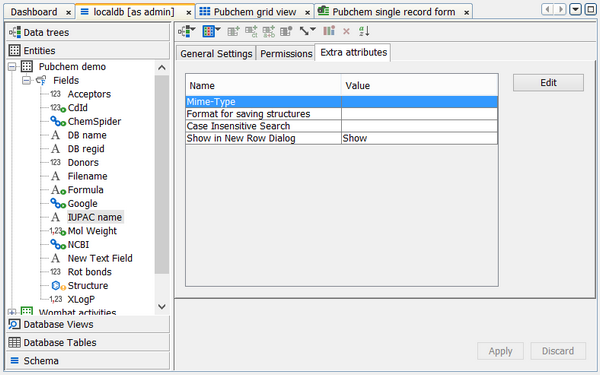
Step 1.
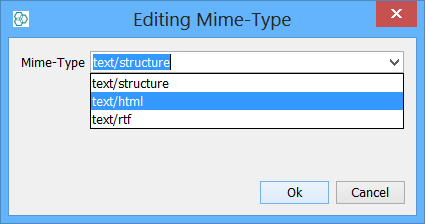
When creating a new field, in the 'Extra Attributes' tab offers setting up the MIME type.
|
|
The Combo box offers 3 possibilities to choose from. |
Step 2.
Next thing is to set up the correct renderer for the widget. Currently, only Table Widget, and Browser Widget support handling of the Text Field with RTF / HTML formatted text. For Table Widget (either in Grid View or Table Widget in Form View), this is done in 'Customize Widget settings' dialogue' and can be set up for each displayed Column/Field individually:
|
|
|


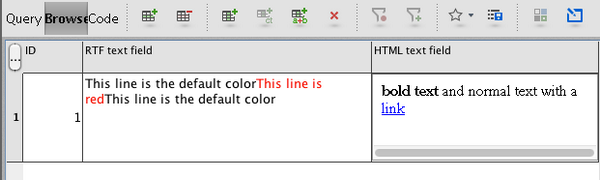
Step 3.
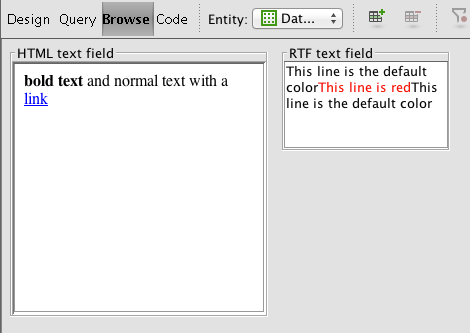
When in Browse Mode, the text contained in the field will be formatted.
|
{\rtf1\ansi\deff0{\colortbl;\red0\green0\blue0;\red255\green0\blue0;}This line is the default color\line\cf2This line is red\line\cf1This line is the default color}<b>bold text</b> and normal text with a <a href="foo.bar">link</a> |
|
Please note that in Form View, to display HTML formatted text, you are currently limited only to Browser Widget, or Table Widget,
while to display RTF formatted text, you can use Table Widget or Multiline Text Widget