IJC Plugin tutorial - MyMathCalc plugin
Overview
This tutorial shows how to add an action, invoked by a menu item, for reading values from the grid view selection and calculating averages or sums.
This tutorial assumes that you have worked through IJC Plugin: Quick Start and IJC Plugin: Hello World! tutorials and that you are familiar with the concepts and instructions described therein. As before, you will use NetBeans IDE to create the example plugin that will extend Instant JChem.
Contents:
-
Using the IDE's Wizards
-
Coding the Module
Exploring 'Math computation actions' plugin example
Before we begin creating our module, let's get to know the sample that we will build in this tutorial. The sample is available as part of the api-examples-suite project that you've downloaded in IJC Plugin: Quick Start.
-
Start api-examples-suite project as described in IJC Plugin: Quick Start
-
In the started Instant JChem create a new IJC project by going to the main menu 'File' -> 'New Project...' and choosing 'General' -> 'IJC Project (local database with demo data)' in the 'New Project' wizard.
-
In the 'Projects' explorer open 'localdb' -> 'Pubchem demo' -> 'Pubchem grid view' view.
-
Select two or more values, for example select several 'Mol Weight' values.
-
In the 'Help' -> 'IJC API Examples' menu there are two menu items called 'Compute average' and 'Compute sum'. If you selected two or more numeric values these actions should be enabled.
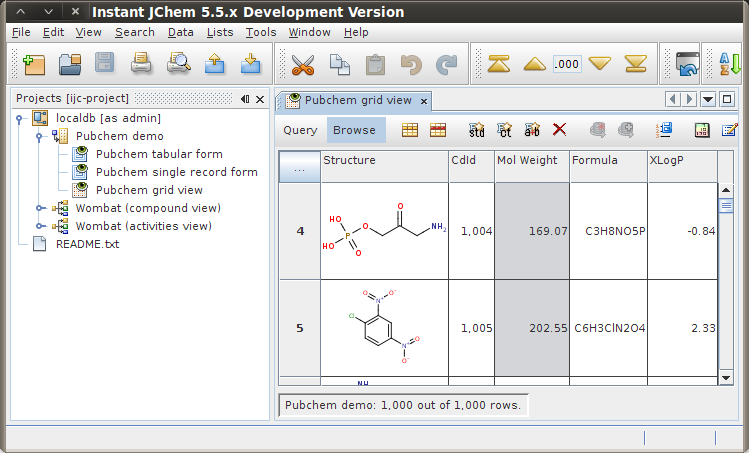
Instant JChem with the demo project and two values - 169.07 and 202.55 - selected.
-
When you select either of these menu items, a dialog box pops up, displaying the sum or average of the selected values, depending on which menu item you selected. For example, if you add the two values, the following dialog box pops up:
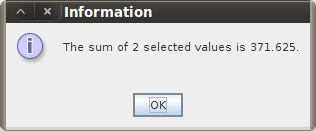
The result of 'Compute Sum' action - the sum of the two selected values
Now that you know the functionality that this tutorial provides, let's create the functionality from scratch.
Creating MyMathCalcPlugin project
If you followed the IJC Plugin: Hello World! tutorial you should have 'IJC Extensions' module suite and 'HelloWorldPlugin' module already available. Open 'IJC Extensions' suite project in NetBeans IDE, we will add a new module to it.
In your IDE go to main menu 'File' -> 'New Project...' and create a new 'NetBeans Modules' -> 'Module' project. Call the project 'MyMathCalcPlugin' and don't forget to add it to 'IJC-Extensions' module suite. As the module's 'Code Name Base' enter org.myorg.mymathcalcplugin and tick the 'Generate XML Layer' checkbox, leave the default location offered for the 'XML Layer' file.
New 'MyMathCalcPlugin' module project in NetBeans IDE's 'Projects' explorer
Setting up module libraries
Our next step is to specify which APIs we want to use. Each API is provided by a module. Some of the APIs belong to the NetBeans API, while others belong to the Instant JChem API. Because our module is deployed to Instant JChem (ie. 'IJC Platform' that we set up earlier), which itself makes use of all NetBeans and Instant JChem APIs that we need, we can simply just set dependencies on modules available in 'IJC Platform'.
-
In 'Projects' explorer r-click the 'MyAddFieldPlugin' project's node and in the popup menu choose 'Properties'. The 'Project Properties' dialog will appear.
-
In the 'Project Properties' dialog go to 'Libraries' -> 'Module Dependencies' and click 'Add Dependency...' button to specify modules that 'MyAddFieldPlugin' module will use.
-
In the 'Add Module Dependency' dialog choose the following modules: Commons - Generic IM Commons, Commons - NB dependent, Dialogs API, DIF API, DIF Core Implementation, Instant JChem Core, Library - JChem, Nodes API, UI Utilities API, Utilities API.
-
Click 'OK' and close the 'Properties' dialog.
The list of module dependencies in the 'Project Properties' dialog should look like this.
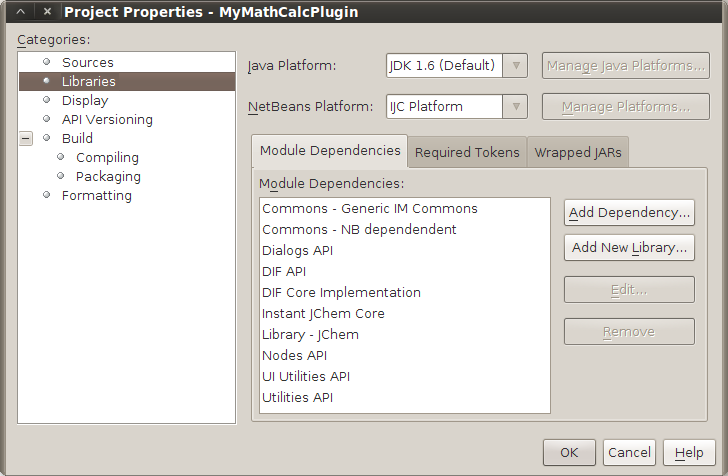
'MyMathCalcPlugin' module dependencies
The dependencies we have just added as well as reasons for adding them (i.e. the classes these modules provide in their API) are summarized in the following table.
|
Module |
Description |
Classes that we need |
|
Provides a set of utility classes for creating dialog boxes. |
||
|
DIF API |
Provides the data model and persistence tiers for applications that need to use chemical and biological data. |
|
|
Provides the basic user interface for Instant JChem and, through its API, provides the ability to extend the IJC user interface. |
||
|
Provides a way to represent JavaBeans or other property containers, formed into a hierarchical tree. |
||
|
Provides a set of utility classes covering general infrastructure points in the NetBeans Platform. |
Creating ComputationPerformer Interface
First, let's begin by creating an interface for our computations.
-
In the main package, org.myorg.mymathcalcplugin, create a java interface called ComputationPerformer. Right click the package's node and in the popup menu choose 'New' -> 'Java Interface...'. This will start the 'New Java Interface' wizard where you can fill in the interface name.
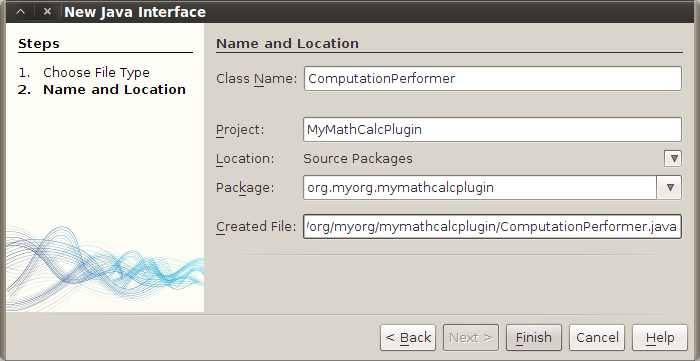
New Java Interface wizard - creating 'ComputationPerformer' interface
-
Replace the generated code with the following:
ComputationPerformer.java source file
Creating AbstractComputationPerformer class
Next, we'll implement the interface that we created in the previous section.
-
Again in the main package, create a java class called AbstractComputationPerformer. It's similar process as with the interface before. Right click the package's node and choose 'New' -> 'Java Class...', which will start the 'New Java Class' wizard.
-
Replace the generated code with the following:
AbstractComputationPerformer.java source file
Creating AbstractComputationAction class
We will create an abstract action, which we will use as the basis of both the actions that we create in the following section.
-
In the same package as before, create a java class called AbstractComputationAction.
-
Replace the generated code with the following:
AbstractComputationAction.java source file
Creating ComputeSumAction class
Let's now implement the abstract action from the previous section. Here, we implement it to create an action to compute sums.
-
As before, in the main package, create a java class called ComputeSumAction.
-
Replace the generated code with the following:
ComputeSumAction.java source file
Creating ComputeAverageAction class
Let's now implement the abstract action from the previous section. Here, we implement it to create an action to compute averages.
-
Create a Java class, again in the main package, called ComputeAverageAction.
-
Replace the generated code with the following:
ComputeAverageAction.java source file
Add localizable strings to Bundle.properties
The centralized location for strings in our plugin is the resource bundle, which is located in the main package and called Bundle.properties. Let's update it to contain all localizable strings that we have used throughout the code:
Bundle.properties source file
Registering the Actions in the Layer File
Finally, let's register our actions in the layer file.
layer.xml source file
Building and running the plugin
If you've followed this tutorial closely you should now have all files in your 'MyMathCalcPlugin' project ready. The project in NetBeans IDE's 'Projects' explorer should look like the picture below.
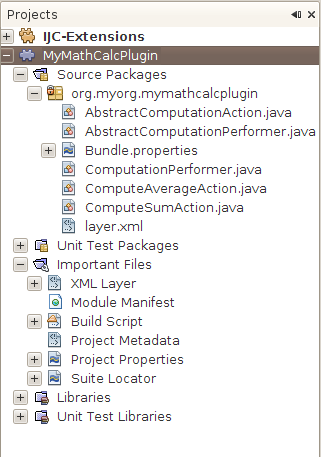
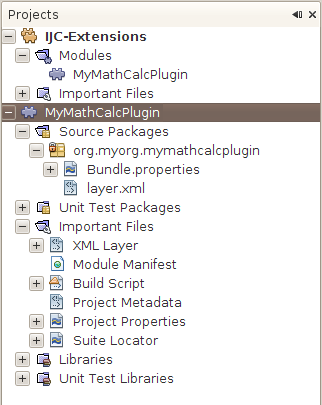
Complete 'MyMathCalcPlugin' project in NetBeans IDE's 'Projects' explorer
You can now r-click the project's node and build the project by choosing 'Clean and Build' and then run it by invoking 'Run' from the same popup menu. Instant JChem will start with MyMathCalcPlugin installed and the actions that we have created will be available in the main menu 'Help' -> 'IJC API Examples'.
Conclusion
Congratulations, you have created actions for computing sums and averages in Instant JChem. In this tutorial you have learned:
-
How to create java classes end interfaces in NetBeans IDE.
-
How to enable actions depending on cells selection in a grid view.
-
How to read field values and use them for mathematical calculations.
-
How to display results in a popup dialog.
-
How to manually register actions in the module layer - layer.xml.
For other IJC plugin development related tutorials please see their complete list here.