Using existing database tables
IJC has typically been used to directly manage the database and has been used to create all the tables in the database. Increasingly users are wanting to use it to connect to an existing database and report information from that. IJC has always supported this, but there are some additional steps that are needed. This document describes those steps.
Databases are very flexible and powerful tools, and allow all kinds of "magic" to be performed. IJC may not understand all these types of "magic" if they are performed directly in the database. You should carefully test any customisations that you perform directly in the database and if in doubt ask on the IJC forum. If you have the choice it is better to create the tables from IJC as that ensures that IJC will completely understand about those tables.
In IJC 5.3.2 the ability to access objects from multiple Oracle database schemas was added (see here for info).
Entities, Tables and the need for promotion.
Databases contain things like tables and columns. Whilst IJC uses these, the user sees things at a higher level of abstraction, which provides more flexibility and a better user experience. In IJC instead of tables and columns you deal with entities and fields. Whilst in the simple case there is not much difference, this level of abstraction allows better handling of richer data types such as range fields and biological data types that cannot sensibly be stored in a single database column.
An entity is basically a table (or potentially multiple tables) that has additional meta data assigned to it that allows IJC to handle it properly. Similarly a field is a column (or columns) that have additional meta data assigned, and a relationship is a representation of a database foreign key constraint (but actually there does not need to be a foreign key constraint present in the database to have a relationship in IJC).
The clearest benefit of this can be seen by the ability to exclude tables and columns that are present in the database, but are of no interest to the user (such as the fingerprint columns of a JChem structure table) or to provide a human friendly display name rather than the unfriendly database name for a table or column.
When IJC creates a table or column it creates and manages this meta data. However when IJC is connecting to a database containing existing tables or columns the meta data does not exist, and needs to be added. This is done using the process of "promotion" which allows a table to be "promoted" to an entity so that it can be used in IJC. The meta data is added as part of this promotion process. A similar process happens for promoting columns to fields and for promoting foreign keys to relationships.
Connecting to the database
When you are connecting to a remote database for the first time you must use the 'New schema' wizard (File -> New Schema). This connects to the database and creates the IJC meta data tables (names beginning with IJC_) in which IJC stores its meta data and user data. The term 'schema' refers to the IJC term for a database connection, not the database (mostly Oracle) term for a schema. The 'New schema' wizard does NOT create a new (Oracle) schema in the database, you are connecting to an existing (Oracle) schema, and making it accessible as an (IJC) schema. The terms are a bit confusing.
Once the (IJC) schema has been created other users connect to this by using the 'Connect to schema' wizard (File -> Connect to Schema). This process expects the IJC meta data tables to be already present (e.g. already created using the 'New schema' wizard).
For more details about connecting to schema see these pages:
How to promote items
If you connect to a new database (connect to an IJC schema) that already contains tables then IJC will initially know nothing about those tables. They must be promoted into IJC, along with the columns that they contain that you are interested in.
Start by opening the schema editor by double clicking on the schema node in the projects window. Look at the 'Entities' and 'Data Trees' tabs should. Initially they will be empty, signifying that IJC does not know about any tables in the database.
To see the items at the database level switch to the 'Tables' tab and you will see the "raw" database tables in the explorer on the left hand side.
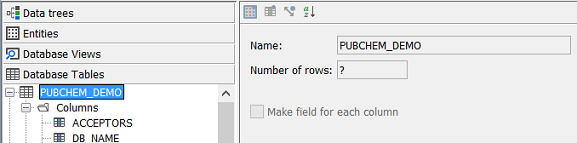
All tables in the database (or more precisely all tables in the database schema that you connected to) are shown. Those that are used by an Entity in IJC are shown in black text while those that are unused are shown in grey text. If you open up the node for any table in the explorer you will see the columns in the table. Again, those columns used by a field in IJC are shown in black text while those that are unused are shown in grey text. In the screenshot you can see 4 tables. The WOMBAT and WOMBAT_UL tables are 2 tables used by JChem for the structure information. At the database level there are 2 tables, but once promoted into IJC they will be seen as a single entity (this is one of the benefits of the table -> entity abstraction described earlier). The other two tables, WOMBAT_ACT_LIST and WOMBAT_MOL_KW are normal data tables containing information related to each structure in the structure table.
Lets start by promoting the structure table. We do this by selecting the WOMBAT table (not the WOMBAT_UL table) and clicking on the 'Promote' button in the Schema Editor toolbar (the second icon in the toolbar - see previous screenshot). The promote table dialog will appear.
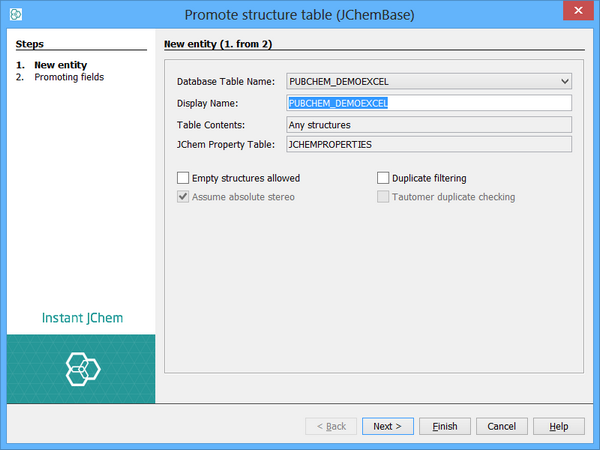
Here you can change some of the meta data settings, such as the display name for the entity and some features of how structures are to be handled.
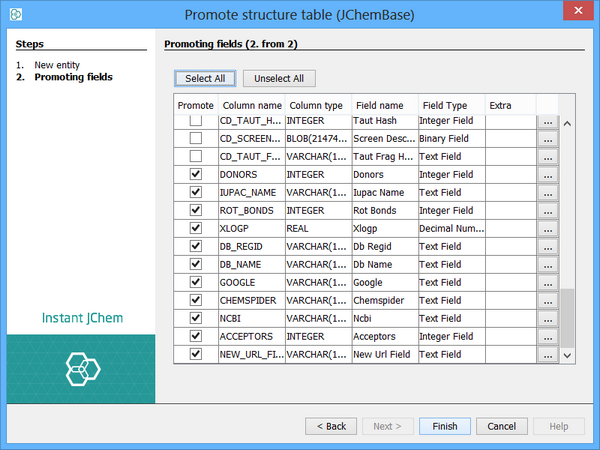
In the second step of the wizard you can specify which columns you want to promote to fields. You select or deselect the columns using the checkboxes alongside each column, and can specify the parameters including IJC field type for each column of the table. This lets you easily promote all the columns you want in one go. If you miss some you can promote them individually at a later stage.
Once you click on the 'Finish' button the table will be promoted and you will see it in the explorer as an entity, and it, and its corresponding WOMBAT_UL table, will now be displayed in black text in the tables tab indicating that they are now used by an Entity. If you expand the node for the Wombat entity you will see the fields.
Unused columns can be pomoted individually. To do this find the column in the 'Tables' tab and click on the 'Promote Column to Field' button in the toolbar. Here we have selected the CD_TIMESTAMP column and chosen to promote it. The process is similar to promoting tables.
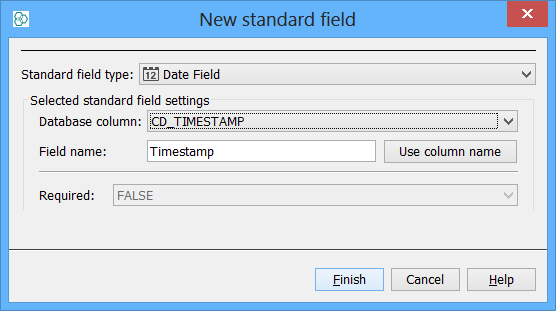
You may have to choose what type of field you want the column to be handled (e.g. integer, boolean...) as in some cases this cannot be automatically determined from the column type.
You may not want to promote all columns. For instance many of the CD_* columns are used internally by JChem and have no relevance to a normal user. This lets you hide things that are not relevant.
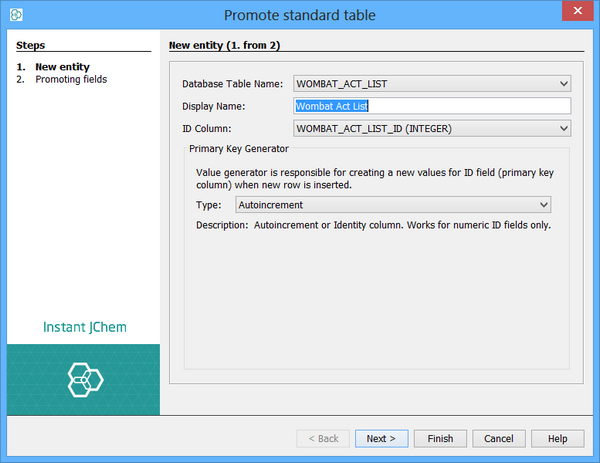
You will then follow this procedure for the other tables. Non-JChem tables will be promoted to standard entities, but the process is much the same. Some additional information is needed for non-structure tables:
-
The name of the column to use as the ID field (the primary key column). Usually this is determined automatically but in some cases you may need to specify it yourself. You must make sure that the column contains unique values for each row, and only integer or text columns can be used.
-
The value generator to use. This specifies how values for the ID field are to be generated. For instance, for Oracle, the name of the sequence that is used to generate new values for the ID field needs to be specified.
For more infomation about ID fields and value generators see the page on About primary keys and value generators
In our example we also promote the WOMBAT_ACT_LIST table and some of its columns.
You must promote the WOMBAT_ID column as this field is going to be used later to define a relationship.
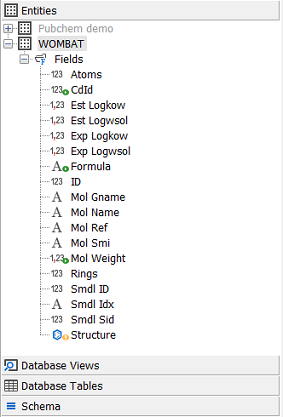
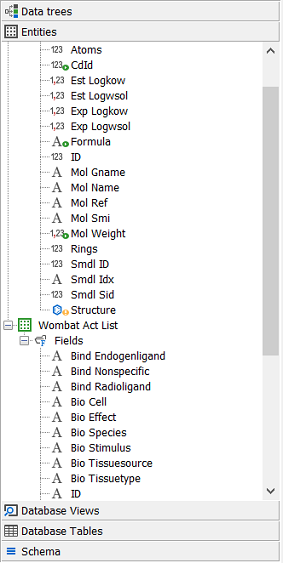
Once you complete this process you will see the promoted entities and fields looking something like this.
At this stage IJC treats these as two completely independent tables as it does not know that there is a relationship between them. However there is a foreign key constraint in the database from the WOMBAT_ACT_LIST table (containing the assay results) and the WOMBAT table (containing the structures). We will now use this foreign key constraint to define the relationship between the two tables.
Find the Wombat Act List entity and choose 'New Relationship' from its right click popup menu. This can also be done from the other entity involved, the Wombat entity (IJC makes foreign keys and relationships visible from either direction, even though in the database they have an explicit direction).
The dialog that opens lets you promote the foreign key to a Relationship. This process is similar to promoting tables and columns and the dialog lets you specify how the promotion should be done.
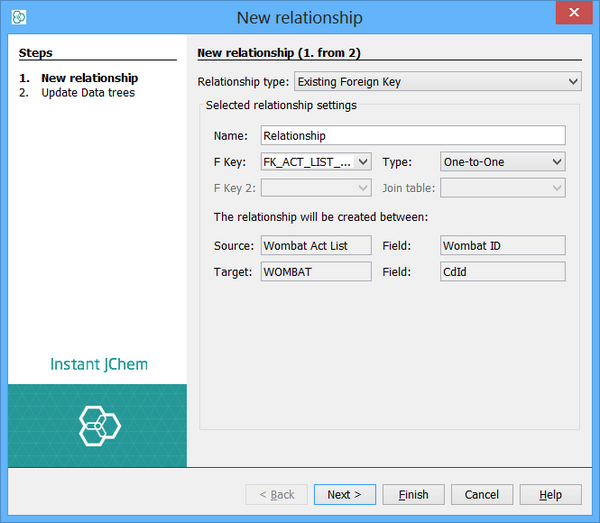
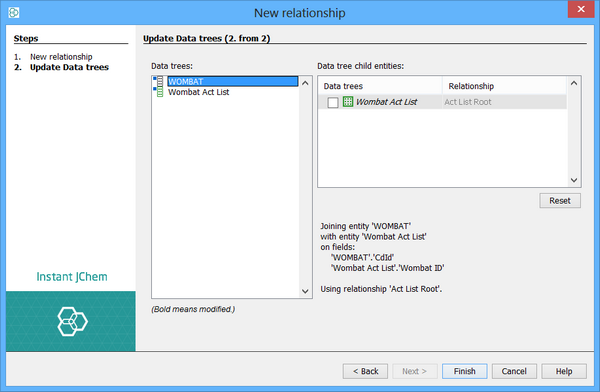
In this case we need to change the relationship type to many-to-one as there are many assay results for each structure. The other options are one-to-one and one-to-many.
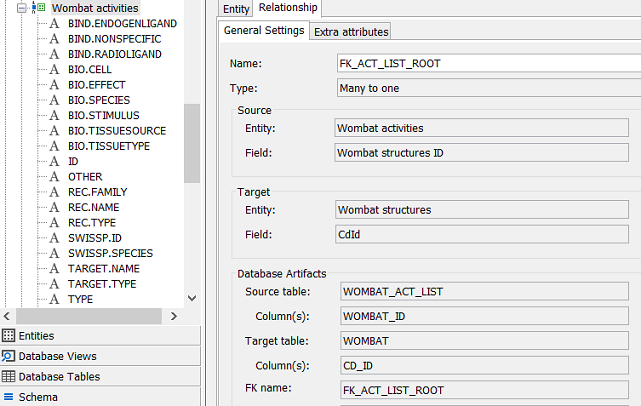
Once promoted the relationship appears for both entities.
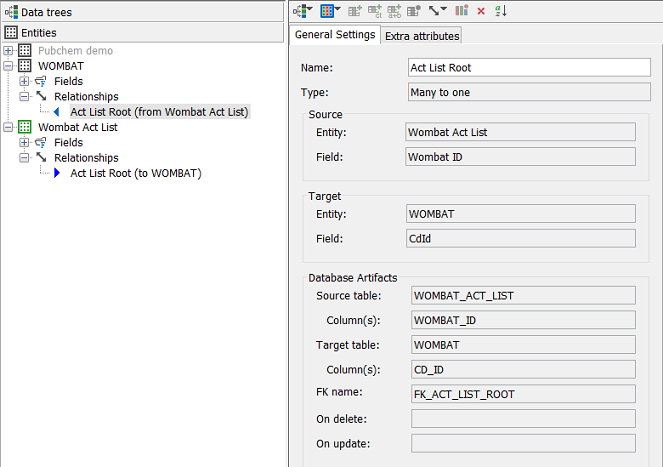
Note that although it is shown in both entities, it actually "owned" by the Wombat Act List entity (the many end) and the directionality is indicated by the icons used.
Data tree creation
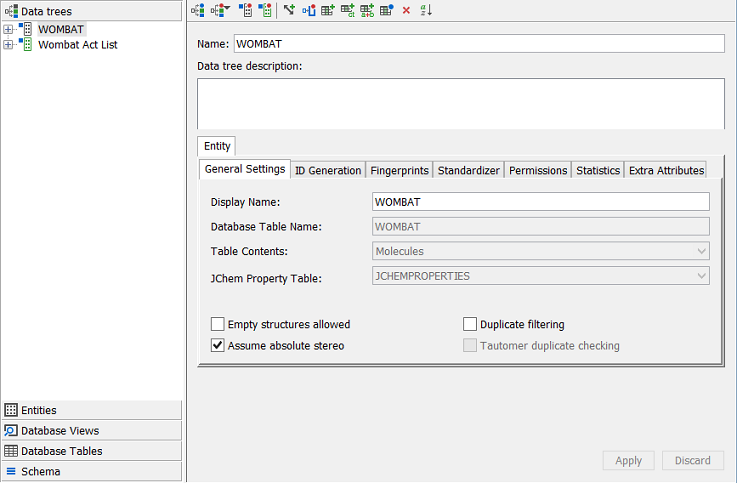
We are now at the stage that we have two IJC entities and there is a many-to-one relationship between them. Each entity contains fields that are of interest to display in the form or grid view. However if we look at the data trees in the projects window or the 'Data Trees' tab of the schema editor we see two simple data trees which were created when the table was promoted to an entity. To use information from both entities we turn this into a complex data tree that uses the relationship between the two entities.
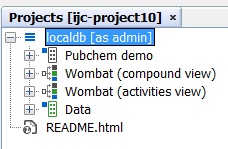
We have two entities and a relationship between them. In the data tree either table could be the master (parent) and the other the detail (child). Which way round depends on how you want to view the data. Compare the 'Wombat (compound view)' and the 'Wombat (activities view)' data trees in the demo project for an indication of the differences. Both show the same data but in the first the compounds entity is the master and in the other the activities entity is the master.
For our purposes here we will assume that we want the compounds entity to be the master and the activities entity to be the detail. To do this we must edit the data tree for the structure entity (named Wombat in our example) as that contains the compound entity as the master. Find this data tree in the 'Data Trees' tab of the Schema Editor and click on the 'Add new edge' icon in toolbar and a dialog appears allowing you to create a new 'edge' for the data tree which will define the child entity. This dialog lets you select from the valid relationships for the master entity. In our case there is only one, but if you have more than one you must select the appropriate one. You can define the edge either by specifying the relationship to use or the entity at the child end of the relationship.
Once added you will see the child entity displayed in the data tree explorer.
You can repeat this process for any additional child entities, and those child entities can themselves have children. In our case we are now complete, and if we look back at the projects window we now have a complex data tree that has the structure entity as the parent and the assay entity as the child.
We could now create a form for this data tree that shows data from both entities. This completes our example.