IJC Plugin tutorial - MySCServer webapp
Overview
In this tutorial we will show how to create a RESTful webservice that processes molecules sent to it from clients and returns results back the clients. The MySCServer is a standard Java EE web application that can be deployed into any servlet container like Apache Tomcat 6.x, which we will use. We will use again NetBeans IDE for developing the webservice and deploying it to Tomcat webserver.
This tutorial assumes that you have NetBeans IDE 6.9.1 installed on your computer as well as Apache Tomcat 6.x webserver, which is bundled with the NetBeans IDE installation. If you followed IJC Plugin: Quick Start tutorial you should have both NetBeans IDE and Apache Tomcat already installed.
Contents:
Creating MySCServer Web Application project
Let's start with creating the MySCServer project in NetBeans IDE. It's an ordinary java web application project that we will use for implementing and deploying a web service.
-
In NetBeans IDE go to the main menu and choose 'File' -> 'New Project...'. This will start the 'New Project' wizard. As a project type choose 'Web Application' in the category 'Java Web' and click 'Next' button.

Create server Web Application - choose 'Web Application' project type in 'Java Web' category
-
Enter the project name and its location. As the project name enter 'MySCServer' and click 'Next' button.
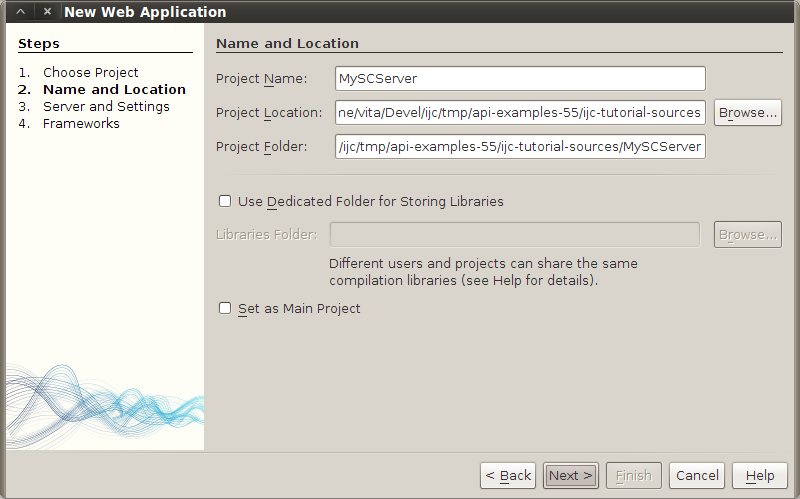
Create server Web Application - enter the project name and location
-
Choose the webserver to use for the project. The Apache Tomcat 6.x server should already be defined in your IDE. If it is not, create a new one by clicking the 'Add...' button.
The 'Java EE' version should be set to 'Java EE 5' and the 'Context Path' to /MySCServer.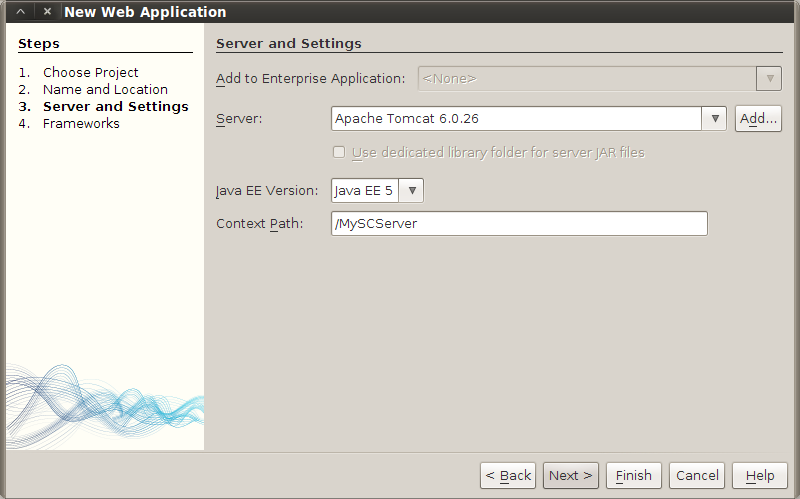
Create server Web Application - selecting the web server
-
The last panel let's you to add several webapp development frameworks to your project. We don't need any of those, because our project will only contain a webservice. You can just click 'Finish' at this panel.
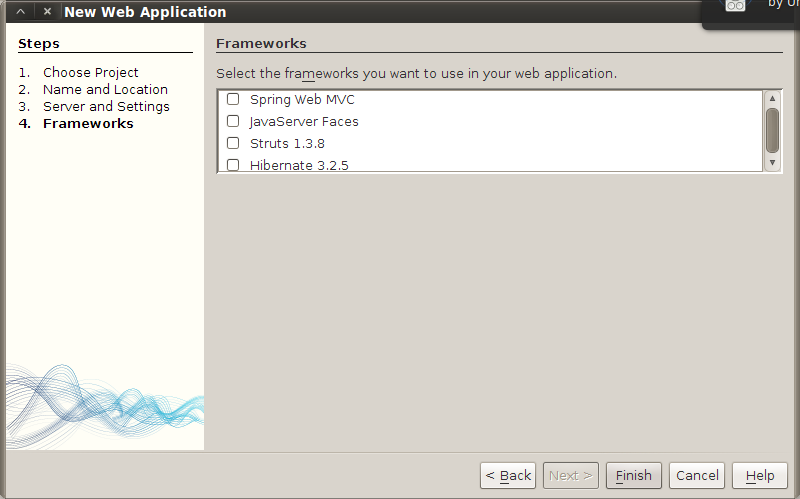
Create server Web Application - do not add any webapp development frameworks
-
The IDE will create the new MySCServer project, which should look like the one on the screenshot below.

MySCServer Web Application project in IDE's 'Projects' explorer
Setting up libraries
As a next step we will setup libraries needed by the webservice. This is going to be slightly different from what you are used to when setting up IJC plugin libraries. But we are not developing an IJC plugin here!
The webservice needs two libraries - it needs parts of MarvinBeans library from ChemAxon to perform operations on the chemical structures sent by webservice clients and it also needs Jersey Multipartextension in order to receive and send complex data.
Both libraries can either be downloaded from the internet or directly from this tutorial. When downloading from the internet, please, go to ChemAxon's download page and download Marvin Beans for Java Developers. Jersey Multipart is comprised from two jars that can be downloaded from these links - jersey-multipart-1.1.5.1.jar and mimepull-1.4.jar. For your convenience the jars from both libraries were packaged to a single zip file, which you can download from here.
-
If you have downloaded the libraries follow these steps to add them to your MySCServer project. First create folders that will store the library jars.
In your NetBeans IDE go to the main menu and click 'Window' -> 'Files', this will take you to the 'Files' explorer where you can see directly the files and folders comprising MySCServer project.
In the 'Files' explorer r-click the MySCServer folder and choose 'New' -> 'Folder...'. This will start the 'New Folder' wizard, which we will use for creating lib/MarvinBeans folders as it is shown on the picture below.
'New Folder' wizard - creating lib/MarvinBeans folderSimilarly, r-click the lib folder's node, choose 'New' -> 'Folder...' and create jersey-multipart subfolder.
-
Copy the following jars to lib/MarvinBeans folder: MarvinBeans-concurrent.jar, MarvinBeans-diverse-modules.jar, MarvinBeans-formats.jar, MarvinBeans-formats.mdl.jar, MarvinBeans.jar,MarvinBeans-license.jar, MarvinBeans-plugin.jar.
-
Copy the following jars to lib/jersey-multipart folder: jersey-multipart-1.1.5.1.jar, mimepull-1.4.jar.
The library folders structure should look like this now.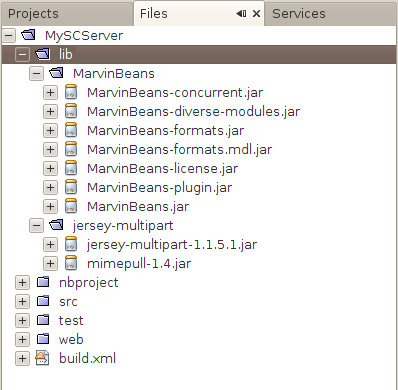
The lib folder structure with library jars
-
In NetBeans IDE go back to 'Projects' explorer and r-click the MySCServer's project node. Navigate to 'Properties' -> 'Libraries' -> 'Compile' to see the list of compile-time libraries. Then click'Add JAR/Folder' button. In the 'Add JAR/Folder' dialog select all MarvinBeans jars first. Make sure that the jars are added using the 'Relative Path' and click 'OK'.
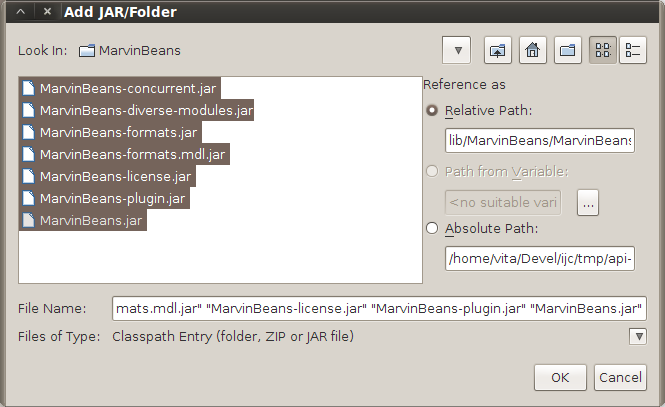
Setting up MySCServer libraries - adding MarvinBeans jars
-
Repeat the process and add Jersey Multipart jars as well.
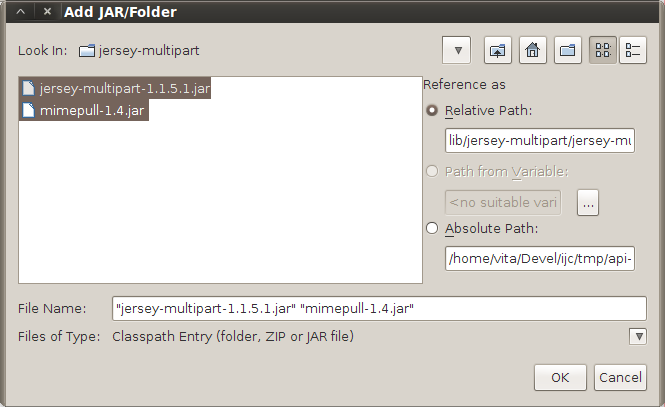
Setting up MySCServer libraries - adding Jersey Multipart jars
-
Close the MySCServer properties dialog by clicking 'OK'. The libraries are now set up and we can start creating the webservice.
Creating RESTful webservice
Creating a RESTful webservice in NetBeans IDE is fairly simple process where most of the work is done by the IDE's wizard. We only have to supply a few bits of key information to the wizard, which will then generate all necessary files and even update the webapp project with required libraries, etc.
-
First, we have to create a java package for our webservice implementation files. The web application project by default comes with no java packages. Please r-click the 'Source Packages' node in'Projects' explorer and choose 'New' -> 'Java Package...'. In the wizard panel enter org.myorg.myscserver as the package name and click 'Finish'.
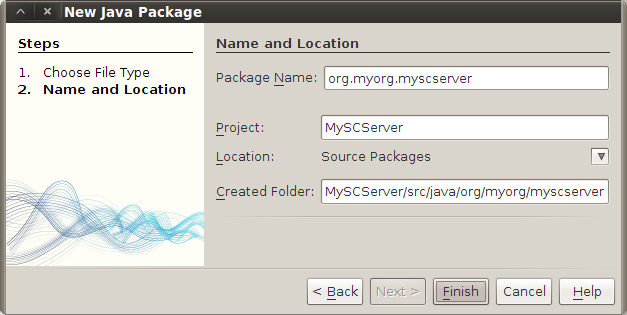
New Java Package wizard - creating org.myorg.myscserver java package
-
Now, r-click the created package node and choose 'New' -> 'RESTful Web Services from Patterns...' or choose 'New' -> 'Other...' if the 'New' submenu does not offer the link to creating RESTful webservice.
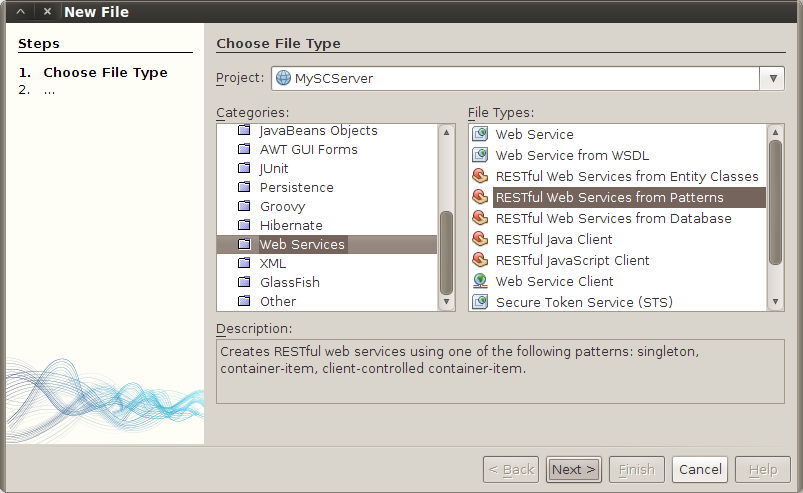
New RESTful Web Services from Patterns wizard - choosing the right wizard type
-
On the next panel choose 'Simple Root Resource' webservice pattern and click 'Next'.
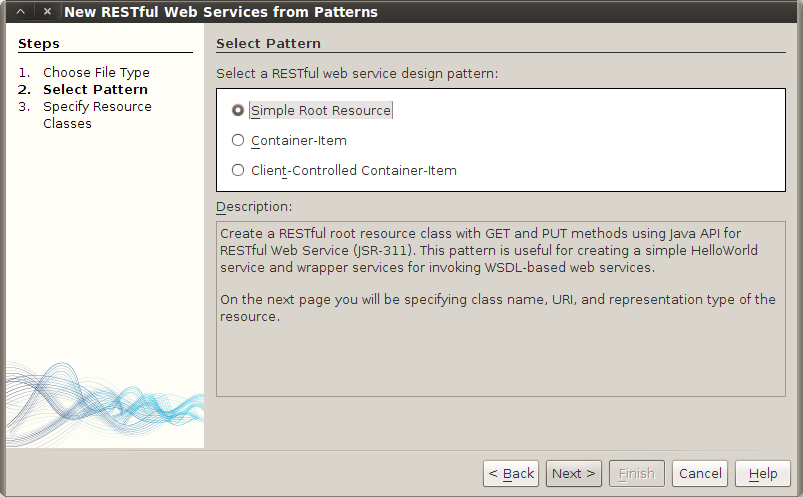
New RESTful Web Services from Patterns wizard - choosing webservice pattern
-
The next panel lets you specify your webservice details. In particular we are interested in setting 'Path' and 'Class Name' values. Enter validator in the 'Path' text box andStructureValidatorService in the 'Class Name' text box.
Leave default values in the rest of the boxes and click 'Finish'.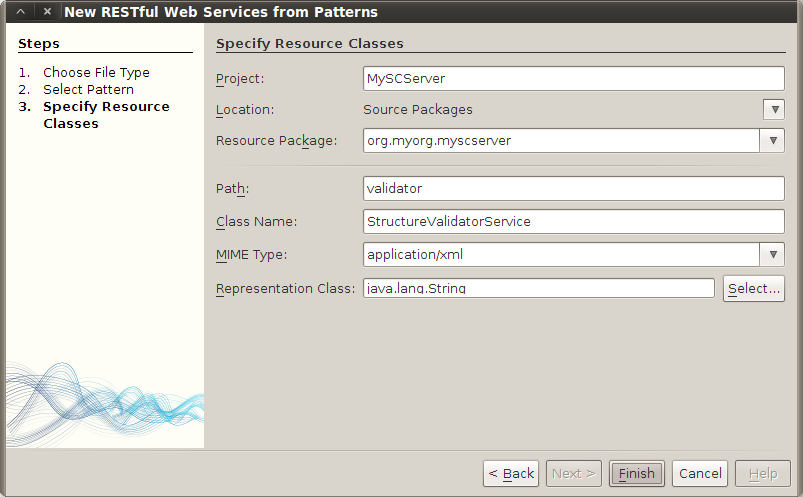
New RESTful Web Services from Patterns wizard - entering 'Path' and 'Class Name' values
-
As part of the webservice creation process NetBeans IDE may need to update your MySCServer project configuration and create a REST servlet adaptor for accepting incoming requests. Let it do so using the default values. The IDE will update your web.xml and also add JAX-RS 1.1 library, which is the RESTful webservices API and its reference implementation in Jersey 1.1 (JAX-RS RI) library.
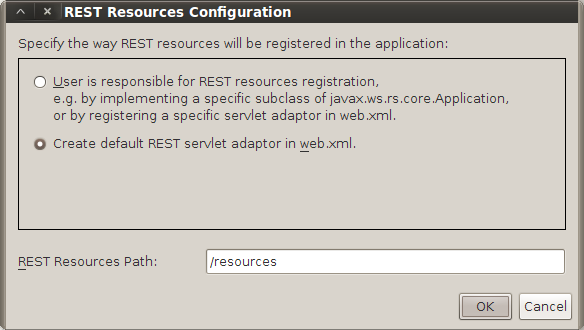
New RESTful Web Services from Patterns wizard - updating MySCServer project configuration to support RESTful webservices
-
When the wizard creates the webservice and updates your MySCServer project the project's web.xml configuration file should look like this.
web.xml configuration fileAnd there should be StructureValidatorService class in org.myorg.myscserver package.
Coding the webservice
-
Go to 'Projects' explorer and open the StructureValidatorService class in the editor. It contains a skeleton of a webservice generated by the wizard. Replace the generated code with the following:
StructureValidatorService.java source file
-
The StructureValidatorService class makes use of ErrorBuilder class. We have to create this class alongside StructureValidatorService class. You should now be familiar with NetBeans IDE and be able to do so in several ways.
Make your ErrorBuilder class contain the following code:ErrorBuilder.java source file
Building and running the webapp
The project should be ready to compile and deploy to the web server (eg. Apache Tomcat 6.x in our case). You can do so by r-clicking the project's node in 'Projects' explorer and choosing 'Clean and Build'. In order to run the project choose 'Run' from the same popup menu. The IDE will start Apache Tomcat webserver, deploy the project to it and then use your default web browser to show index.jsp from the deployed project. This is a simple Hello World page.
Conclusion
Congratulations, you have successfully created an implementation of a RESTful web service capable of processing chemical structures and sending results back to it clients. In this tutorial you have learned:
-
How to create a web application project in NetBeans IDE
-
How to create add library jars to the project
-
How to create create a RESTful webservice
-
How to run and deploy the web application project
For other IJC plugin development related tutorials please see their complete list here.