Deploying the IJC OData extension into Spotfire
-
For using the Spotfire extension and running the personal server in IJC refer to user's guide .
Installing the extension
Download a zip file containing documentation and the deployment package and unzip these into a folder on your computer.
To setup the package into the Spotfire Server, access it through the web interface in a browser and login using the your administrator login details. The link to it is usually as follows: http://\[Your Spotfire Server]/spotfire/administration/
-
Click the link "Open Administration Console" to start administering the server.
-
On the top are three tabs, of which you click the last one, "Deployment" .
When loaded you can choose to which part of the server to deploy the extension, "Production Area" or "Test Area" . We recommend to first try it out in the "Test Area" before migrating it onto the "Production Area" .
When the area is chosen, click the "Edit" link and then the "Add" link. Now you can specify the path to the folder where you unzipped the extension and add it to the area by pressing "Ok". When the package file is uploaded simply press "Save" to accept the changes and the package is now on the server.
Starting the IJC Spotfire/JChem4XCL integration
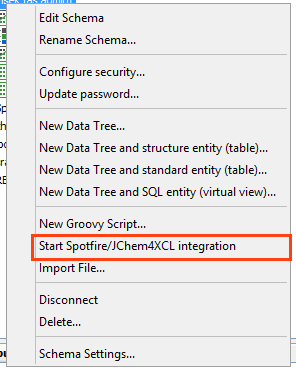
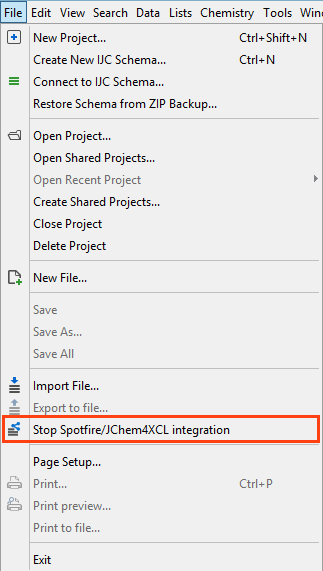
There are 3 possible ways to start the integration. All of them work as a toggle - they start the integration if it is not running, or stop the integration if it is already running. The possibility for the user to start the integration is dependent on the ROLE_EXPORT_DATA security role. For more descriptions please see here.
-
Tool Bar icon
 which also serves as a status indicator for the integration to be running (if it is running, it changes to
  )
) -
R-click on the local database
-

-
Menu
-

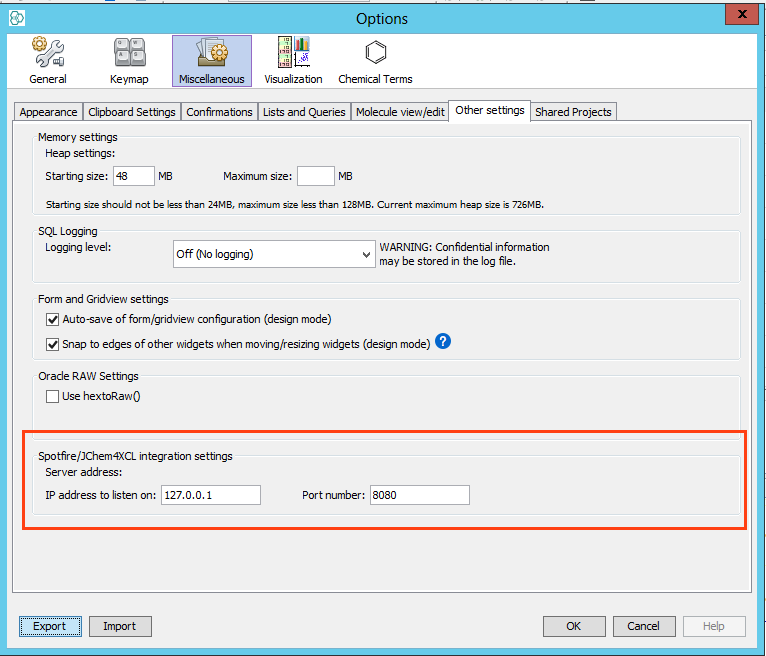
The Spotfire/JChem4XCL integration settings are available in "Options -> Miscellaneous -> Other Settings".

Starting the import wizard
The next time a user logs in to the Spotfire server, a prompt will appear for the user telling that there is a new extension available for download. When installed, Spotfire will start as normal and user can now import from IJC.
-
Navigate to the "Open from" in the "File" menu.
-
Choose to "Import from IJC".
Supported versions
|
IJC version |
Spotfire server/client version |
IJC-SPotfire Bridge version |
|
5.12.x |
3.3.2 |
5.12.0.6 |
|
5.12.x |
4.0.x |
5.12.0.6 |
|
5.12.x |
4.5.x |
5.12.0.6 |
|
6.0.x |
3.3 |
6.0.0.46 |
|
6.0.x |
4.0 |
6.0.0.46 |
|
6.0.x |
5.0 |
6.0.0.46 |
|
7.0.x |
7.0 |
16.2.2200.235 |
Video Example
Your browser does not support the HTML5 video element
Logging
To log the events in the IJC-Spotfire Bridge it is possible to configure a logger with the help of a configuration file. The configuration file is created during the first usage of the IJC Spotfire extension in Spotfire.
The configuration file can be found here: c:\Users\CurrentUser\AppData\Local\Chemaxon\IJC_DataLoader_Configuration.xml. The following settings can be configured in the configuration file:
|
Parameter |
Available values |
|
LogFile |
Name of the log file. (Default value is IJC_DataLoader.log) |
|
Logging |
On/Off |
|
LoggingLevel |
Error/Debug/ Info/All |
When Logging is set to On a log file will be created during the usage of the Spotfire extension.
The log file will be located in the c:\Users\CurrentUser\AppData\Local\Chemaxon\ folder and its name will be the LogFile parameter from the above configuration file.
Limitations
In case of Lead Discovery module is in use (it is available from Spotfire version 4.x), be aware of that Spotfire supports only the 32 bit version of Marvin Sketch for structure viewing purposes.