Background
Shared projects is a new feature in IJC 2.3. It allows central configuration of a project and all the database connections and data that are contained in the project. this avoids you (as an end user) needing to configure the database connections, licenses etc. and makes deploying IJC to a site much simpler. Note that part of a shared project's contents can be shared views, queries and lists, further enhancing the ability to roll out pre-prepared information to all your users. For more information look at the Sharing items with others documentation.
Administrators may set up shared projects that can be deployed to Instant JChem for all users. Typically they do this as part or the configuration of the Java Web Start instance and the shared project(s) are loaded automatically so you see them when IJC starts for the first time. However if for some reason you cannot use this mechanism then you can still use shared projects, but you need to configure the project location manually. Administrators documentation for setting up shared project can be found here.
Adding/removing shared projects
Shared projects may already be configured by your administrator and you may not need to perform any manual configuration.
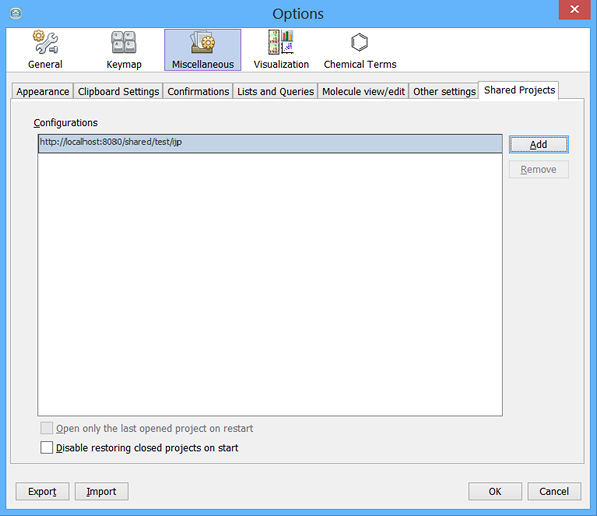
Shared projects are configured using the 'Shared projects' section of the user settings. Find this using the Tools->Options menu, and then choosing the Miscellaneous section. Currently configured shared projects will be visible. New ones can be added or current ones removed.

Use the Add button to load a new shared project. You will need to know the URL of the project. Ask your administrator for this information. Once added the shared project will be added to the projects window.
Use the Delete button to remove a shared project. Removing it will remove it from the list of shared projects and remove the project from the projects window. Note that if you remove a shared project that has been configured by your administrator as part of the Instant JChem installation then the shared project will re-appear next time you start Instant JChem.
